
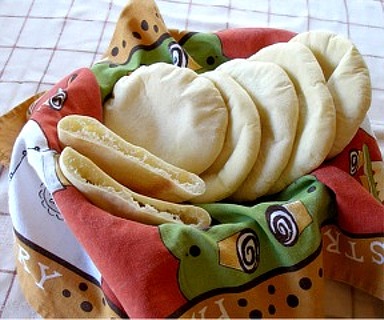
Pita bread, a form of Arabic flat bread, is one of the oldest recipes known to mankind. There is also baladi from Egypt, bouri from Saudi Arabia and souri from Libya and North Africa. The word, “Pita” has become a generic term for round, flat bread and it originated from the Greek word “Pitta”, which means thin, flat layers.
Pita bread recipes differ from region to region but the basic ingredients are flour, water, salt, sugar and yeast or starter. Other ingredients that may be added include butter, shortening, or non-fat dry milk for flavor and texture. Pita bread dough is formed by hand into a round shape. During baking at high temperatures (usually 450 to 500 degrees F), it forms a pocket during baking — the dry exterior skin of the dough sets and carbon dioxide from the yeast and steam from the liquid ingredients expand until the pressure is sufficient to allow separation of the lower and upper layers, forming a pocket in between. The crust then lightly browns.
You can fill them with whatever your heart desires. When they are warm from the oven, it is nice to cut one open and spread a little butter on the inside…pure HEAVEN!
BREAD RECIPE HELP
INGREDIENTS
warm water, 100 to 110 degrees F; measured with an instant read thermometer: 2 1/4 liquid cups / 18.76 ounces / 531 grams
active dry yeast: 3 teaspoons / .33 ounces / 9.33 grams
sugar: 1 tablespoon / 0.5 ounce / 13 grams
olive oil: 2 tablespoons / 1 ounce / 27 grams
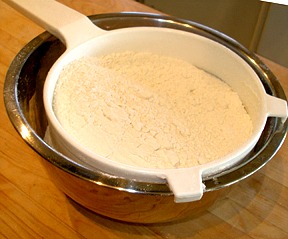
unbleached all purpose flour, sifted (plus more for kneading and rolling): 6 cups, spoon into measuring cup and level to rim, then sift / 26.46 ounces, then sift / 750.12 grams, then sift
salt: 2 teaspoons / 12 grams
INSTRUCTIONS
STEP I. MIX THE PITA DOUGH AND LET IT GO THROUGH THE FIRST RISE
1. Put yeast and water in mixer (fitted with dough hook attachment) bowl and stir to combine.
Add sugar and stir.
2. While yeast is proofing (dissolving), sift together salt and flour, into a large bowl.
3. Add olive oil to yeast mixture and stir.
Add 1/2 flour mixture to the yeast mixture and stir till combined.
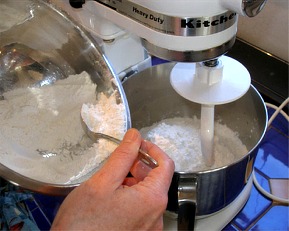
4. Add enough of the remaining flour to make a dough that is slightly soft, but not overly sticky. When enough flour is added, dough will pull away from the sides of your mixer.
Knead dough for about ten minutes in the mixer, to develop the gluten.
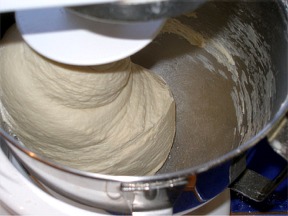
5. When dough is smooth and elastic, remove from mixer bowl and place on lightly floured counter.
Knead dough by hand for a minute or two, adding enough flour so the dough is only SLIGHTLY sticky. The dough should still be fairly soft and not stiff.
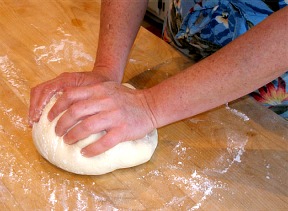
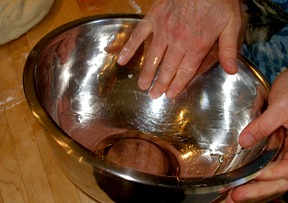
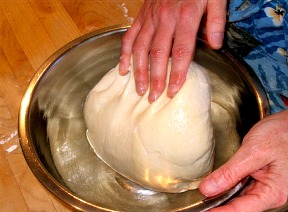
6. After kneading, lightly oil a large bowl with olive oil.
Place dough in the oiled bowl and then turn the dough over so that there is oil on the top surface.
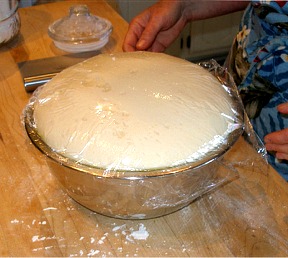
Put plastic wrap over the bowl and set your dough aside, in a warm place, to rise till double in bulk, 45 minutes to 1 hour.
This is what your finished dough should look like. Nice and puffy and light.
STEP II. PREHEAT THE OVEN, PUNCH DOWN AND SHAPE THE PITA DOUGH
1. IMPORTANT: When the dough is done rising, place your oven shelf on the bottom rung with your pizza stone(s) on it. Preheat the oven to 450 degrees. It is important that your oven be very hot when making the pita bread. This is what causes the pocket to form. I find that the pizza stones need to preheat for at least 30 minutes, to be evenly hot.
2. Shape the dough:
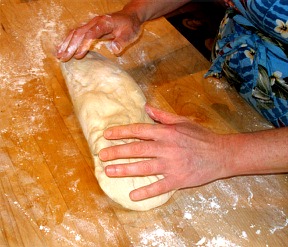
A. Remove plastic wrap and gently punch down dough. Place dough on lightly floured surface and roll with hands to form a thick cylinder.

B. Cut straight-down through the dough into 16 equal portions with a sharp knife or bench scraper.
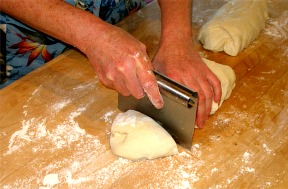
C. Roll each of the 16 sections into a smooth ball.
KELLY CA SAYS: I do this by turning the dough in one hand and gently pulling the surface down and pinching it underneath the ball. After that, I gently roll the ball in my palms.

D. When all of the balls are rolled, begin rolling out the circles with a lightly floured rolling pin. Before rolling, simply press dough down with the palm of your hand and then roll the dough, turning it, to get a uniform circle.
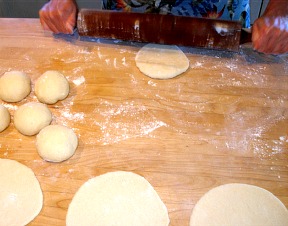
KELLY SAYS: The rounds should be 6-7 inches across and about 3/16 of an inch thick. It is important to not roll them too thin, or your pocket will not form correctly.
SARAH SAYS: Check out Kelly's heavy-duty rolling pin! Don't mess with Kelly in her kitchen – I think she means business! HA!
STEP III. SECOND RISE OR PROOFING
1. Here are all the rounds waiting to be proofed again.
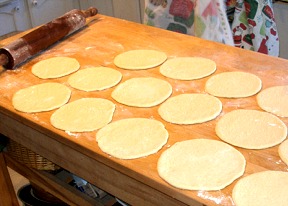
Cover rounds with a clean light-weight kitchen towel (I use flour sack towels). DO NOT use terry-cloth towels, because the dough can stick to the little “fingers” of the terry cloth.
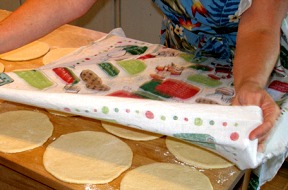
2. Let covered rounds rise in a warm place for 30 minutes, until slightly puffy.
STEP IV. BAKE THE SHAPED PITA DOUGH
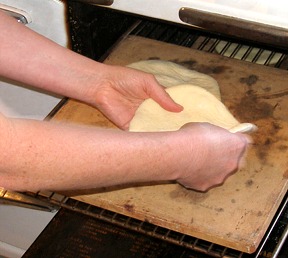
1. When rounds are puffed from proofing, it is time to bake them.
It is important to allow the oven to retain as much heat as possible when transferring the rounds to your stone(s). So, move quickly, yet carefully, because the oven is VERY hot.
I place two rounds on my arm and carry them to the stove. I open the oven, pull out the oven rack with a pot holder and then carefully place the two rounds on the stone.
Please excuse the appearance of my pizza stones. They are WELL used.
2. Bake pitas for 4-5 minutes, until the rounds are puffed and the edges and tops are beginning to brown. The bottoms of the pitas will be a bit more brown than the tops. The pitas should look like puffy little pillows of yumminess.
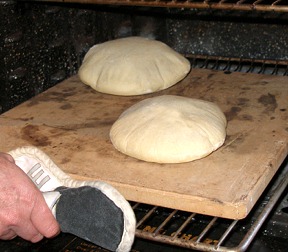
KELLY SAYS: Here, you can see how brown they look on the bottom of the pitas.
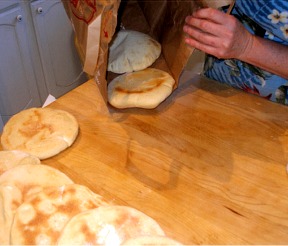
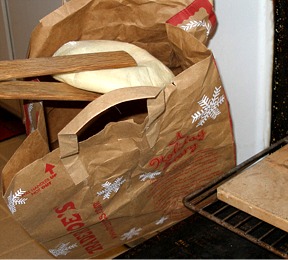
3. Remove rounds from oven with tongs and immediately place them in a clean brown paper bag, folding the top closed, so they can steam.
KELLY SAYS: Move quickly, yet carefully, while you add the next batch of rounds to the stones.
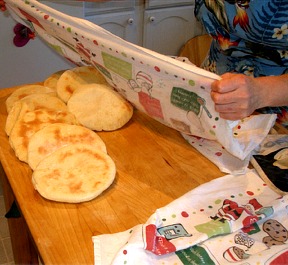
4. While next batch of rounds is baking, remove pitas from the paper bag and place on counter. Cover the rounds with a DAMP light-weight kitchen towel. This allows the pitas to steam in a moist environment and gives them their soft, chewy goodness. Let pitas steam until they are all cool.
SERVE
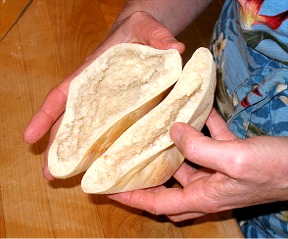
Carefully slice each pita in half across the pita, with a serrated knife and fill. Be careful when handling the hot loaves as they are filled with very hot steam.
KELLY SAYS: The little pockets are all ready for whatever stuffings you can dream up. I often fill them with sliced grilled chicken (that has been marinated in lemon, olive oil, garlic and oregano), hummus and lettuce. They are also good when sliced into wedges and smeared with hummus. The fillings, however, can be less exotic. I have sent my son to school with pitas filled with PB&J. He LOVES them like that.
STORAGE
When pitas are completely cool, store the uncut ones in resealable plastic bags. You can refrigerate them for several days or you can store them in the freezer, tightly wrapped, for about a month.