
Variation: Ultimate Butter Cake or UBC and Variations
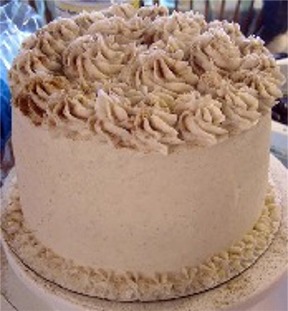
Cake and photo by Berta L., Premium Member © 2000 Sarah Phillips
Berta L., Premium Member, created a rum flavored variation of my Ultimate Butter Cake or UBC. The original was created to be a rich, moist and tender treat because I was tired of eating dry, flavorless cakes. It has a fine to medium crumb in texture and is somewhat dense, but much lighter than a pound cake. Many brides have selected this for use in a wedding cake because it can be made in so many flavors (and is quite flavorful) and doesn't need a lot of trimming. It can be easily filled and frosted with many types of recipes and decorated or served plain with fruit. It's now my family's favorite all-occasion cake!
I use ingredients right from the refrigerator when I bake most of my recipes, except with chocolate from the freezer, because I have found that the friction from the beaters quickly warms them. I believe that the step of using room temperature ingredients in a recipe makes them too warm, and is old-fashioned, necessary when cakes were mixed by hand. I do not see a difference on how recipes come out when using ingredients cold, right from the refrigerator, when using electric mixers of today.
CAKE RECIPE HELP
INGREDIENTS
4 cups unbleached all purpose flour; spoon into measuring cup and level to rim
1 tablespoon baking powder
1 teaspoon salt
1 cup whole or 2% milk; use cold – does not have to be at room temperature
1/2 cup rum
1 tablespoon rum extract or 1 teaspoon orange and 1 teaspoon almond extract
1 teaspoon vanilla extract
2 cups (4 sticks) unsalted butter; use cold – does not have to be at room temperature
2 cups sugar or superfine sugar
3 large eggs; use cold; does not have to be at room temperature
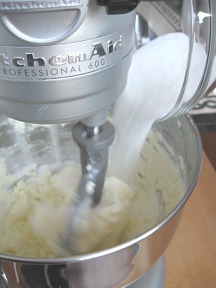
NOTE: Cake is mixed using a KitchenAid Professional 600 Series Mixer, 575 watts.
INSTRUCTIONS
1. Position the oven shelf in the middle of the oven. Preheat the oven to 350 degrees F.
Grease two 9- x 2-inch, preferably light colored, heavy NOT nonstick pans. (If you use dark, nonstick baking pans or ovenproof, Pyrex glass pans, be sure to reduce the oven heat by 25 degrees F).
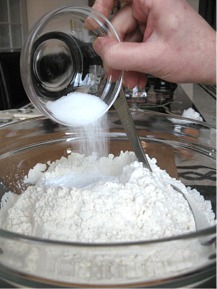
2. In a medium bowl, whisk together the flour, baking powder, and salt; set aside.
Add the rum, rum and vanilla extracts to the milk and set aside.
Cake by Sarah Phillips, Photos by Tara Korde © Sarah Phillips
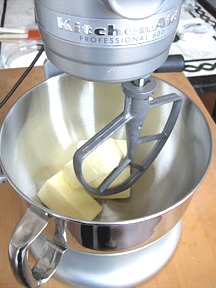
3. Beat the butter in the bowl of a stand mixer, fitted with a paddle attachment, on low until softened. (If the butter is cold, it will warm quickly from the beaters – taking about 60 seconds).
4. Add the sugar in a steady stream at the side of the bowl.
Increase speed to medium and beat for 1 minute until the butter is lighter in color and aerated.
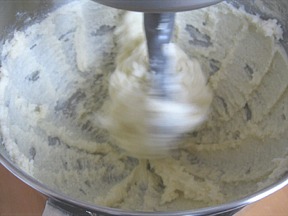
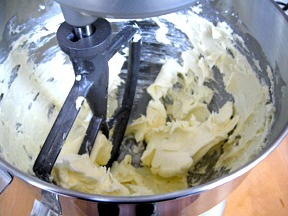
SARAH SAYS: Another way to tell when the mixture is aerated properly, is when there are ridges of butter and sugar left at the side of the bowl as the beater moves through it.
The butter is tacky and not too soft and has not melted.
5. Stop the mixer and scrape the side and bottom of the bowl with a large rubber spatula.
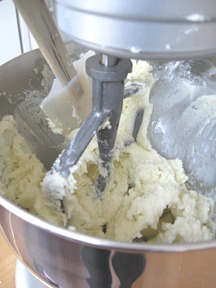
6. With the mixer on low, add the eggs one at a time and beat for 20 seconds after each addition.

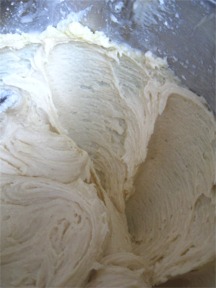
After the eggs have been added, increase the mixer speed to medium and beat the mixture for 2 minutes. (If the eggs are cold, the batter will curdle slightly. It's ok. It will come together as the batter warms from the beaters. ) Set the kitchen timer to help you keep track of the time. The mixture will become fluffy and aerated.
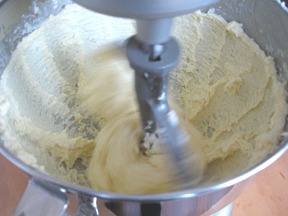
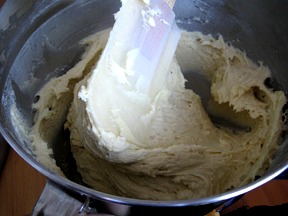
SARAH SAYS: The butter is an excellent temperature. Notice that it forms ridges on the side of the mixing bowl after the beaters pull through the mixture; the batter is tacky and not too warm so it sticks to the side of the mixing bowl! The batter has become lighter in color as it takes on air bubbles and SOMEWHAT fluffy, as well!
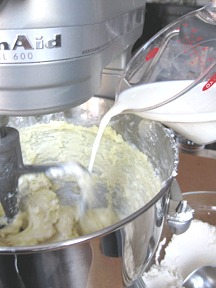
7. With the mixer on low, add the flour mixture in 3 equal portions, alternating with the milk in 2 equal portions, beginning and ending with the flour. (If the milk is cold, the batter will curdle slightly. It's ok. It will come together when you add the flour.)
Add the flour and liquid ingredients in increments quickly; do not wait in between additions too long as you don't want to overmix the batter.
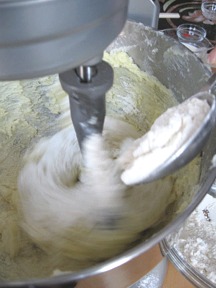
After completing the last addition of flour, stop the mixer, and scrape the side and bottom of the bowl with a large rubber spatula.
Then, let the mixer run for 30 seconds on LOW. The batter will be very thick and form ridges on the side of the bowl as the beater pulls through the batter. STOP the mixer. Do NOT overmix.
8. Remove the mixing bowl from the mixer. With a large rubber spatula, give the batter ONE or TWO quick folds to incorporate any stray flour or milk left at the sides and bottom of the bowl. Then, STOP!
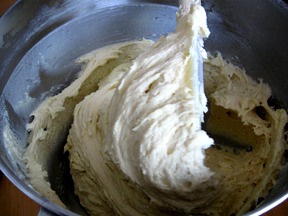
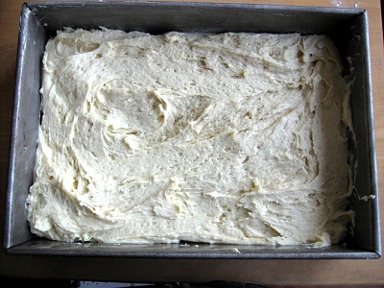
Divide the batter in the prepared baking pans (should fill 1/2 full) and lightly smooth the tops.
9. Bake for 40 to 45 minutes or until the top feels firm and gives slightly when touched and will shrink slightly from the side of the pan.
The cake will be slightly browned. If you insert a toothpick in the middle and remove, there should be a few moist crumbs attached, but not batter.
The cakes will have a slight dome and small cracks on top right when it comes from the oven, but as the cakes cool, they will flatten on top and the tiny cracks will disappear.
NOTE: The cake can be baked in a 9 x 13 x 2-inch greased cake pan, taking 45 – 55 minutes to bake. Cupcakes take 20 – 30 minutes to bake.
10. Remove cakes to cool on wire racks for 10 to 15 minutes. Loosen the sides with a small metal spatula or sharp knife, taking care not to scratch the cake pan.
Invert onto cake rack and place upright to cool completely. Be careful, the cakes are delicate when warm.
The cake layers need no trimming before stacking because they cool flat.
STORAGE
The cake layers store nicely. They can be stored at room temperature for about 3 or more days. The cake layers freeze well for about a month or more. Keep well wrapped.