
Variations: Allspice Applesauce Bundt Cake; Allspice Spice Cake; Pumpkin Applesauce Bundt Cake
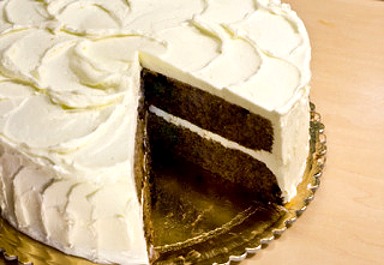
Cake and photo by odetteganda © Sarah Phillips
A nice spice cake for the fall is always in fashion. I thought this cake would go wonderfully filled and frosted with Italian Meringue or Mousseline Buttercream or IMBC – White Chocolate Variation. We show you how to make both!
CAKE RECIPE HELP
Odetteganda, Premium Member, Says: “The cake is very delicious! It was Allspice Applesauce Bundt Cake Recipe that I decided to bake into a layer cake. The combination of spices, nuts and raisins gave the cake a burst of flavors. I was never a spice cake lover, but I think it is because I ate the wrong cakes! I totally love this cake! The buttercream also provides a luxurious taste that is complimentary, but not overpowering. I better watch my diet!”
INGREDIENTS
1 1/3 cups unbleached all-purpose flour; spoon into measuring cup and level to rim
1 cup whole wheat flour
1 cup dark brown sugar, packed
1 cup granulated sugar
2 teaspoons ground allspice
2 teaspoons baking powder
1 1/2 teaspoons ground cinnamon
1/2 teaspoon ground ginger
1/2 teaspoon baking soda
1/2 teaspoon salt
3 large eggs
1 1/4 cups whole or 2% milk
3/4 cup unsweetened applesauce
1/4 cup canola oil
2 teaspoons vanilla extract
1 cup raisins
1/2 cup chopped walnuts
STEP I – MAKE THE CAKE LAYERS
INSTRUCTIONS
1. Position an oven shelf in the middle of the oven. Preheat oven to 350 degrees F.
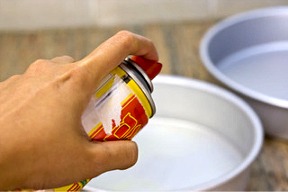
SARAH SAYS: Reduce the oven heat by 25 degrees F if using a dark, nonstick pan. Avoid sprays with lecithin because it promotes a gummy layer build up on the pan. Bakers' Joy, a nonstick spray with flour is recommended.
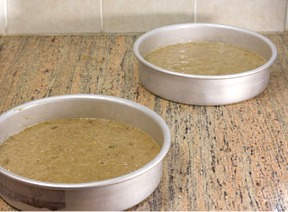
Adequately grease and flour or lightly spray two, 9- or 8- x 2- inch round cake pans with nonstick cooking oil spray. Set aside.
ODETTE SAYS: I used two 8 x 2-inch cake pans for this tutorial.
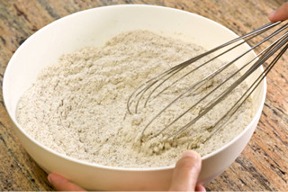
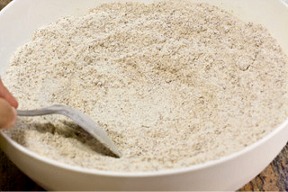
2. In a large bowl, combine the flours, sugars, allspice, baking powder, cinnamon, ginger, baking soda, and salt.
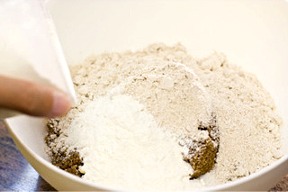
Whisk until well combined. Set aside.
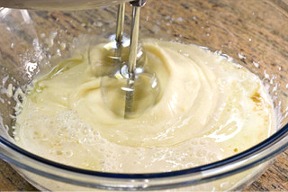
3. In a medium bowl, combine the eggs, milk, applesauce, oil and vanilla.
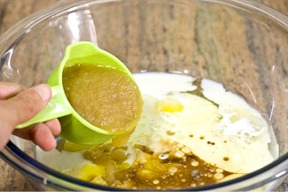
Using a handheld electric mixer set at medium-high speed, beat the mixture until lightened and frothy, about 1 to 2 minutes.
4. Make a well in the center of the dry ingredients with a large spoon.
Pour in the applesauce mixture.
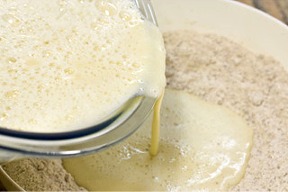
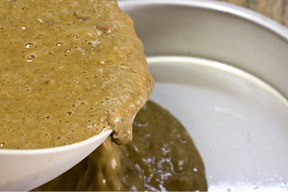
Using a large rubber spatula, FOLD together the mixtures until almost combined.
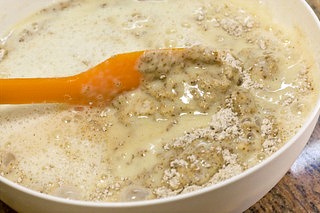
SARAH SAYS: The batter will be thick, and there should be a few traces of flour remaining. DO NOT OVERMIX.

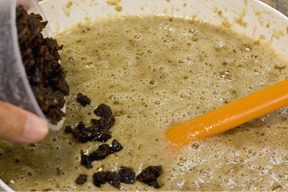
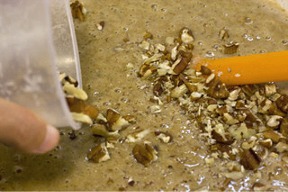
Add the raisins. Then the walnuts. Fold until the flour is just incorporated. Do not overmix.
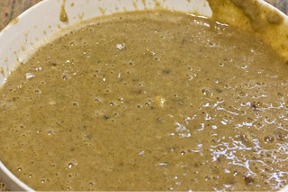
Here is the final batter.
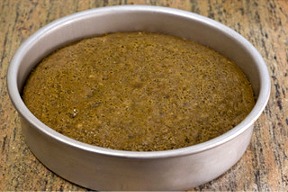
5. Divide the batter evenly into the prepared pans. Gently smooth the top. Bake 55 minutes until the top of the cake springs back when pressed gently in the center and the sides are beginning to pull away from the sides of the pan. DO NOT OVERBAKE.
Cool cake layers in their pans for 15 minutes. Invert cakes onto wire cake rack and turn upright to cool completely.
STORAGE
Cake can be stored at room temperature for a day or two. Applesauce cakes tend to sweat more than butter-based cakes and tend to get sticky on top. It's best to freeze them for storage longer than two days. Cake freezes nicely for a month or more.
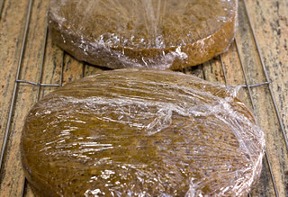
ODETTE SAYS: I wrapped the cakes for storage in plastic wrap ONLY after it cooled completely.
STEP II – MAKE THE ITALIAN MERINGUE OR MOUSSELINE BUTTERCREAM OR IMBC – WHITE CHOCOLATE VARIATION
ITALIAN MERINGUE OR MOUSSELINE BUTTERCREAM OR IMBC – WHITE CHOCOLATE VARIATION / Recipe alone
Makes 4 1/2 cups – enough to fill and frost 2 9-inch x 1 1/2 layers or 3 9 x 1-inch layers
INGREDIENTS
1 pound (4 sticks or 2 cups) unsalted butter (65 degrees F – slightly softened and cool – not runny, greasy or soupy)
1 cup (200 grams) sugar
1/4 cup (60 grams) water
5 large (150 grams) egg whites, room temperature
1/2 + 1/8 teaspoon cream of tartar
6 ounces of melted and cooled white chocolate
A stand mixer works best, using the whip attachment for the eggs and switching to the paddle when you start adding the butter (to reduce unwanted air bubbles when icing the cake), and you'll need a candy thermometer.
INSTRUCTIONS
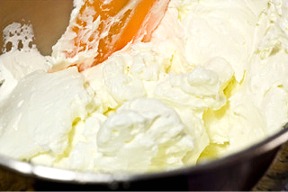
1. In a mixing bowl beat the butter until smooth and creamy and set aside in a cool place.
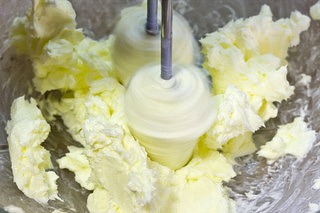
ODETTE SAYS: I used a medium sized bowl and a hand mixer to beat the butter.
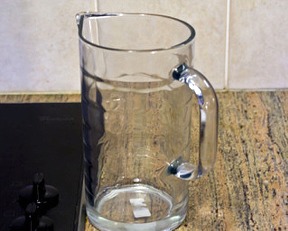
2. Have ready a 2-cup heatproof large glass measuring cup near the stove. LIGHTLY spray the inside with nonstick vegetable oil spray.
SARAH SAYS: I skip this step and pour the hot sugar syrup directly from the pan into the mixing bowl in Step #6.
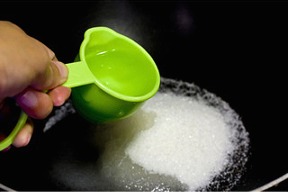
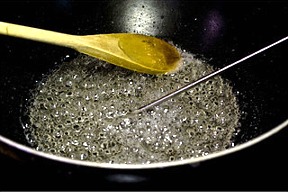
3. In a small heavy saucepan, combine 3/4 cup sugar and the 1/4 cup water.
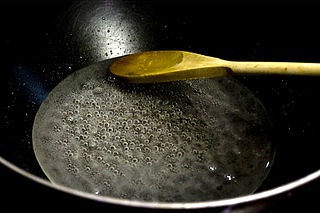
Under medium-high, boil sugar and water mixture, stirring constantly, until the sugar dissolves and the mixture is bubbling. Stop stirring and reduce the heat to low. (If using an electric range remove the saucepan from the heat.)
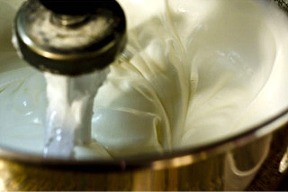
4. Meanwhile, place the egg whites in the mixing bowl of a stand mixer.
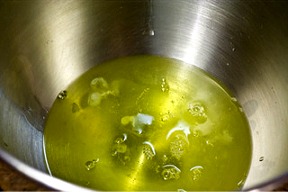
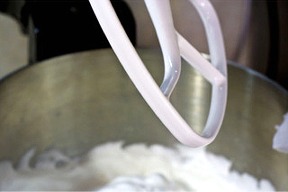
Fitted with a WHISK attachment, beat the egg whites with a stand mixer on medium until foamy for 1 to 2 minutes. Then, stop the mixer and add the cream of tartar.
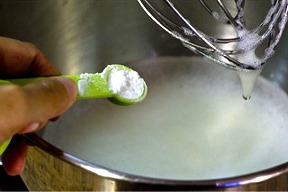
Beat for 3 more minutes on medium-high or until soft peaks form when the beater is raised.
Gradually beat in the remaining 1/4 cup sugar, taking 3 more minutes. Increase the mixer speed to high and beat until stiff peaks form when the beater is raised slowly. Simply turn off the mixer.
SARAH SAYS: It is important to slowly build a stable egg white foam, so the resulting buttercream will not deflate.
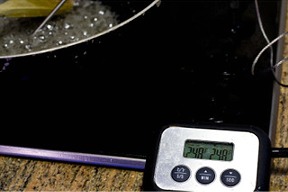
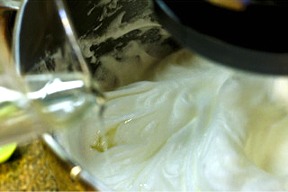
5. Increase the heat of the stove and boil the syrup until you get bubbles all over the surface. (If using an electric stove, return the saucepan to the heat and proceed.)
The syrup starts to look thicker and the Candy Thermometer registers 248 degrees F to 250 degrees F (firm ball stage).
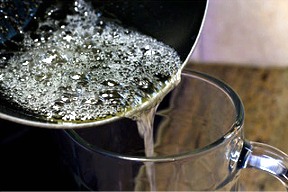
Immediately transfer the syrup to the glass measure to stop the cooking. Do not try and get the last remains of the sugar syrup at the bottom of the pan or any hardened bits of sugar.
6. Fit the mixer with a PADDLE attachment (not a whisk attachment.)
Turn the mixer on high, and start drizzling the sugar syrup, in a thin stream, into the contents of the bowl directly from the 2-cup heatproof large glass measuring cup or optionally, pan; Do not try and get the last remains of the sugar syrup at the bottom of the pan or any hardened bits of sugar.
Aim for the space between the side of the bowl and the moving beater attachment. Do not hit the beater; the syrup will get caught in the beater and/or spin onto the sides of the bowl where they will harden, and will not get mixed into the egg whites, ruining the recipe with pieces of hardened sugar in your meringue.

SARAH SAYS: The buittercream will start to deflate; it's ok.
7. Continue with the remaining syrup, gradually pouring it into the beaten meringue. For the last addition, use a rubber scraper to remove the syrup clinging to the glass measure.
Lower the mixer speed to medium-high and continue beating up to 2-3 minutes to start to cool the mixture.
SARAH SAYS: The buttercream will begin to get fluffy and increase in volume.
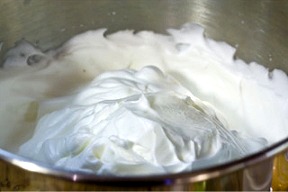
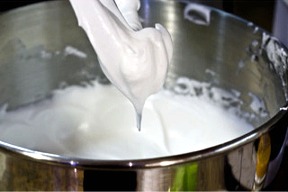
Keep beating until the mixture cools completely, taking about 5 to 10 minutes. Feel the side of the bowl. It will feel really warm. You want to cool the mixture down before you add the butter. If not completely cool, continue beating on medium speed – no lower. Keep feeling the side of the bowl to help you gauge the temperature of the mixture. At this stage, you have made Italian meringue. It should be glossy and thick, and very stiff.
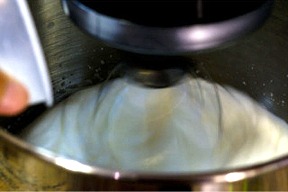
8. Beat in the butter at medium speed 1 tablespoon at a time. After the first few tablespoons have been added, the mixture will seem thinner, but keep adding in butter slowly and beating because the meringue will thicken beautifully by the time all the butter is added. If at any time the mixture looks slightly curdled because the butter is too cold, increase the speed slightly and beat until smooth, and then lower the mixer speed before continuing to add more butter.
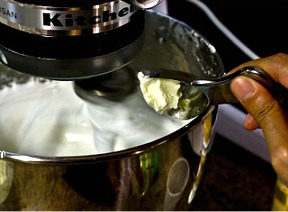
SARAH SAYS: Italian Meringue Buttercreams are an emulsion between fat and water. When you add butter to the mixture, the temperature of the butter and whipped egg whites need to be pretty close. If the butter is colder than the egg white mixture, the beaten egg whites will curdle. If the egg whites are too hot, the butter will melt, thinning the mixture. Either place the mixture in the fridge to cool it down or warm up the egg whites by increasing the beating speed.
9. Then, slowly beat in 6 ounces of melted and cooled white chocolate, with the mixer on medium speed.
The final texture of the buttercream should be very light, fluffy and smooth.
STORAGE
Place in an airtight bowl. Rebeat lightly from time to time to maintain silky texture. Refrigerate the mixture to firm the fat in the butter and then rebeating helps to fluff it up, too. Buttercream becomes spongy on standing.
Will keep 10 days refrigerated, 8 months frozen. Allow to come to room temperature completely before rebeating to restore texture or it will break down irretrievably.
STEP III: ASSEMBLE THE CAKE
SARAH SAYS: The beauty of this cake is that the layers bake flat and require no trimming. You can just assemble this cake, and then you are ready to go! Most of my cakes bake flat or with a slight dome. In fact, well-written and professional cake recipes should bake that way, requiring very little or no trimming at all, which is the way I like to go. I don't believe in fussing around with a recipe – I like my recipes to bake like a workhorse, and be able to be put together with ease without a lot of extra steps in between. I like my cakes to look like a professional did them – instantly! HA! It's just my philosophy. Life is too short and time is so precious to be fussing around with a cake – trying to get it level and straight! I believe that the cake recipe should do all the work for you and all you have to do is slap it together and it should look and taste great every time you bake it! LOL! That's a technical term I like to use – “slap it together!” HA!
Here's how to frost a cake using the Upside-Down Icing Technique:
1. Trace the outline of the 8-inch pan [top side down] onto a sturdy surface, such as a cardboard cake round
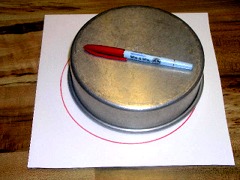
2. Cover the outline with a piece of parchment paper about 1 to 2 inches larger than the pan's outline and tape securely so that there are no wrinkles. Some people have had success using acetate instead of parchment.
3. Using the White Chocolate Italian Meringue Buttercream, “ice” the area of the circle, extending the icing about 1/4-inch past the outline; any extra icing will be removed later. Apply the icing about 1/4″ thick.
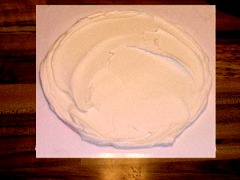
Place the “iced” board in the refrigerator and allow to chill until firm, about 10 to 15 minutes.
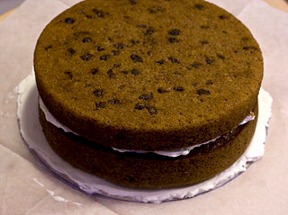
4. Once chilled, remove the iced board from the refrigerator and place one 8 x 2-inch cake layer upside-down on a cardboard cake round, centered on the icing circle.
5. Fill with 4 tablespoons White Chocolate Italian Meringue Buttercream.
6. Stack the second layer on top, top side down.
7. Crumb coat cake. Smooth the top and sides of the cake. Chill cake in the refrigerator for 10 minutes to let the frosting settle.
8. Once chilled, apply final coat on the sides. Smooth any icing build up over onto the “bottom” of the cake with a small angled spatula. When the side are smooth to your satisfaction, carefully cut the parchment paper loose from the board ALL THE WAY AROUND THE CAKE using an Exacto Knife. Return the cake to the fridge for about 10 to 15 minutes to firm the icing.
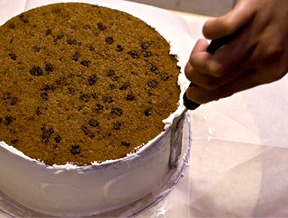
9. Prepare the final cake board by smearing a few strokes of icing on it. Remove the cake from the fridge, center the board and quickly “FLIP” the cake over. REMOVE the top cardboard, but leave the parchment in place and return the cake to the fridge for about 10 minutes.
Then carefully remove the parchment paper. Return the iced layer, uncovered in the refrigerator.
10. Once chilled, final coat the cake. For the final coat, I just made random swirls on the cake.
STORAGE
The cake must remain refrigerated because of its filling and frosting, and can stay outside at the cool side of room temperature for two hours. The cake can be frozen for a month or more. Thaw in the refrigerator.
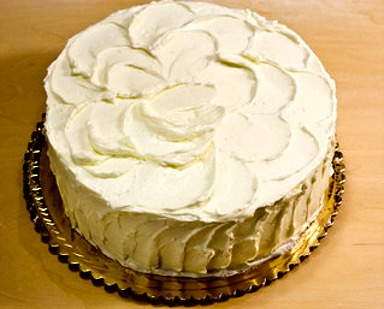
Cake and photo by odetteganda © Sarah Phillips
VARIATIONS
Allspice Applesauce Bundt Cake
Allspice Spice Cake
Pumpkin Applesauce Bundt Cake