
Variations: 1 2 3 4 Yellow Buttermilk Cake; 1 2 3 4 Chocolate Buttermilk Cake; 1 2 3 4 Citrus Buttermilk Cake; 1 2 3 4 Lactose-Free and Kosher Buttermilk Cake
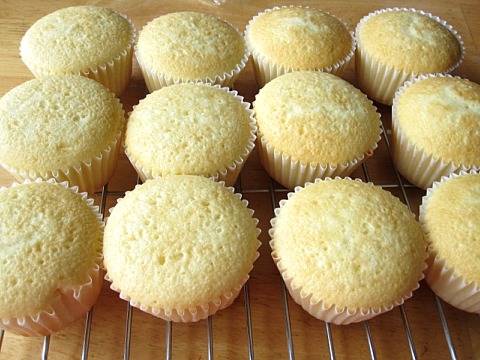
Cupcakes and photo by kake, Premium Member © Sarah Phillips
Kake, Premium Member, Says: “I have made those cupcakes and those are fluffy and yum….Now this is my favorite white cupcake.”
The recipe's basic 1 2 3 4 main ingredients have been added to and I have modified its mixing methods to use what is called the Two-Step Mixing Method, to bring you a tender and moist white cake! I recently discovered through research, that in fact, the Pillsbury Company invented this method in 1945, which they called the Quick-Mix Method, as a way for home baker's to bake light and airy cakes using the Two-Stage Method. Crisco was used in their recipes at the time, and butter could be easily substituted, with the same result.
Some white cake recipe can use 6 to 8 large egg whites, which I find have a drying effect on the recipe. When I develop white butter cake recipes, such as this one, I substitute some of the egg whites with whole eggs, without affecting its color; it's because of the presence of bleached cake flour and a still larger percent of egg whites in the recipe. The result is a more flavorful and moister cake, with longer storage capabilities. I use my ingredients cold from the refrigerator because I found that the friction from stand mixer blades against them will quickly warm the cake's ingredients to the optimal finished batter temperature of 68-72 degrees F.
I use my ingredients cold from the refrigerator!
CAKE RECIPE HELP
INGREDIENTS
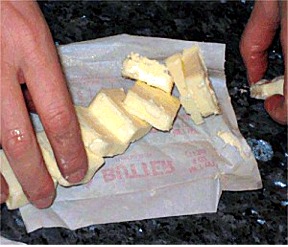
1 cup unsalted butter; use cold – does not have to be at room temperature
3 cups bleached cake flour (not self-rising); spoon into measuring cup and level to rim
2 cups sugar
1 tablespoon (3 teaspoons) baking powder
1 teaspoon salt
1 cup buttermilk; well shaken; use cold – does not have to be at room temperature
1/2 cup water
1 teaspoon vanilla extract
1/2 teaspoon baking soda
2 large eggs; use cold – does not have to be at room temperature
4 large egg whites; use cold – does not have to be at room temperature
INSTRUCTIONS
1. Position oven shelf in the middle of the oven and preheat to 350 degrees F. (If using dark, nonstick baking pans or ovenproof, Pyrex glass pans, be sure to reduce the oven heat by 25 degrees F).
Lightly spray two 9 x 2-inch cake pans with nonstick cooking spray. Set aside.
2. Remove the butter sticks from the refrigerator, and cut each stick into approximately 10 – 12 evenly-sliced pieces (24 pieces total). Set aside, and let soften slightly, but for best results, they must remain cool.
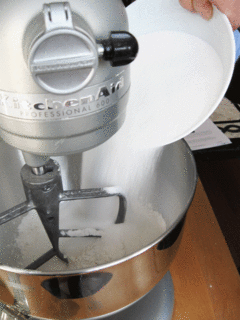
3. Clamp on the mixing bowl and fit a paddle attachment to a stand mixer.
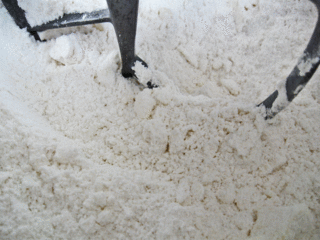
Add the flour, sugar, baking powder and salt into the mixing bowl, and mix on low, about 10 to 15 seconds to combine.
Make sure you get all of the ingredients mixed in from the bottom of the bowl.
3. With the mixer on low speed, add the butter 1 tablespoon or piece at a time at a time into the flour mixture. Keep adding each butter-piece about 10 seconds apart, until all has been incorporated.
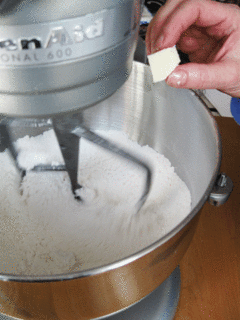
SARAH SAYS: I re-chill the butter pieces in the fridge if they get too soft or greasy before using in the recipe. The friction from the beaters will quickly warm them, anyway. If the butter is too warm, the mixture will clump together.
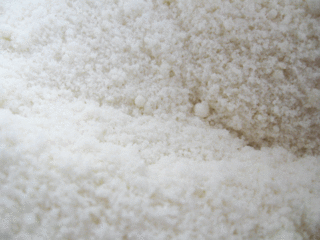
Half-way through mixing, the flour mixture should begin to look like cornmeal and will clump together a little; if the butter is warm, the mixture will become sticky. You should not see any large butter pieces in the mixture. It may take awhile for this to happen depending on how warm the butter is.
When the butter has been incorporated into the flour, sugar and dry ingredients, the mixture will look like fine cornmeal. If the butter is warm, the mixture will clump together. I used butter cold from the refrigerator, so the mixture did not clump.
4. In a 2 cup measuring cup or a bowl with a pouring spout, add the buttermilk, water and vanilla extract, and stir. Quickly add the baking soda, stir until well incorporated. With the mixer on low speed, slowly pour the buttermilk mixture at the side of the bowl into the flour / butter mixture, and mix until just combined.
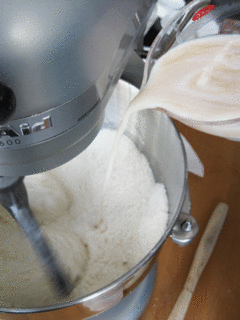
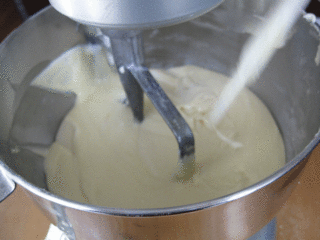
Increase the mixer speed to medium and mix until the batter is smooth, taking about 4 to 6 minutes. Stop the mixer.
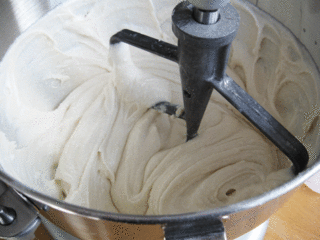
SARAH SAYS: The way I can visually tell when the cake batter is done mixing, is when I see ridges being formed at the side of the bowl from the moving beaters. It's because the gluten from the wheat flour has been sufficiently formed and the gluten strands start to become sticky and will pull away from the side of the bowl when the mixer blades pass through the batter. By the way, I do not stop the mixer and bother to scrape the side of the bowl during mixing; I find it unnecessary until the end.
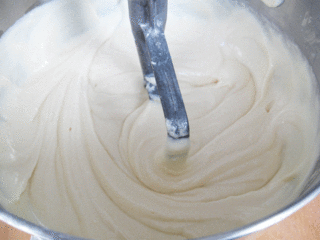
5. Lightly whisk together the eggs and egg whites in a medium size bowl. Turn on the mixer to low, and slowly add the egg mixture at the side of the bowl.
When the egg mixture has been added, scrape the side and bottom of the bowl with a large rubber spatula because you want to make sure you get all of the ingredients before the last mixing step.
Turn the mixer speed to medium and beat the batter for one minute or until smooth and creamy.
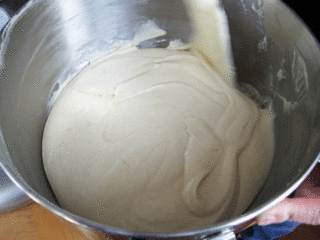
Scrape the side and bottom of the mixing bowl with a large rubber spatula. Fold the batter one or two times to incorporate all of the ingredients. Then, STOP!
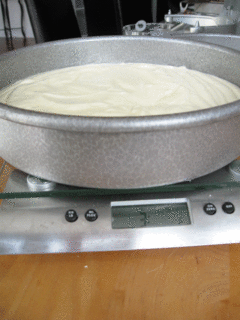
6. Divide the batter evenly between the pans and gently smooth the tops. The batter will fill the baking pans about half-full.
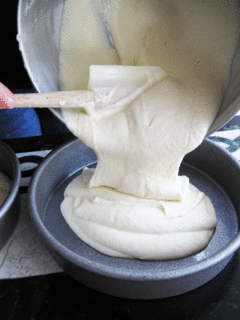
SARAH SAYS: After depositing the batter into both cake pans, I weigh each pan to make sure they weigh the same. If they do, then I know that the batter is deposited evenly! If not, adjust the batter in the pans with a large rubber spatula and weigh each one, again. Do not fuss to much with the batter bbecause you want to get the cakes into the preheated oven as soon as possible!
Bake for about 25 to 30 minutes for two, 9 x 2 -inch layers; 35 to 40 minutes for one 9 X 13 x 2-inch cake, or or until the top feels firm and gives slightly when touched and will shrink slightly from the side of the pan. The cake will be slightly browned on top.
SARAH SAYS: The test for doneness I invented is: If you insert a toothpick in the middle and remove, there should be a few moist crumbs attached, but not batter. The cake, when done baking, should not look dry.
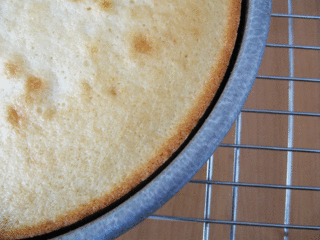
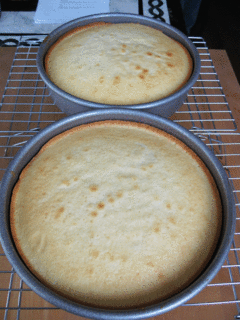
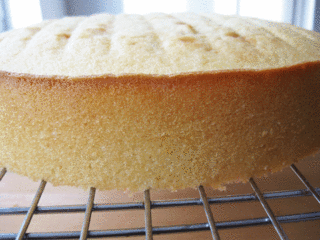
Remove the cakes to cool on wire racks for 10 to 15 minutes and then unmold onto wire cake racks, turning right-side-up to cool thoroughly. Be careful, the cakes are delicate when warm.
STORAGE
The cake layers store nicely. They can be stored at room temperature for about 3 or more days. The cake layers freeze well for about a month or more. Keep well wrapped.
VARIATIONS
1 2 3 4 Yellow Buttermilk Cake
1 2 3 4 Chocolate Buttermilk Cake
1 2 3 4 Citrus Buttermilk Cake
1 2 3 4 Lactose-Free and Kosher Buttermilk Cake