

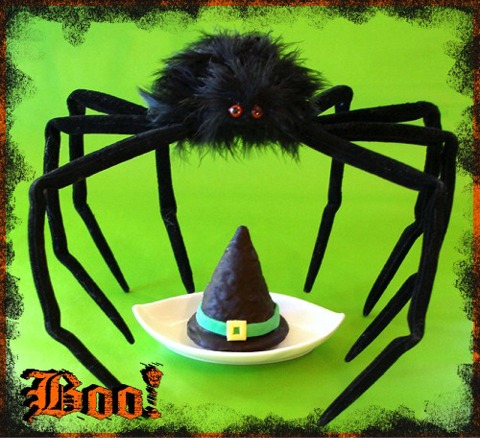
These little hats are a fun Halloween treat.
The combination of the crunchy cookie base, moist cake, chocolaty coating and creamy filling is fiendishly delicious.
Happy Halloween!
KELLY SAYS: Save trimmings in a resealable plastic container to make
 Halloween iPOPs!
….it would be a sin to waste all that yummy cake! Store at room temperature for up to 3 days or freeze for a month or more.
CAKE RECIPE HELP
Kelly Says: “Ger (my husband!) cannot stop eating them…he LOVES them. :^)”
INGREDIENTS
To make these devilishly good Halloween treats, you will need:
1 recipe Sarah's Ultimate Chocolate Butter Cake Half, below
1/2 recipe Tami's Buttercream, tinted greusome green, below
2 12 oz. packages BLACK Wilton's Candy Melts
2 Tablespoons shortening
1/2 package Nabisco Famous Chocolate Wafer Cookies, or chocolate sugar cookies at least 2.5″ in diameter
1/4 c. green Marshmallow Fondant or MMF
1/8 c. yellow Marshmallow Fondant or MMF
Cone-shaped Solo brand 4oz. paper water cups
STEP I: MAKE SARAH'S ULTIMATE CHOCOLATE BUTTER CAKE OR UCBC HALF RECIPE
ULTIMATE CHOCOLATE BUTTER CAKE OR UCBC – HALF RECIPE – TWO LAYERS / recipe alone
NOTE: Cut the mixing times by about 1/3.
INGREDIENTS
1 3/4 cups / 7.72 ounces / 218.79 grams unbleached all-purpose flour; spoon into dry measuring cup and level to top
1/4 cup cocoa powder, natural; spoon into dry measuring cup and level to top
1 teaspoon instant espresso powder (optional)
1 teaspoon baking powder
1/4 teaspoon baking soda
1/2 teaspoon salt
1 cup whole or 2% milk; use cold – does not have to be at room temperature; measure in liquid measuring cup
2 teaspoons vanilla extract
3/4 cup / 1 1/2 sticks / 16.5 grams unsalted butter; use cold – does not have to be at room temperature
1 1/4 cups plus 2 tablespoons sugar or superfine sugar
3 large eggs; use cold – does not have to be at room temperature
6 ounces (squares) bittersweet or semi-sweet chocolate, melted and cooled to tepid
SARAH SAYS: Looks are deceiving — when done, the chocolate square collapses slightly, but has a recognizable shape and will look shiny. When you touch the top with the tip of a knife (not your fingertip because its hot), you'll see that it's melted. Take care the chocolate doesn't burn which happens quickly. Remove from oven and stir. Cool to room temperature (70 degrees F) until needed in recipe.
INSTRUCTIONS
Prepare:
1. Position an oven shelf in the middle of the oven and remove the shelves above. Preheat the oven it 325 degrees F.
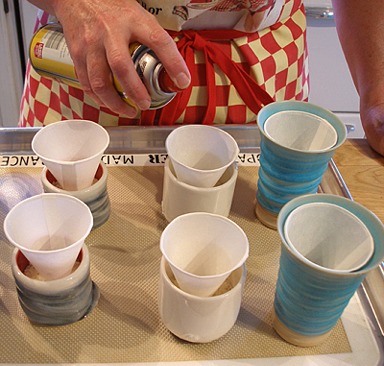
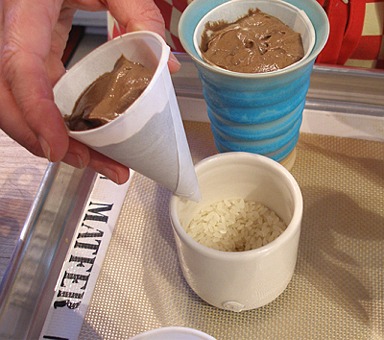
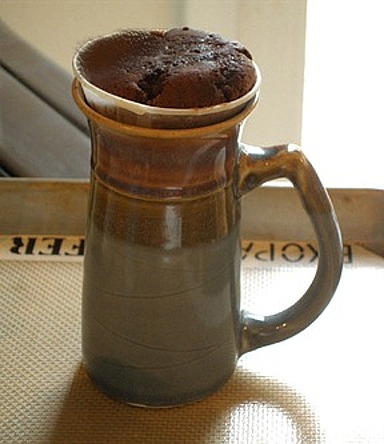
2. Place cone paper cups in oven-proof ceramic cups, to hold them upright.
If the cups need additional support, you may put a layer of uncooked rice in the bottom of the support cups.
Set the oven-proof ceramic cups, on a rimmed cookie sheets or sheet pans, about 6 or so per pan.
KELLY SAYS: You will be baking one rimmed cookie sheet or sheet pan in the oven at a time, but you will fill all of
the cone paper cups in advance and refrigerate the ones not being baked. I like to line my sheets with a silpat mat or
parchment paper for easy clean-up in case of any batter baking over the rim of the cone and dripping onto the pan!

3. Spray the paper cups with nonstick spray, so the cake's will release easily after baking. This is VERY important! Set aside.
Mix:
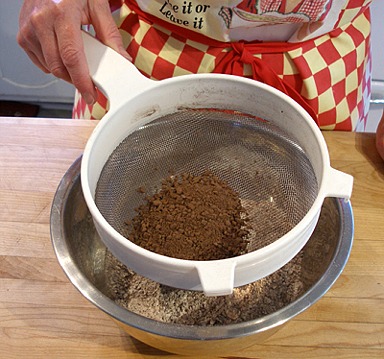
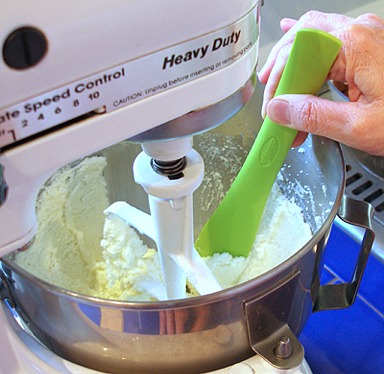
1. In a medium bowl, whisk together the flour, instant espresso powder, baking powder, baking soda and salt. Sift the cocoa powder into the mixture and combine all ingredients. Set aside.
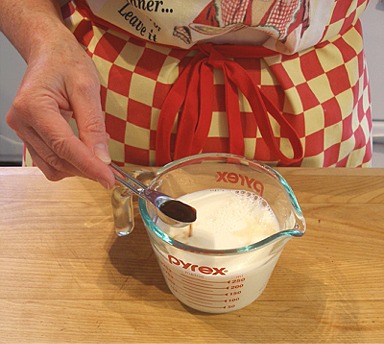
Add the extracts to the milk and set aside.
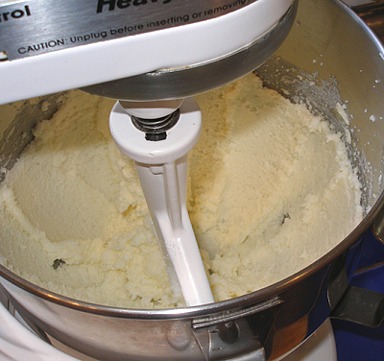
2. Beat the butter with a stand mixer, fitted with a paddle attachment, on low speed until softened. (If the butter is cold, it will warm quickly from the beaters).
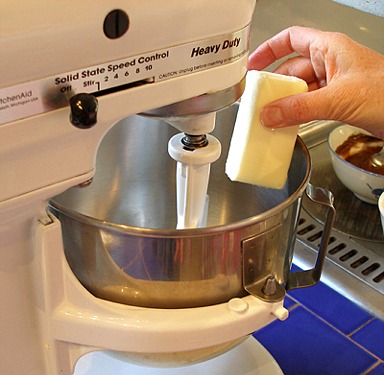
Add the sugar in a steady stream at the side of the bowl. Increase speed to medium and beat for 2 minutes until the mixture is light yellow and fluffy.
Stop the mixer and scrape the side and bottom of the bowl with a large rubber spatula.

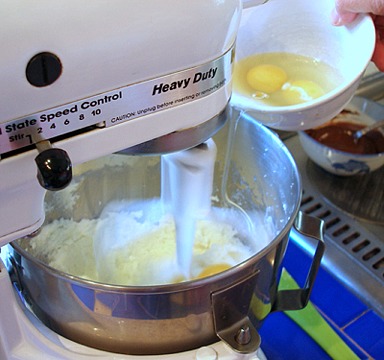
3. With the mixer on low, add the eggs one at a time and beat for 20 seconds after each addition.
After the eggs have been added, increase the mixer speed to medium and beat the mixture for 2 minutes. (If the eggs are cold, the batter will curdle slightly.
It's ok. It will come together as the batter warms from the beaters. ) Set the kitchen timer to help you keep track of the time.
The mixture will become fluffy and aerated.
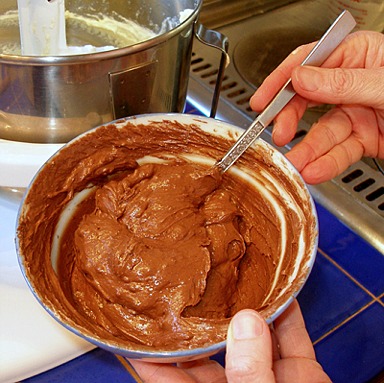
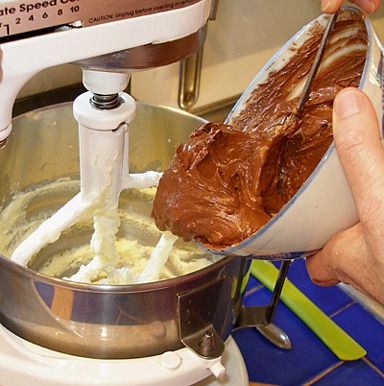
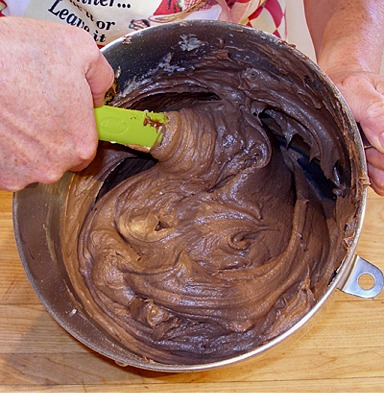
4. Add melted and cooled chocolate: Temper the chocolate by adding a teaspoonful of the butter/sugar/egg mixture at a time to the cooled chocolate and mix thoroughly after each addition.
You can increase the amount added to the chocolate after the initial first few teaspoons to tablespoons,
Add about 1/2 cup or more of butter/sugar/egg mixture to the melted chocolate before returning it to the main mixing bowl. Mix all the ingredients on low speed until combined and creamy.
SARAH SAYS: Tempering the chocolate properly is a very important step. If the chocolate is too warm, and added to the batter, it will seize, creating small bits of hardened chocolate in the batter. These bits will never melt and incorporate into the batter when the cake bakes; they will remain as hardened pieces of chocolate in the final cake.
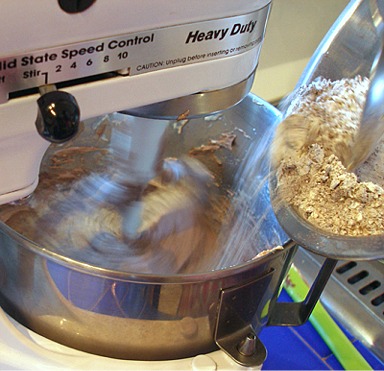
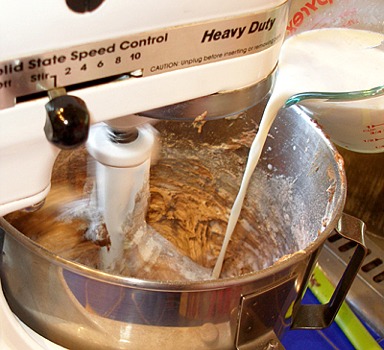
5. With the mixer on low, add the flour mixture in 3 equal portions, alternating with the milk in 2 equal portions, beginning and ending with the flour.
(If the milk is cold, the batter will curdle slightly. It's ok. It will come together when you add the flour.)
SARAH SAYS: Add the flour and liquid ingredients in increments quickly; do not wait in between additions too long as you don't want to overmix the batter.
After completing the last addition of flour, let the mixer run for 30 seconds on LOW. The batter should look mixed. STOP the mixer. Do NOT overmix.
SARAH SAYS: Chocolate batter is generally thicker than vanilla butter cake batter because of the presence of the starches in cocoa powder. If your mixer is having trouble mixing the batter, stop the mixer and remove the mixing bowl. With a large rubber spatula, FOLD the ingredients together – DO NOT STIR them.
6. Remove the bowl. With a large rubber spatula, give the batter ONE or TWO quick folds to incorporate any stray flour or milk left at the sides and bottom of the bowl. Then, STOP!
Bake:
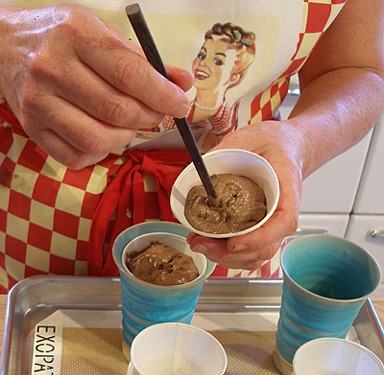
1. Scoop cake batter into all of the cone paper cups.
Add a small scoop at first, and poke it down with a chopstick so it goes down into the point of the cup, then fill the cup 3/4 full.
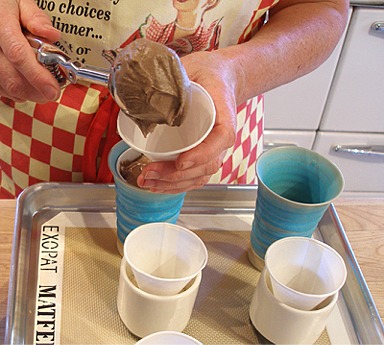
2. Bake one rimmed cookie sheet or sheet pan's-worth at a time, refrigerating any unbaked and filled cone paper cups.
3. Bake for about 25 minutes, testing for doneness starting at 20 minutes.
Use a wooden skewer to test for doneness, making sure to push it well into the cake, since it is a very deep cupcake.
4. When the cone cakes are baked, remove them from the oven and let them cool completely in their ceramic cups, before attempting to unmold them from their cone paper cups.
5. Bake the remaining cake batter, repeating Step #s 2 – 4 as many times as you need.
STEP II: ASSEMBLE THE WITCH'S HATS
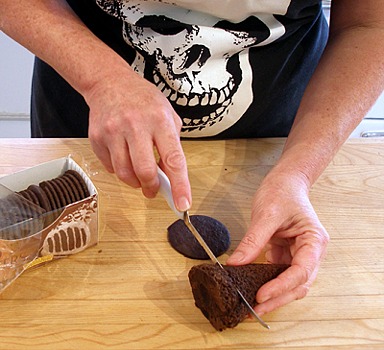
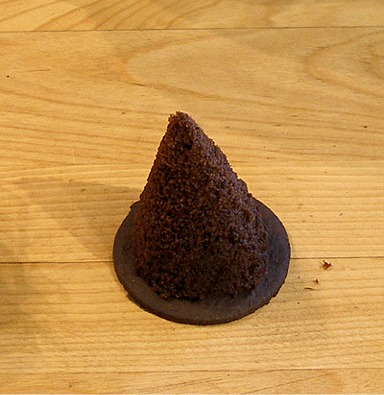
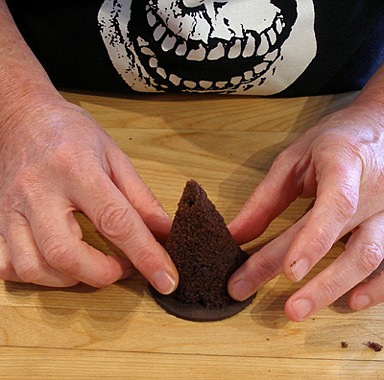
1. Remove the cakes from the cone paper cones and trim:
a. Gently loosen the cake from the paper cones.
Insert a thin knife down the side of the cup, and go around the edge to insure that the cake if fully released from the cup, all the way to the tip.
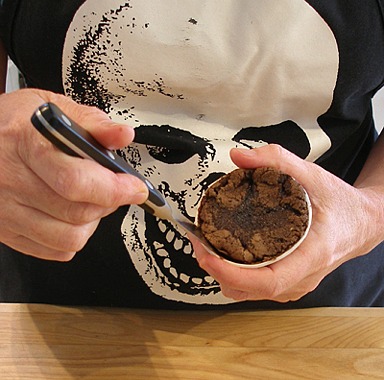
b. Remove one cookie from the package and place cone-shaped cake on top of it.
c. Trim the cakes so that the cookie is at least an 1/8-inch larger than the cake, all the way around, forming the brim of the hat.
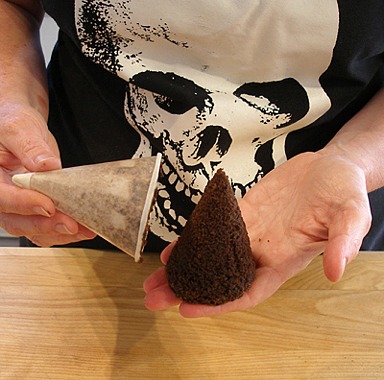
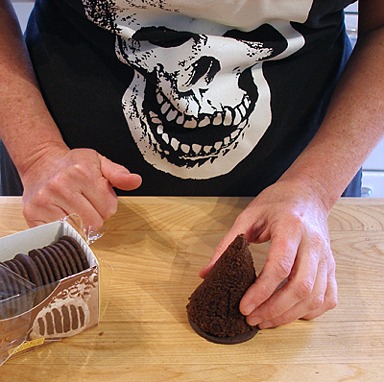
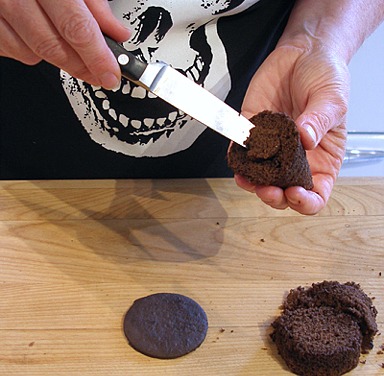
2. Fill each cake cone with frosting:
a. Cut a cone shaped piece out of the bottom of the cake with a sharp paring knife.
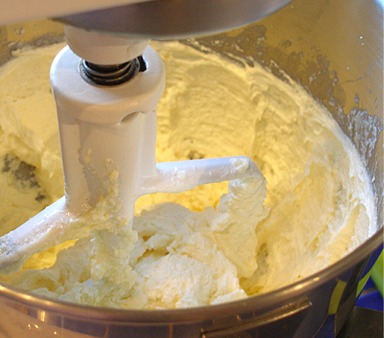
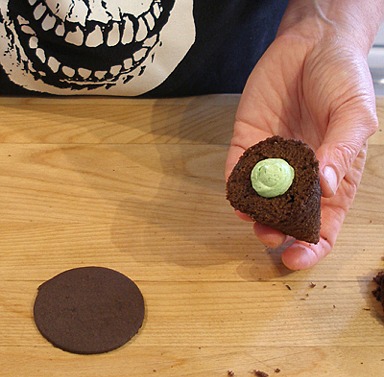
b. Fill a piping bag, fitted with a large plain tip, with green Tami's Buttercream.

c. Fill the hole in the cake, generously, with the green buttercream.

d. Place the bottom of the cake in center of cookie, and gently press down, to adhere. The buttercream will act as a glue.
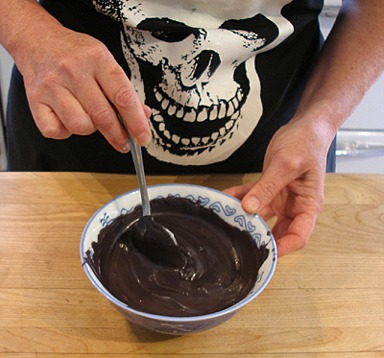
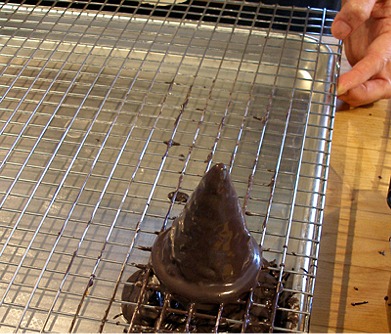
3. Coat each cookie cone with candy melts:
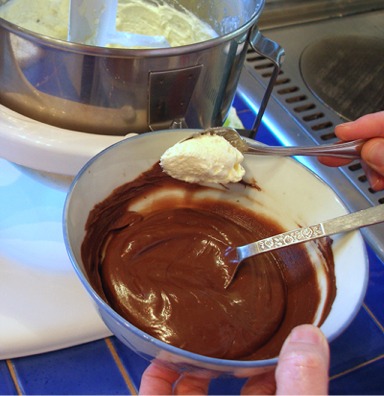
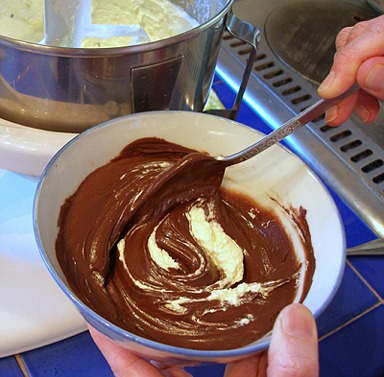
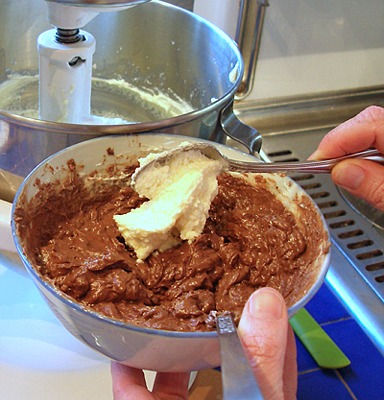
a. Melt one package black Wilton candy melts, according to package directions
Stir well, to make sure all the pieces are completely melted, then add 1 tablespoon shortening. Stir to combine.
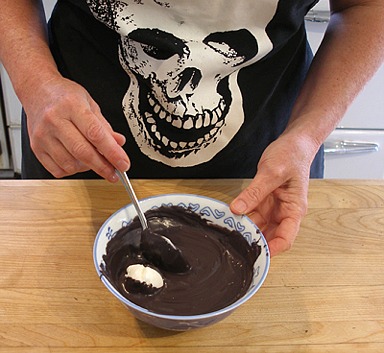
b. Take melted candy melts and place the bowl in a larger bowl of hot water.
This will help keep the coating fluid, while you cover the cakes. Be careful that you do not get any water in the mixture, or it will cause it to seize, and become unuseable.
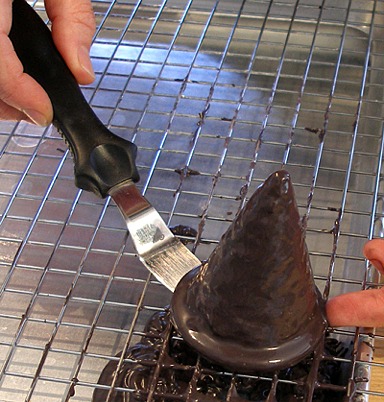
c. Place a cooling rack over a baking sheet and place one witch's hat on the rack. Spoon coating over the cake, to cover completely.
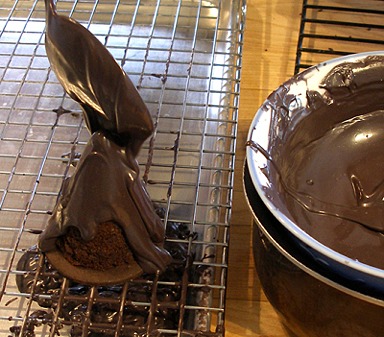
d. Lift up one edge of the rack and bounce it repeatedly, to smooth out the coating. The excess coating will flow onto the baking sheet.
After coating several hats, you can scrape the overflow off the baking sheet, remelt it, and use it again.
e. When coating is smooth, remove the hat with a small spatula and move it to another rack.
NOTE: This is a messy process, and you WILL get candy coating all over your fingers, and under your nails.
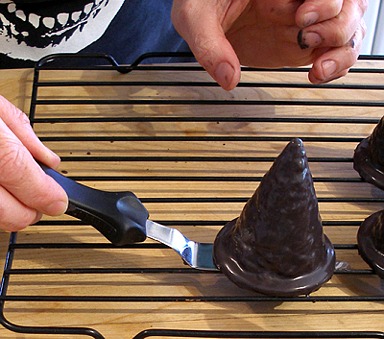
f. When you are done coating the cakes, place rack in the refrigerator, till the candy coating is hardened.
g. When candy coating is set, remove cakes from refrigerator.
STEP III: DECORATE THE WITCH'S HATS
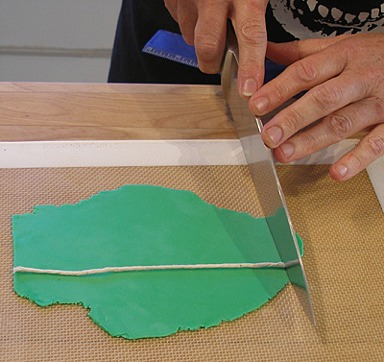
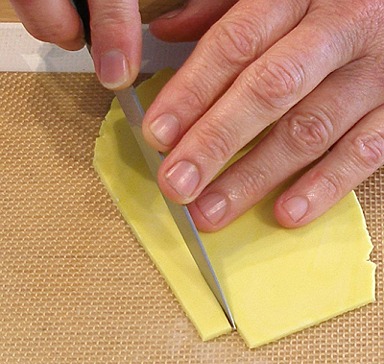
1. Roll green MMF out on a silpat mat, using a scant dusting of cornstarch, to keep it from sticking to the surface.
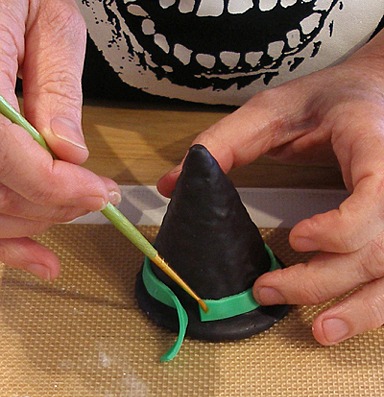
2. Using some kitchen string, measure the length you need to go all the way around the base of the hat.
Cut the string, leaving a little extra length, for overlap.
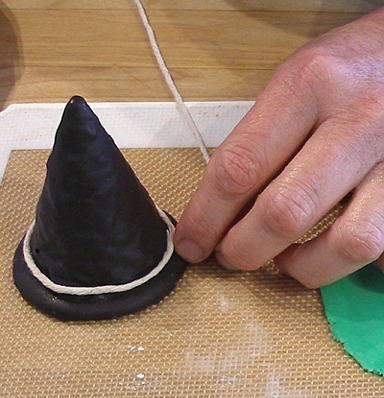
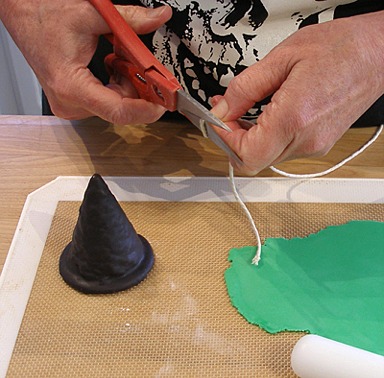
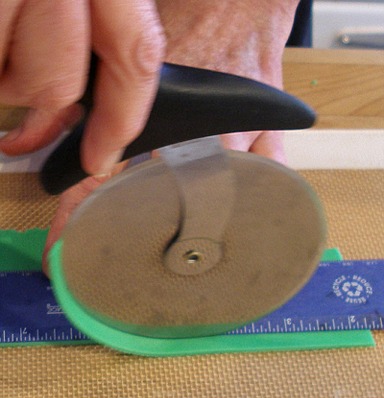
3. Place string on MMF and cut edges to the length of the string.
4. Use a pizza cutter to cut hat bands, a little less than 1/4-inch wide.
5. Wrap hat band around the hat, and moisten the area where they come together with a little dab of water.
NOTE: Nails are not dirty….it's the fault of the black candy melts!
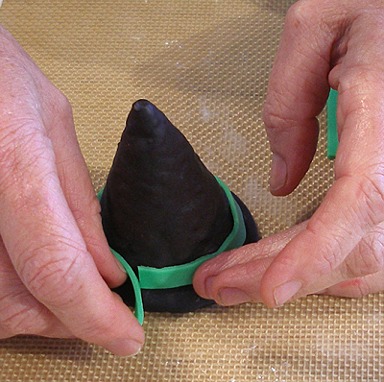
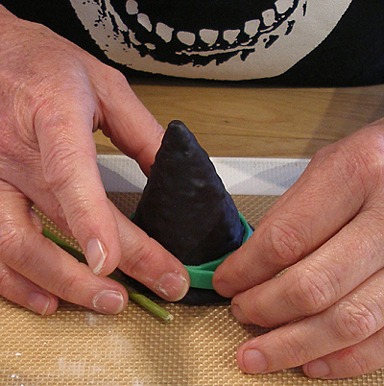
6. Press seam to adhere, then cut off the excess MMF.
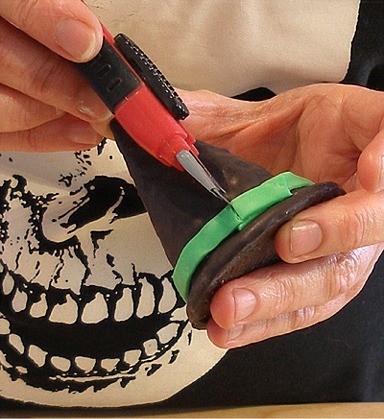
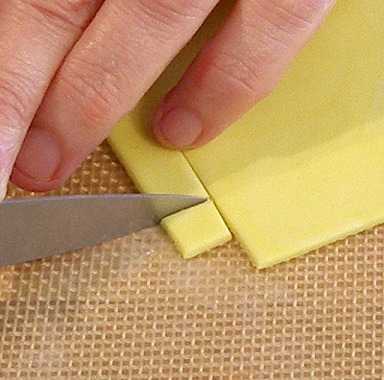
7. Roll out the yellow MMF and cut a strip about 1/4-inch wide.
Cut out a square and then cut out the center, with the tip of a sharp knife.
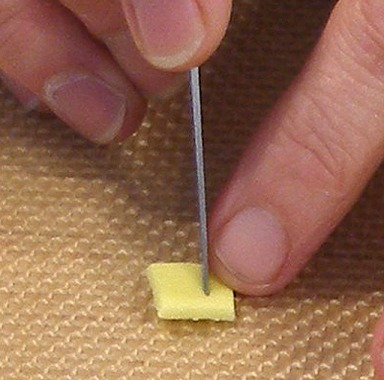
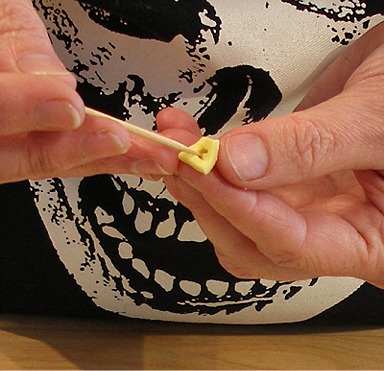
Poke cut center out with a toothpick, making a buckle.
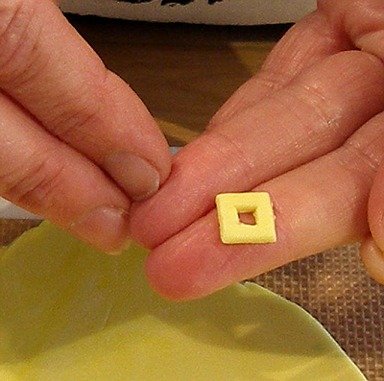
8. Find the front of the hat…the best side…and paint a little water on the band.
Place buckle on, and gently press, to adhere.


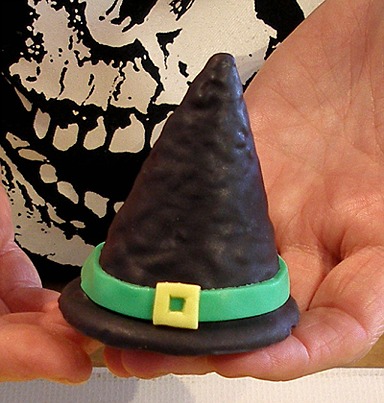
VIOLA!