
Variation: Gluten-Free Everyday Chocolate Cake or Cupcakes
This gluten free yellow cake is really great! I mix the cake using my new gluten-free mixing methods, called Sarah's Gluten-free Mixing Method. It all started with this very recipe. The resulting cake has a beautiful texture and flavor and does not dip in the center, common with gf cakes! This one is not sticky at all and can be easily unmolded from the baking pan! It also cuts beautifully and has a really nice cake texture to it, which is my goal! You need to use flavored oils with extracts and citrus peel to enhance the flavor in the cake, because gf cakes are not naturally flavorful – because in the absence of wheat flour, there is little natural flavor in the cake!
CAKE RECIPE HELP / GLUTEN-FREE RECIPE HELP
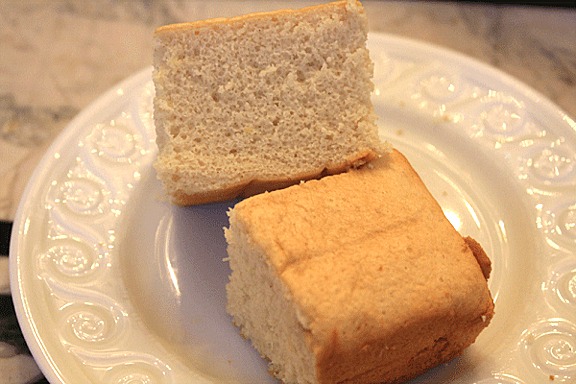
SARAH SAYS: Look at the very fine and moist cake texture I achieved with my new mixing method-invention!
Cake and Photo by Kelly Hong © Sarah Phillips
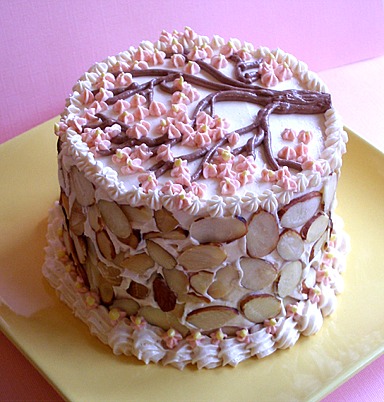
4-inch three layer Gluten-Free Everyday Yellow Cake with the Caramel Swiss Meringue Buttercream Tutorial, toasted almonds on sides. Inspired by the flowering trees in my yard.
INGREDIENTS
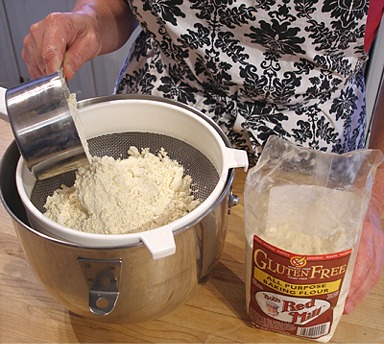
2 cups Bob's Red Mill All-Purpose Gluten-Free Baking Flour; spoon into dry measuring cup and level to rim; or any Gluten-free flour blend
1 1/4 cups sugar
2 teaspoons gluten-free baking powder; such as Clabber Girl
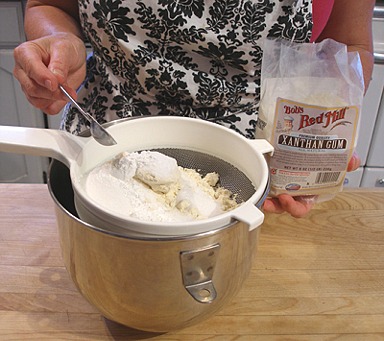
1 teaspoon xanthan gum
1 teaspoon salt
1 cup milk; cold from the fridge – I have used soy milk
3 large eggs; cold from the fridge
2 – 3 teaspoons gluten-free vanilla
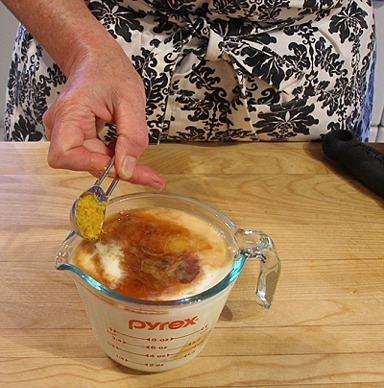
2 teaspoons lemon peel or 1/4 teaspoon lemon oil, optional
1 stick (1/2 cup) unsalted butter; cold from the fridge – I have used Earth Balance Buttery Sticks
INSTRUCTIONS
Prepare the oven and baking pans:
1. Position an oven shelf to the middle of the oven and preheat the oven to 350 degrees F.
2. Grease two 9 x 2-inch or one 9 x 13-inch baking pan and set aside.
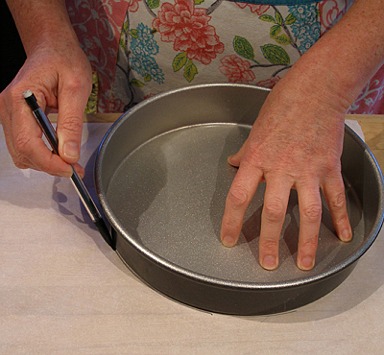
A. Line with parchment paper: Place one pan on top of a piece of parchment paper and trace around it with a pencil. The lead is nontoxic.
Cut out the round of parchment paper following the pencil marks as a guide.
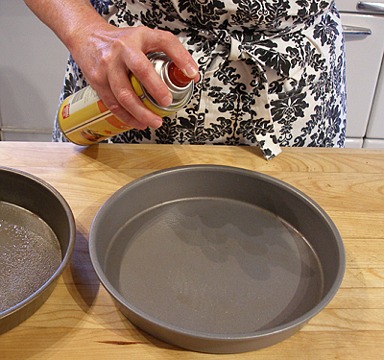
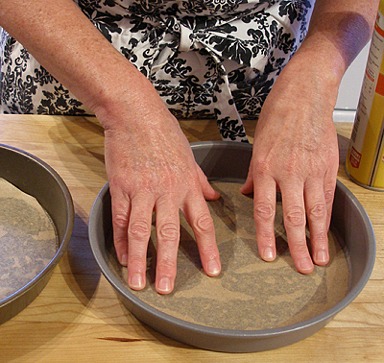
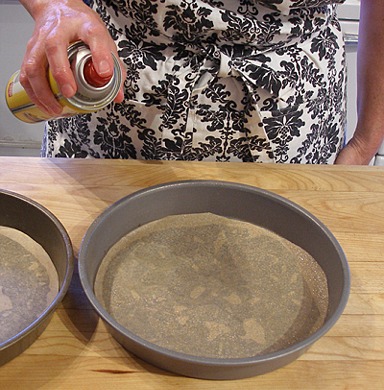
B. Grease the pans with cooking oil spray. Place the parchment paper round in each pan, and grease again. Set pans aside until needed.
Mix the ingredients:
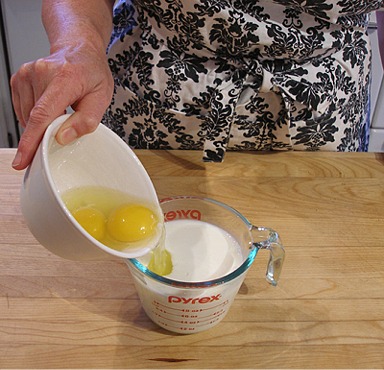
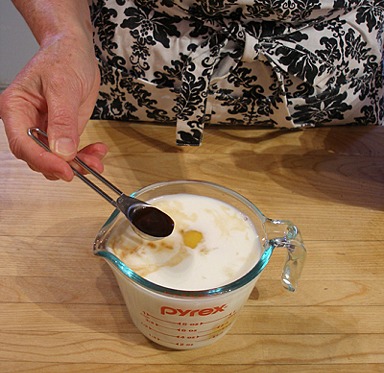
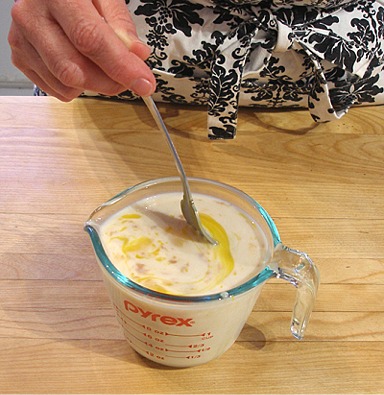
1. In a one-cup measuring cup or a bowl with a pouring spout, beat together the milk, eggs, vanilla and lemon peel. Set aside.
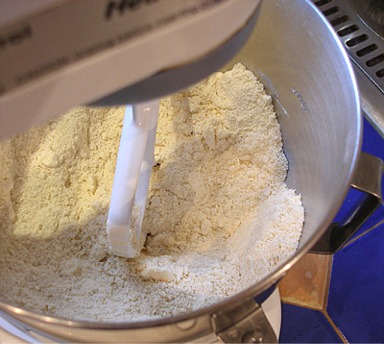
2. Into the mixing bowl of a stand mixer sift together the gluten-free flour blend, sugar, baking powder, xanthan gum, and salt.
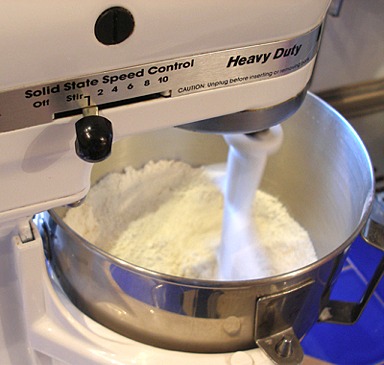
Clamp on the mixer bowl to the stand mixer, and fit the mixer with a paddle attachment. Turn the mixer on low to combine the ingredients.
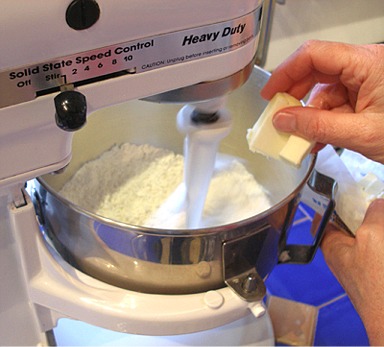
3. Cut the cold butter into tablespoon size-pieces. With the mixer on low speed, add the butter 1 tablespoon or piece at a time at a time into the flour mixture.
Keep adding each butter-piece about 1 second apart, until all has been incorporated.
The butter must be COLD.
Stop the mixer when the butter particles are the size of red kidney beans.
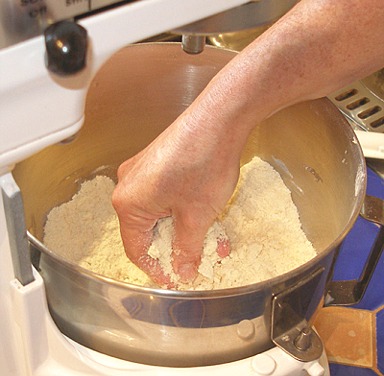
4. Unclamp the paddle attachment and set aside.
Reach into the mixer bowl and quickly rub the butter into the gluten-free flour mix in between your fingertips and thumb. Let the mixture drop back into the bowl.
Toss the flour with a fork to get as many butter and flour particles from the bottom of the mixing bowl up to the top, making sure you reach every ingredient.
Take about 30 seconds 1 minute to complete the task, making sure you do not melt or soften the butter.
5. Fit the paddle attachment back on the mixer.
With the mixer speed on low, continuously add the egg/milk mixture at the side of the bowl, taking about 5 seconds to complete.
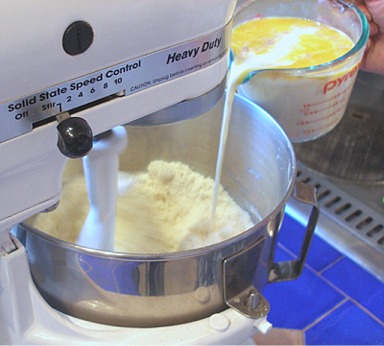
When it has been added, stop the mixer and scrape the side and bottom of the bowl. Make sure you scrape the mixer blade.

6. Set the mixer speed to high and beat for 2 – 3 minutes until the batter is light, fluffy and aerated – – like you are whipping whipped cream or egg whites to their fullest.
This also activates the xanthan gum and after two or so minutes, the batter should have strands forming in it, as it is beaten.
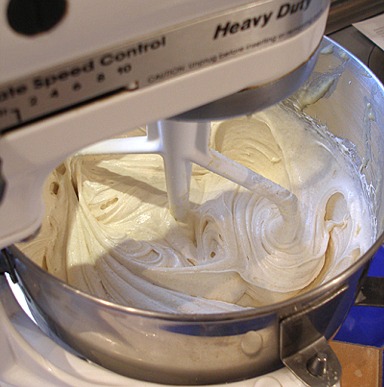
SARAH SAYS: This is a critical part of my new gluten-free mixing method. The cake batter will look pretty strange before this “miracle mixing” process; it magically turns into a “real” looking fluffy cake batter after this important aerating step. If mixed properly, the funny odor from the gluten-free ingredients should pretty much disappear. The batter should not taste bitter, either.
Bake:
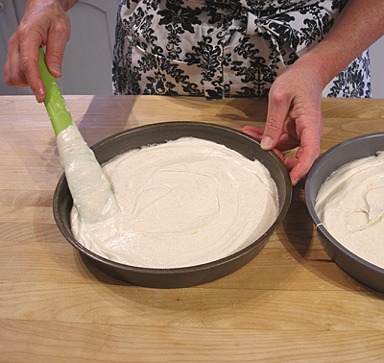
1. Divide the batter evenly into two 9 x 2-inch prepared pans.
2. Bake for 30 to 35 minutes for two 9 x 2-inch pans. (Bake for 35 to 40 minutes for one, 9 x 13-inch pan.)
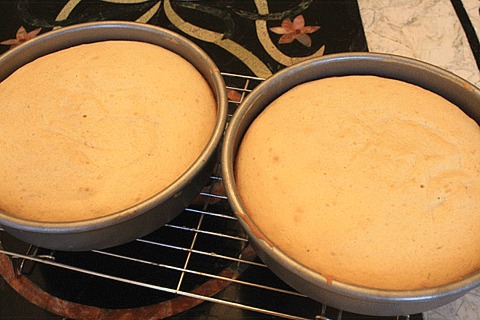
SARAH SAYS: Cakes baked in two 9 x 2-inch pans.
Do NOT underbake or overbake. Gluten-free cakes need to be baked perfectly.
If you insert a toothpick in the middle and remove, it should be clean with one or two moist crumbs attached at most, but not batter. The cake will slightly shrink from the side of the pan.
SARAH SAYS: The cake smells really good while baking – another attribute that I look for when baking alternative recipes! The cake should be just like a REAL cake!
3. Remove the cakes to cool on wire racks for 10 to 15 minutes. Loosen the sides with a small metal spatula or sharp knife, if necessary, taking care not to scratch the cake pan.
Invert onto cake rack and place upright to cool completely. Be careful, the cake is delicate when warm.
SARAH SAYS: Two 9 x 2-inch cake layers cooling.
NOTE:
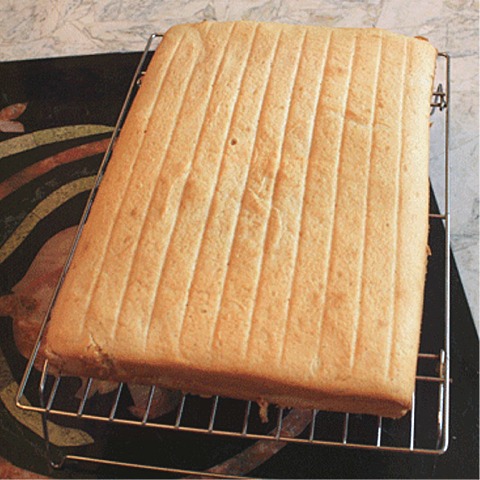
SARAH SAYS: I am proud of how nice and flat the cake baked in one 9 x 13-inch pan. It unmolded beautifully from it and was not sticky or gummy at all!
4. Let cake layers cool thoroughly before storing or frosting.
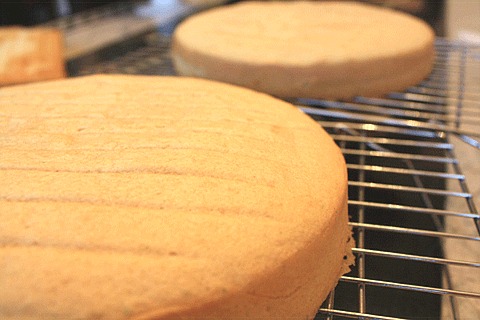
SARAH SAYS: I wanted to show you the very fine texture I achieved! Note how high the cake rises – almost 1 1/2-inches!
STORAGE
Gluten-free cake layers stale faster than conventional cakes made with wheat flour. They can be stored at room temperature for about 1 to 2 days, well wrapped.
Unfrosted cake layers are best stored frozen, wrapped in plastic wrap, for about a month at most; they also do not freeze well as long as conventional cakes.
Thaw in their wrappers at room temperature. Cakes can become sticky when thawed.
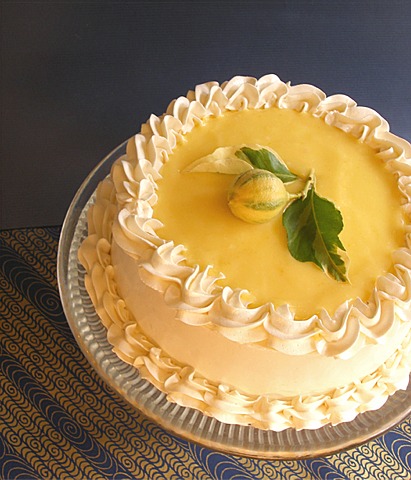
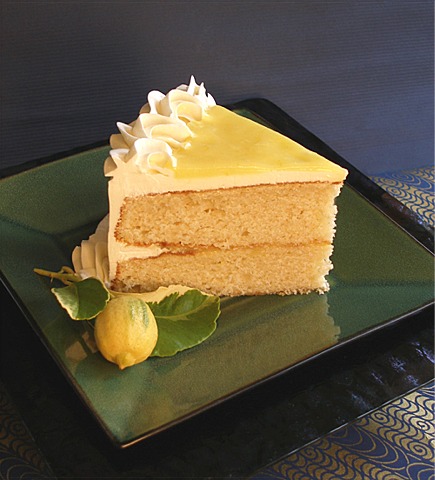
ASSEMBLY
1 recipe Italian Meringue or Mousseline Buttercream or IMBC
1 recipe Fresh Lemon Curd
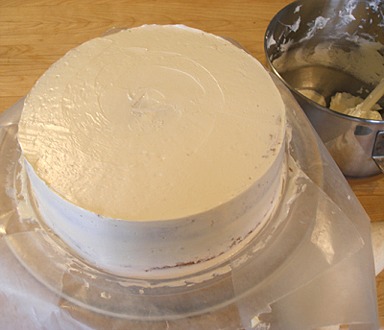
1. Place strips of waxed paper on the edges of your cake plate, to protect it while you frost the cake.
2. Place one layer, bottom side down. Pipe a frosting dam with the IMBC. Fill in with 1/4 – 1/2 cup Lemon Curd.

3. Place the second layer on top, top side down. Crumb coat the layers. Chill cake in the refrigerator for 20 minutes.
4. Finish cake with a frosting layer. Pipe bottom and top decorations. Fill in top with 1/4 – 1/2 cup Lemon Curd.
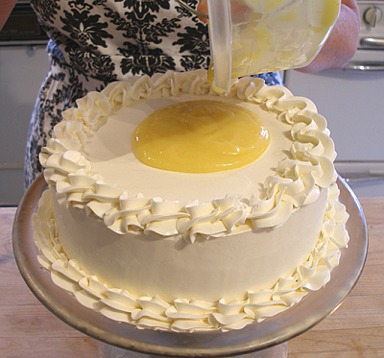
5. Smooth the Lemon Curd with a small offset spatula. Chill cake for 20 minutes.

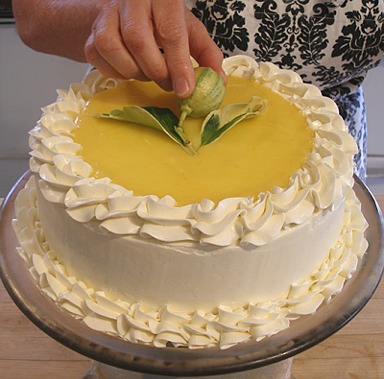
6. Optionally, decorate the top of the cake with a pesticide-free lemon and leaves.
STORAGE
The frosted and filled cake is perishable and must remain refrigerated. It will keep for 2 to 3 days.
VARIATION
Gluten-Free Everyday Chocolate Cake or Cupcakes