
Internet photo
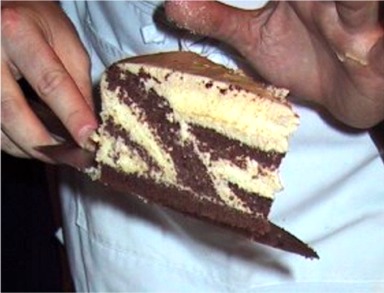
Consisting of Vanilla and Chocolate Chiffon Cake layers, filled and frosted with Swiss Meringue Buttercream or SMBC, I figured out that this cake is really a mathematical puzzle! I figured out the solution in Step #5, under Assembling the cake! The original recipe by Bo Friberg, appears in his book, The Advanced Professional Pastry Chef.
CAKE RECIPE HELP
STEP I: MAKE THE CHIFFON CAKE RECIPES AND THE SWISS MERINGUE BUTTERCREAM
VANILLA CHIFFON CAKE
Makes one, 10 x 2-inch cake
INGREDIENTS
1/3 cup (80 ml) vegetable oil
4 large egg yolks (1/3 cup/80 ml)
1/2 cup (120 ml) water, room temperature
1 1/2 teaspoons (7.5 ml) vanilla extract
1 1/2 cups (7 ounces/200 grams) bleached cake flour
1 cup (7 ounces/200 grams) sugar
2 teaspoons (8 grams) baking powder
1/2 teaspoon (2.5 grams) salt
4 large egg whites (1/2 cup/120 ml)
INSTRUCTIONS
1. Position oven rack to the center of the oven and preheat to 375 degrees F. Line one 10-inch (25 cm) round cake pan with a circle of greased parchment paper or grease bottom of the pan. Do NOT grease the sides of the pan. Set aside.
2. In a large mixing bowl, sift together the flour, 1/2 of the sugar (1/2 cup), salt and baking powder. Set aside. In a mixer bowl of a stand mixer, fitted with a whisk attachment, whip the oil together with egg yolks until just combined. Stir in the water and vanilla extract.
3. While the mixer is on the lowest speed, add the flour mixture slowly at the side of the bowl to the egg-yolk mixture. When combined, increase speed to high and whip for one minute and set aside.
4. Beat egg whites until foamy. Add remaining sugar (1/2 cup) and continue beating until stiff peaks form. Carefully fold the beaten egg whites into beaten flour and egg yolk mixture. You shouldn't see any streaks of batter and eggs whites in the mixture. The mixture should be smooth.
5. Immediately scrape the batter into the prepared pan. Run a table knife or thin icing spatula through the batter in an “s” formation so large air pockets will break-up into smaller ones. It will also break up any egg white clumps. The rest will dissolve into the batter. DO NOT bang the pan on the countertop because this eliminates air from the batter, which you don't want to do!
6. Bake for about 20 – 25 minutes or until the cake springs back when pressed lightly in the center. Allow cake to cool inverted (upside down) on a wire cake rack. When cake has cooled, run a knife around the edges to release.
CHOCOLATE CHIFFON CAKE
Makes one, 10 x 2-inch cake
Make recipe above, except:
Decrease bleached cake flour to 1 1/4 cups (1.5 ounces/42.5 grams)
Add in 1/4 cup Natural cocoa powder (1.5 ounces/42.5 grams)
In Step #2: In a large mixing bowl, sift together the flour, cocoa powder, 1/2 of the sugar (1/2 cup), salt and baking powder. Set aside.
Cake Variations:
Lemon Chiffon Cake
Replace 1/4 cup (60 ml) of the water with 1/4 cup (60 ml) lemon juice. Add the grated zest of 3 lemons together with the water-juice mixture.
Orange Chiffon Cake
Replace 1/4 cup (60 ml) of the water with 1/4 cup (60 ml) orange juice (approximately 2 small oranges). Add the grated zest of 2 small oranges together with the water-juice mixture.
SWISS MERINGUE BUTTERCREAM OR SMBC
1 recipe Swiss Meringue Buttercream or SMBC
1. Flavor with vanilla extract.
2. Refrigerate until needed
STEP II: ASSEMBLE PUZZLE CAKE
INGREDIENTS
1 Vanilla Chiffon Cake
1 Chocolate Chiffon Cake
1 recipe Swiss Meringue Buttercream or SMBC
1 cup (240 ml) Frangelico liqueur (amaretto)
1/4 cup (60 ml) water
4 ounces (112.5 grams) unsweetened chestnut puree, softened
4 ounces (112.5 grams) bittersweet chocolate, melted and cooled
additonal 4 ounces (about 112.5 grams) bittersweet baking chocolate block; Prepare chocolate curls. Refrigerate on a wax paper lined cookie sheet.
3 ounces (85 grams) sliced almonds, toasted and lightly crushed
INSTRUCTIONS
Prepare ingredients:
1. Mix the Frangelico liqueur (Amaretto) with water for brushing cake layers. Set aside.
2. Warm the Swiss Meringue Buttercream Meringue or SMBC to room temperature.
Take half of the amount and fold in melted and cooled chocolate. With the other half, fold in the chestnut puree. Cover both and set aside.
Assemble Cake:
1. Torte each cake layer:
Slice both the vanilla and chocolate chiffon cake into 3 equal layers each. You will end up with 6 torted cake layers – 3 vanilla layers and 3 chocolate layers.
You will need 2 vanilla and 3 chocolate layers for the cake. You will use one of the torted chocolate layers in Step #4. Store or eat the extra torted vanilla layer.
Cover the extra torted chocolate layer and set aside.
2. Create a layer cake with four alternating layers:
Place one chocolate chiffon layer on a cardboard round. Lightly brush or spray with amaretto liqueur mixture on top to moisten.
Spread a 1/8-inch (3-mm) layer of the chestnut SMBC on the layer.
Place a vanilla chiffon sponge layer over buttercream and lightly press into place. Repeat with liqueur and chestnut SMBC.
Repeat again with a layer of chocolate cake, liqueur, chestnut SMBC and then ending with vanilla cake layer on the top.
Do not brush the top vanilla layer with amaretto liqueur.
Cover and place in refrigerator until the buttercream is firm, about 1 hour.
3. Cut cone-shaped piece from layered cake:
Remove the four layer cake from the refrigerator, and do not let warm to room temperature.
Immediately, using a thin, serrated knife, dipped in hot water, cut out a cone-shaped piece from the layered cake from the center of the cake.
Make a hole cut 8-inches in diameter at the top, leaving a 1-inch border around the edges, and cut through to the bottom layer, at an angle, leaving a 2-inch diameter hole cut through the bottom of the cake with a 4-inch border around the edges of that hole.
Using a thin knife or icing spatula to help you, take out the cone-shaped piece of cake.
Invert the cone-shaped piece and place it, flat side down on a cake board and set aside. There will be a large crater in the cake.
4. Ice the inside of the crater and 1-inch top edge of the cake with a 1/4-inch (6 mm) thick with chocolate SMBC.
Place the reserved torted chocolate chiffon cake layer from Step #1, on top and line it up with the edges of the cake.
Press to seal the chocolate layer to the edges of the cake with the crater.
Place a clean cake board on top and invert the cake.
The new chocolate layer, is now at the BOTTOM of the cake. The chocolate layer, once on the bottom, is now at the top.
5. Brush the top chocolate cake layer with the amaretto liqueur mixture to make the cake pliable, but not overly wet.
With your fingertips, gently press down on the top layer of cake around the hole so that it bends and touches the bottom cake layer.
The cake walls will also collapse/bend inward towards the center.
What was once the top layer of chocolate, will now become part of the slanted wall.
Smooth it so it adheres to the walls of the newly formed crater.
You now have a cone shaped crater once again. Ice the new crater with 1/4-inch (6 mm) thick layer of chocolate SMBC.
Replace the cut out cone-shaped piece of cake into the crater and press down firmly to fit.
SARAH SAYS: THE SOLUTION TO THE CAKE!~Here is the part that baffles most of us. The sides of the cake, will fall into the center, giving you the appearance that they slant, creating uneven cake walls on the outside of the cake. You will trim the side of the cake in the next Step #6.
But, I figured out that the cake is a mathematical puzzle!
See how the cake sides slant in in the finished cake. The top layer of the slant is used to be the top of torted chocolate cake layer after the cake was inverted. It had a 4-inch border and a hole in the middle. If you were to cut the cake in half, the cake that is left has four sides to it.
The original height of the cake was two inches. You torte the layers into three. Each torted layer becomes .66 inches. The cake becomes 5 layers with a precise amount of filling in between. The height of the cake becomes about 4 inches. The top rim is 4-inches. The slant of the cake side is 4-inches. And, the depth of the core is 4-inches. So, when you push the core into the small hole, the cake rotates onto another four-inch side, and the cake fits. You will have the point of the shape sticking out the side of the cake, which you trim in the next step.
6. Trim the sides of the cake to make them even because when you bent the cake inward, there will be points of the original cake wall sticking out of the new sides. You need to trim the cake so the walls are straight up-and-down. (The end result, Bo Friberg says is a 10-inch round cake in diameter. I am not sure that is true. I think you would end up wth an 8-inch round cake.)
7. Ice the sides and top of the cake with chocolate buttercream. Press crushed almonds onto the sides of the cake. Sprinkle shaved chocolate curls on top of the cake. Refrigerate cake until the buttercream is firm.
SERVE
Serve cake at room temperature, as the buttercream tastes best that way.
STORAGE
The unfilled and unfrosted cake layers will keep for about 3 days at room temperature, and 1 month or more frozen, but suffer somewhat in texture when thawed. It's best to freeze cake before unmolding from the pan. Wrap pan in foil before doing so.
Refrigerate if filled or frosted with perishable items, such as SMBC, where it will keep for a few days because the filling and frosting only lasts that long.