
Variation: Gluten-Free (Gluten Free) Rice Kripsies Treats Skulls; Halloween Rice Krispies Treats Tweaked on a Stick

Kelly and I thought it would be fun to do a Rice Krispies Treats Tutorial for Halloween.
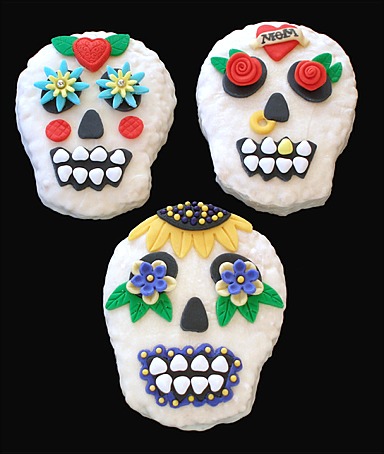
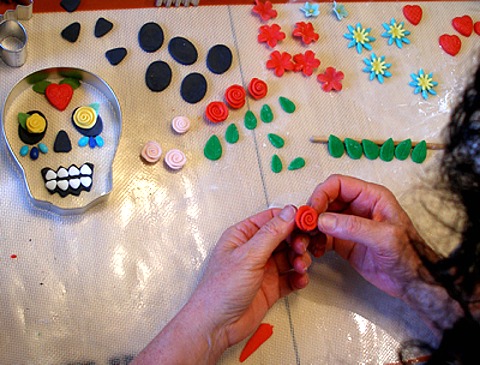
Sugar skulls are traditional decorations for the “Day of the Dead”, or “Dia de los Muertos”. This holiday is celebrated from Halloween, through November 2nd.
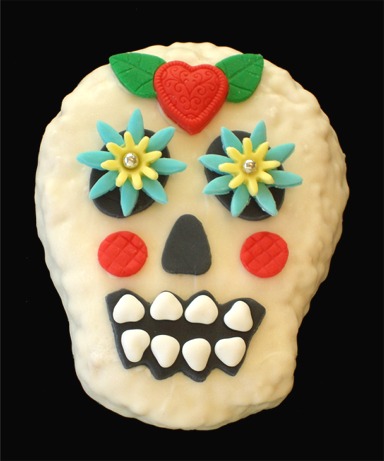
Sugar skulls are fancifully decorated with flowers, hearts, crosses and bright colors.
While some associate skulls with horror and the macabre, the whimsical appearance of sugar skulls give them more light-hearted aura.
Tattoo artists often depict sugar skulls, many of them are very elaborate and beautiful.
These cereal treat sugar skulls were inspired by these tattoo images.
They are a perfect Halloween treat, tasty and a lot of fun.
COOKIE RECIPE HELP
RECIPES AND SUPPLIES
1 recipe Rice Krispies Treats Tweaked, below
Two 14 ounce packages white Wilton Candy Melts (You will have some left-over)
1 recipe Marshmallow Fondant or MMF for coating and decorating skulls
Leave 1/2 of the MMF recipe white
The other half of the MMF recipe:
Tint 1 cup black
Tint the rest whatever colors you like. It does not take a lot to make the flowers, leaves and/or hearts.
One Wilton “Heart Drops” sprinkles or simliar
One Wilton “Jumbo Rainbow Nonpareils” sprinkles or sugar pearls or similiar
One Wilton “Skull Fun Face Cutter” Set
One Japanese vegetable cutters for the bamboo and ginkgo leaves
One 1 1/2″ oval cookie cutter(for eyes)
Cornstarch for rolling MMF
Various flower, leaf, and heart cookie and/or fondant cutters ie: Wilton Cutter Set
Gumpaste ball tool
Gumpaste flower forming foam pad
Black food color marker, such as Foodoodlers
STEP I: MAKE THE RICE KRISPIES TREATS
RICE KRISPIES TREATS TWEAKED / recipe alone
INGREDIENTS
10 ounces marshmallows, mini or regular size or 1 jar (7 oz.) marshmallow crème; for best results, use fresh marshmallows
3 tablespoons unsalted butter
1 teaspoon vanilla extract
6 cups Rice Krispies Brand Cereal (whole)*
*NOTE: For a gluten-free variation, replace the Rice Krispies Cereal with 6 cups Crushed Gluten-free Rice Chex Brand Cereal or Gluten-Free (Gluten Free) Cocoa Pebbles; crush into small pieces and then measure.
INSTRUCTIONS
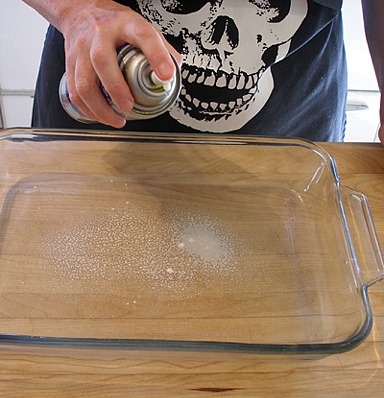
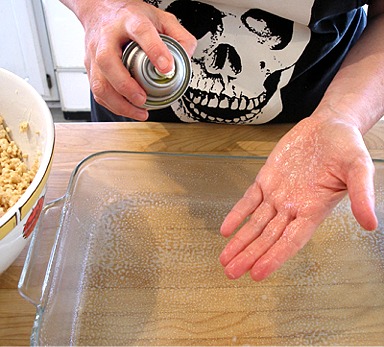
1. Spray a 13- x 9- x 2-inch pan with cooking spray. Spray a large wooden mixing spoon with vegetable oil. Set aside.
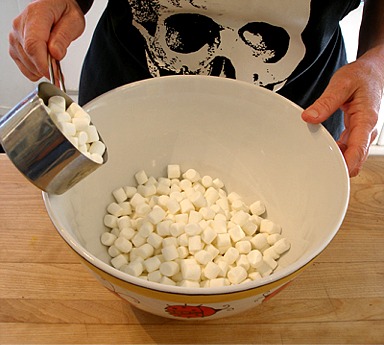
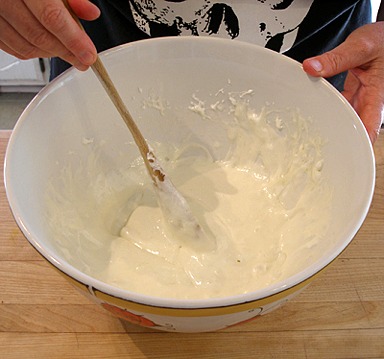
2. Place marshmallows in a large microwave safe bowl. Cut butter into tablespoon size pieces and add.
Microwave the mixture on HIGH for 2 minutes. Stir mixture. Microwave an additional 30 seconds to 1 minute on HIGH, if needed.
Stir until smooth.
(Microwave cooking times may vary.)
NOTE: Alternatively, on the stovetop, in a large heavy-bottomed saucepan melt butter over low heat.
Add marshmallows and cook under low heat, stirring continuously until completely melted. Remove from heat.

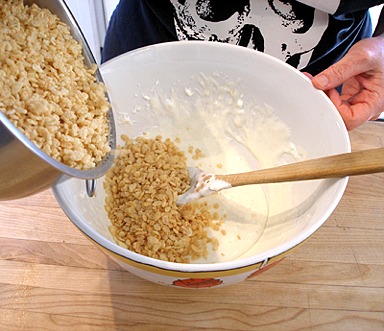
3. Add the rice krispies treats cereal. Stir until well coated.
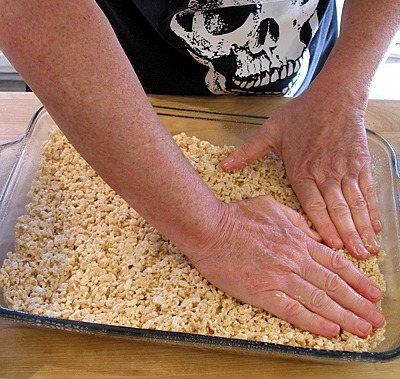
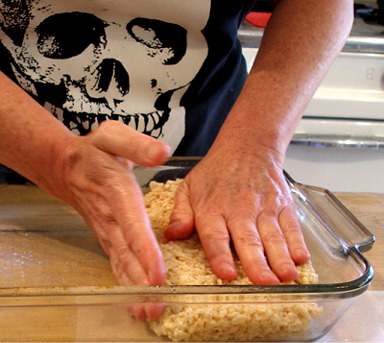
4. Spray hands with cooking spray. This is so when you compress the sticky Rice Krispies Treats mixture in the pan in the next step, it won't stick.
NOTE: You can omit spraying your hands with oil and place a sandwich-sized bag on your hand like a glove, instead.
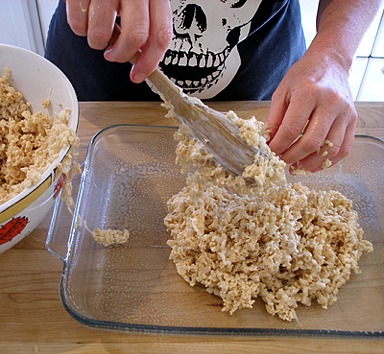
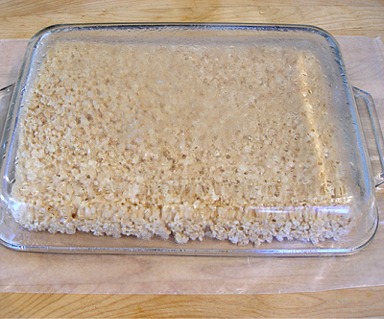
5. Spread mixture evenly in pan and then press the mixture to compress with greased hands.
Compressing the mixture makes them stronger, which is important when you are cutting them out with cookie cutters.
6. Set cereal treats aside, to cool
STORAGE
Store no more than two days at room temperature in an airtight container.
To freeze, place in layers separated by wax or parchment paper in airtight container.
Freeze for up to 6 weeks. Let stand at room temperature for 15 minutes before serving.
STEP II: MAKE THE MARSHMALLOW FONDANT (MMF) FACIAL DECORATIONS, FLOWERS AND OTHERS
While the Rice Krispies Treats are cooling and setting, make the following:
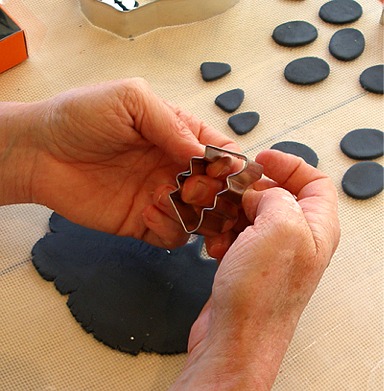
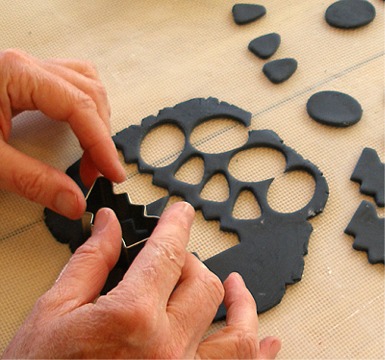
1. Facial Features:
Cut 7 sets of facial features each from the Wilton “Skull Fun Face Cutter” Set
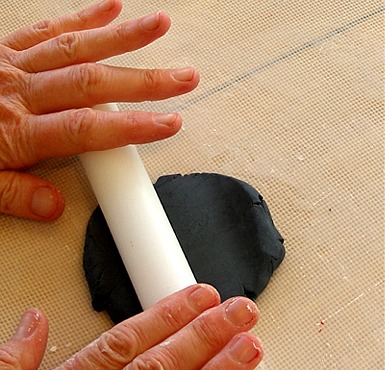
A. Lightly sprinkle or sift a small amount of cornstarch on a nonstick baking mat.
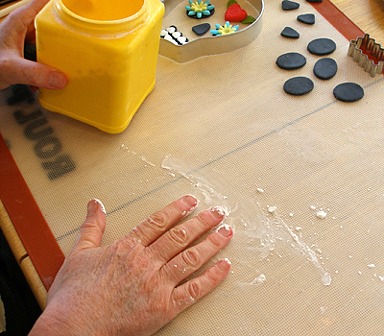
B. Roll the black MMF to 1/8-inch thick on the prepared surface.
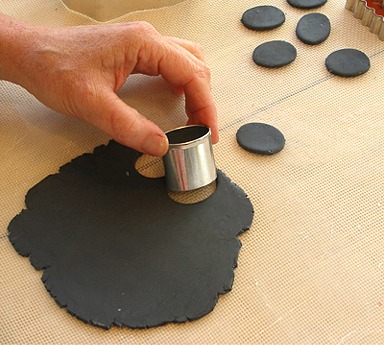
C. Use 1 1/2-inch oval cookie cutter or round cutter to cut the eyes.
Do not use the eye cutter that comes with the kit, because it is too small.
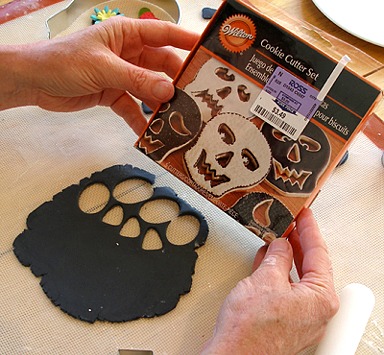
D. Before you cut the mouths out, gently pull the cutter from the kit, to make a wider opening, so there will be room for the teeth.
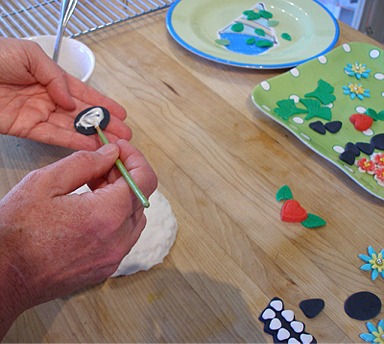
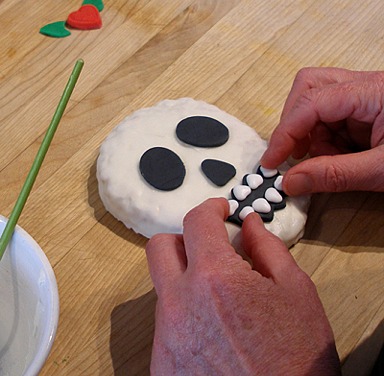
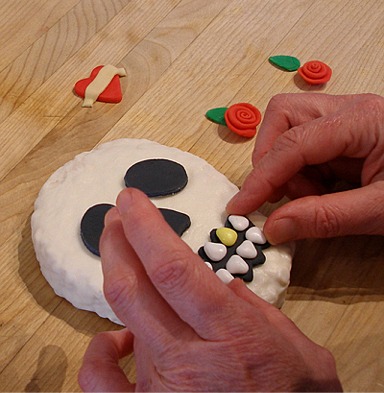
2. Set teeth with “Heart Drops”:
A. While the mouths are still soft, place white “Heart Drops” on the mouth cut out and gently press them into the MMF to seat them.
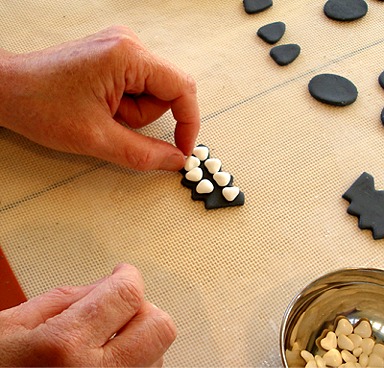
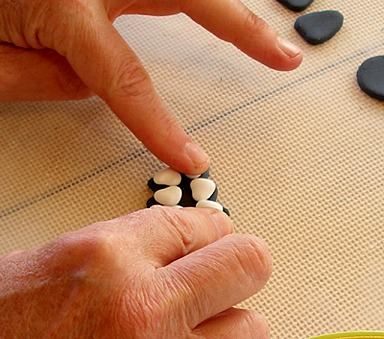
B. One at a time, remove the “teeth” and paint the area under the tooth with a small amount of water.
Place the tooth back in place, and press gently, to adhere it to the MMF.
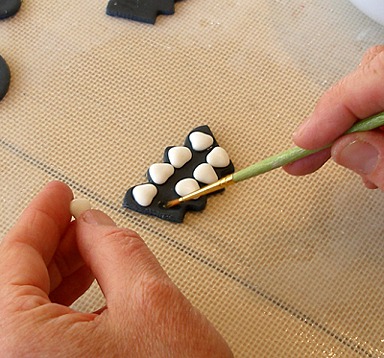
C. When all the teeth are in place, set the mouths aside to dry and stiffen.
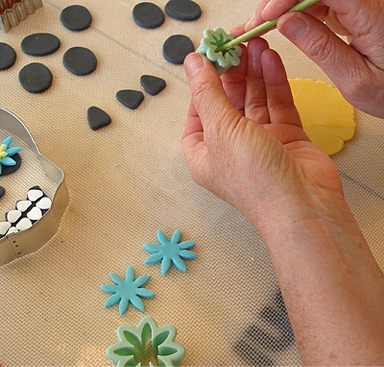
3. Make the MMF flowers and leaves:
I made various shapes of leaves and flowers to decorate the skulls using a Wilton Cutter Set
You could also use ready-made royal icing flowers, if you do not want to make your own.
Make as many flowers as you want; I used them to decorate the eyes of the skulls with.
Flowers:
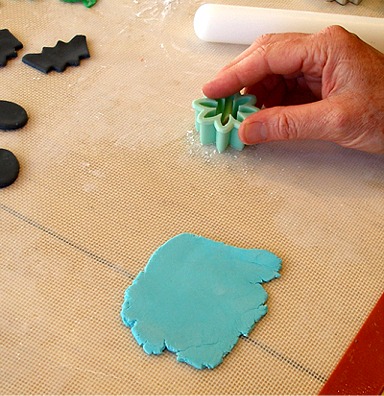
A. To make a two layer MMF flower, choose one flower cutter, and another one that is slightly smaller.
B. Roll any color fondant out to about 1/16-inch thick. I used turquoise.
C. Dip cutter in cornstarch then cut out the larger flower.
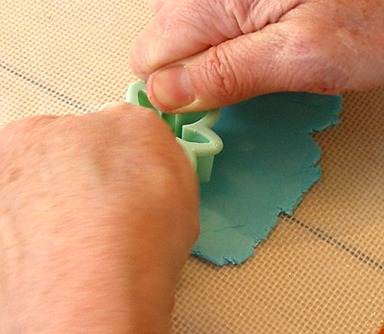
D. In the same manner, using a different color of MMF, cut out the smaller flower. I used yellow.
If the MMF sticks in the flower cutter, push it out with a wooden tool.
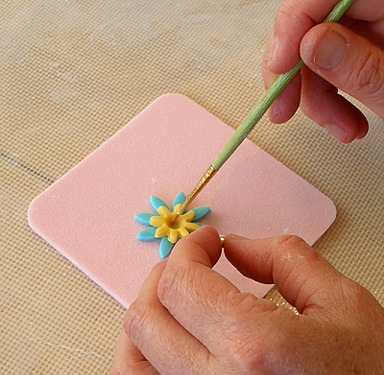
E. Place the larger flower on a piece of thin gumpaste forming foam.
Moisten the center of the large flower with a little water.
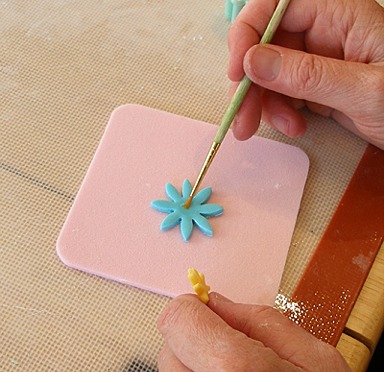
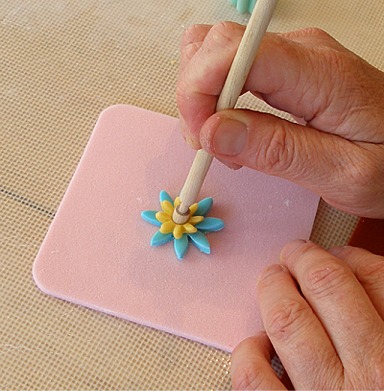
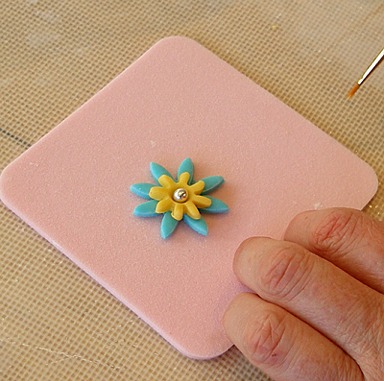
F. Place the smaller flower in the center of the large flower and press center down gently with a ball tool.

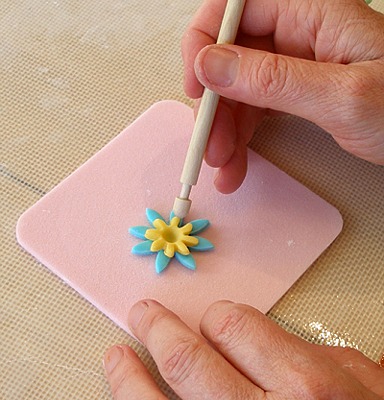
G. Place a small amount of water in the center of the flower and add a dragee or other round sugar sprinkle or pearl.
Set flowers aside to stiffen.
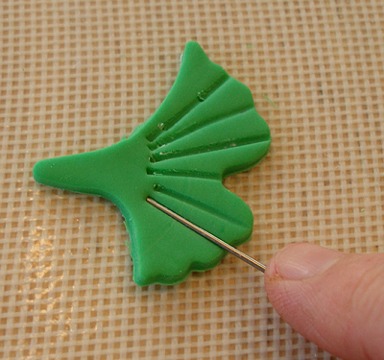
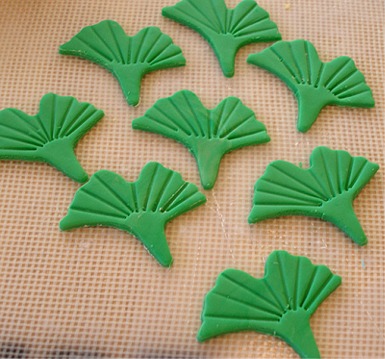
Leaves:
A. Make green MMF leaves by cutting them with leaf cutters, and texturing them with a leaf veiner or a piece of stiff wire.
For these gingko leaves, I used Japanese vegetable cutters.
I made the veins with a metal cake tester. Set leaves aside to stiffen.
SUMMARY:
As you can see by the picture below, I made quite a variety of flowers, leaves and hearts.
I also had a small silicone heart mold, so I made some of them too, but a heart cookie cutter works great too.
It is helpful to plan out your sugar skull treats ahead of time, to be sure that you have enough MMF decorations made for six skulls.
Do a Google.com image search for inspiration.
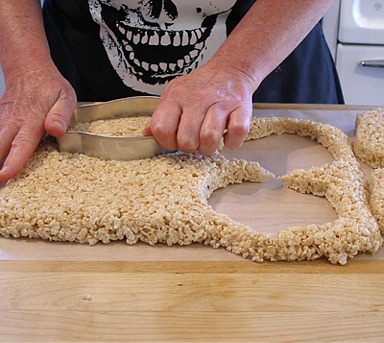
STEP III: CUT OUT SIX RICE KRISPIES TREATS SKULLS
1. Cut out six Rice Krispies Treats Skulls:
A. Place a piece of waxed paper on your work surface. Invert the pan onto it, and unmold the cereal treats from the pan.
If necessary, tap the bottom of the pan a few times with your fist.
Set the pan aside.
B. Line two cookie sheets with a nonstick mat or wax or parchment paper.
C. Cut out the first four skulls, using the cookie cutter from the kit.
You will have to press quite hard on the cutter to get it through the cereal treats.
Remove each skull and place on a the lined cookie sheet.
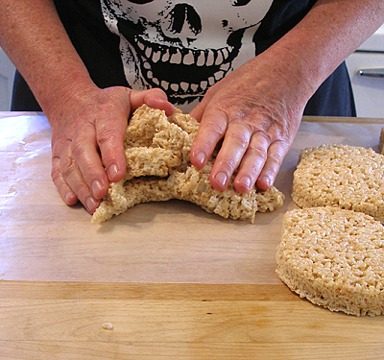
D. To cut out the remaining two skulls, you will use the Rice Krispies Treats scraps.
Push remaining scraps into a ball and reheat it for about 30 seconds in the microwave to soften.
Then, press it back onto 1/2 the pan, the same height as the first four skulls, and cut out two additional skulls.
STEP IV: COAT THREE RICE KRISPIES TREATS SKULLS WITH CANDY MELTS AND THREE WITH MMF
You can coat all of the skulls with white candy melts or white MMF.
The candy melts make for a tastier treat, but the MMF gives you a smoother, more polished, look.
I chose to coat three with candy melts and three with MMF:
1. Coat three skulls with candy melts:
A. Position a cake rack over one rimmed cookie sheet and set another wire cake rack aside.
B. Melt candy melts over a pan of simmering water, or in the microwave, according to the directions on the candy melts package.
Stir and set aside to cool slightly. Stir before using.
If the candy coating in the cup begins to harden, just pop it in the microwave on 50% power for about 10 – 20 seconds to remelt it.
Stir before using.
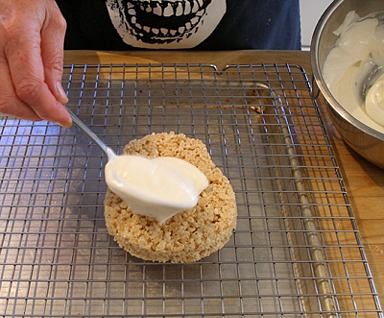
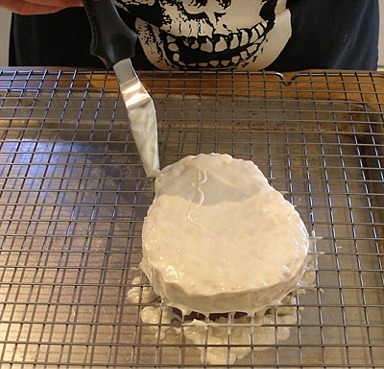
C. Place one skull on the rack.
D. Stir the candy melts. Spoon a generous amount of melted and slightly cooled candy melts over the skull.
Spread evenly with the back of the spoon until the candy melts starts to go over the edge of the skull.
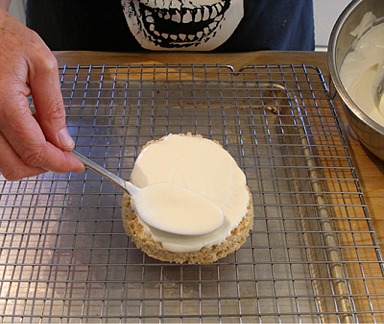
E. Gently tap the baking sheet to level the coating. Then, use a small offset spatula to coat any bare spots on the edges.
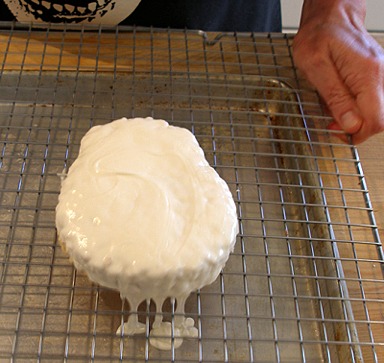
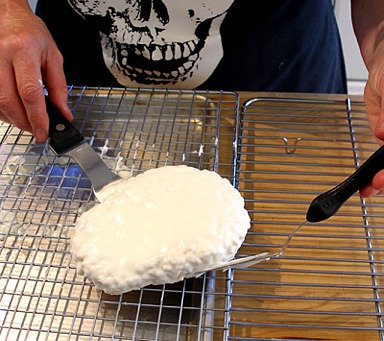
F. Remove skull, with a pancake turner or a large metal icing spatula, and place it on the other cake rack, to set.
Repeat process until the skulls are coated. You may scrape the coating that builds up in the baking pan and reuse it as necessary.
Place the coated skulls on the wire cake rack, in the refrigerator uncovered, to harden the coating.
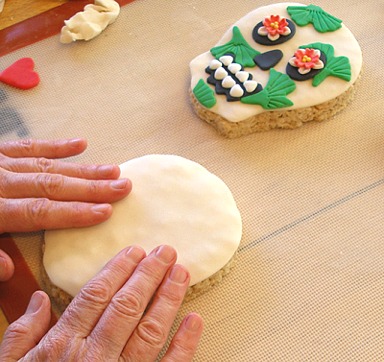
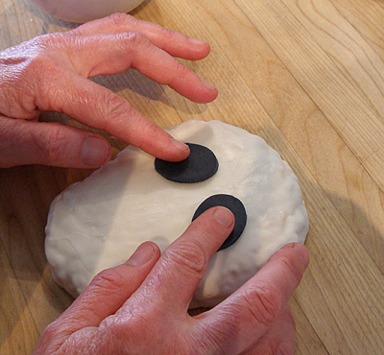
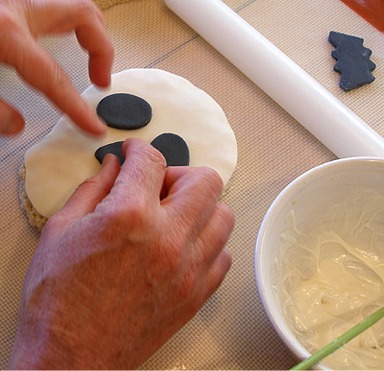
2. Cover three skulls with MMF:
A. Roll white MMF out to a scant 1/8-inch thick.
Cut out three skull shapes, using the same skull cutter that you used to cut the cereal treats.
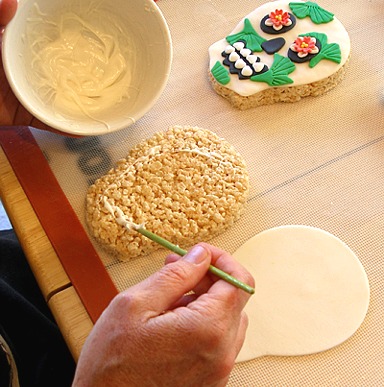
B. Melt a small amount of white candy melts. This will be the “glue” that you use to adhere the MMF to the cereal treat.
Set aside to cool slightly. Stir before using.
If the candy coating in the cup begins to harden, just pop it in the microwave on 50% power for about 10 seconds to remelt it.
Stir before using.
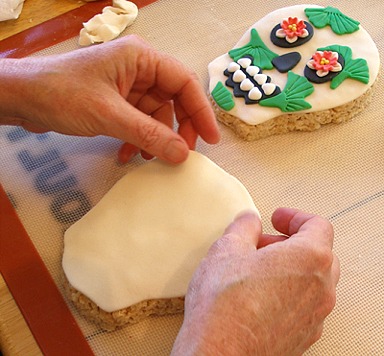
C. Paint in on the outer edge of the treat, then place the MMF skull in place, and press gently to adhere.
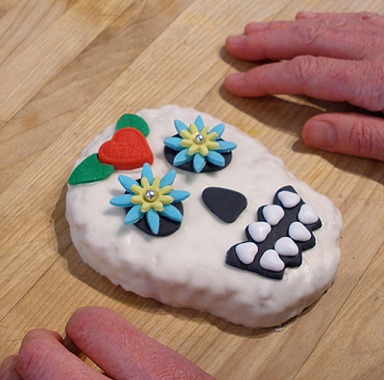
STEP V: DECORATE THE SIX RICE KRISPIES TREATS SKULLS
It is helpful to plan out your skull before you begin adding the embellishments. There are no rules here – just use your imagination and have fun!
1. Decorate the three candy coated skulls:
A. When the candy melts have set, remove the skulls from the refrigerator in order to decorate.
B. Melt a small amount of white candy melts. This will be the “glue” that you use to adhere the MMF to the cereal treat.
Set aside to cool slightly. Stir before using.
If the candy coating in the cup begins to harden, just pop it in the microwave on 50% power for about 10 seconds to remelt it.
Stir before using.
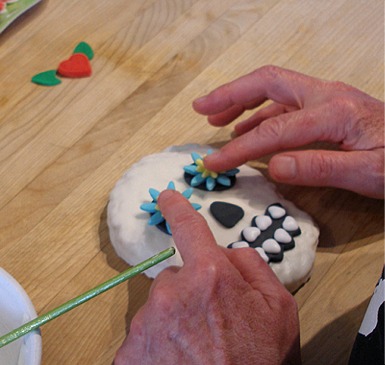
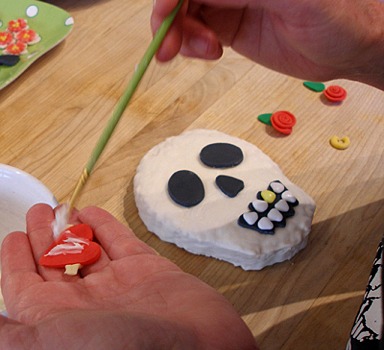
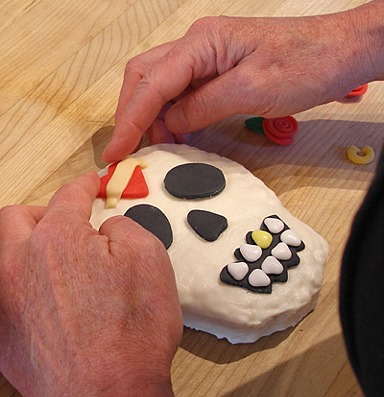
C. Use melted candy coating as “glue”, add the facial features to the skull.
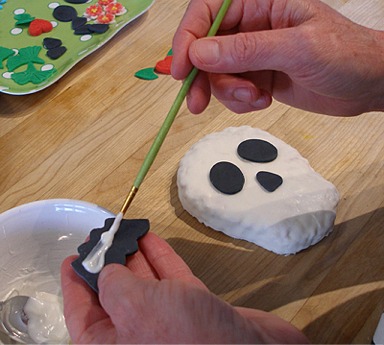
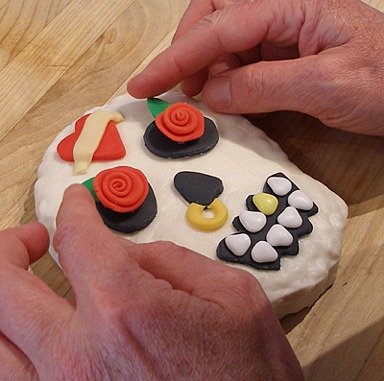
D. “Glue” the flowers, hearts and leaves in the same manner.

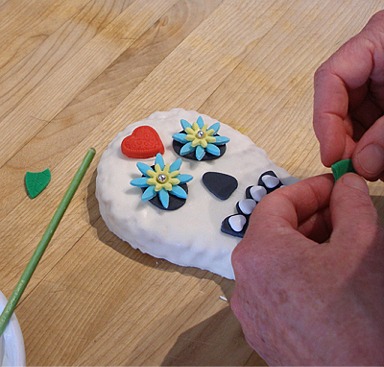
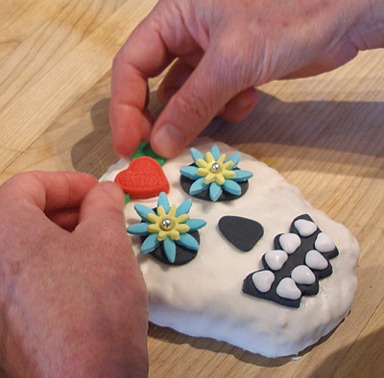
E. I added some blushed cheeks to complete the look, cut out of red MMF.
For some reason, this gal reminds me of a “Valley Girl”.
F. Repeat with the other two candy melt covered skulls.
Another design idea:
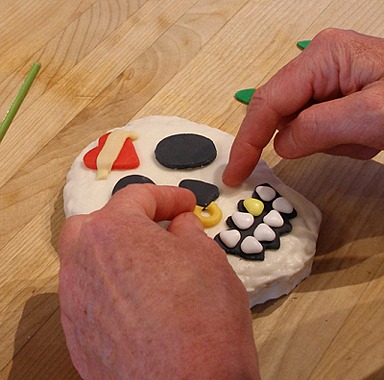
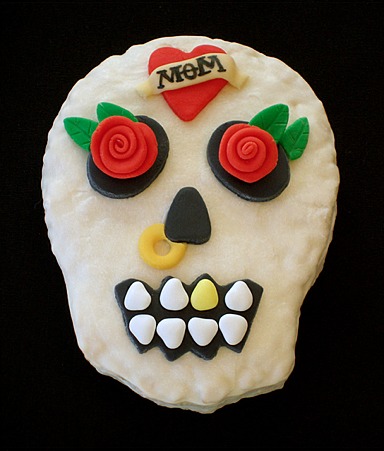
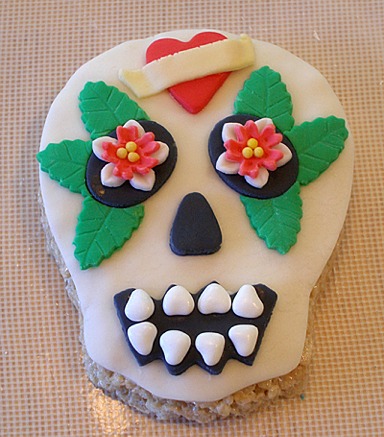
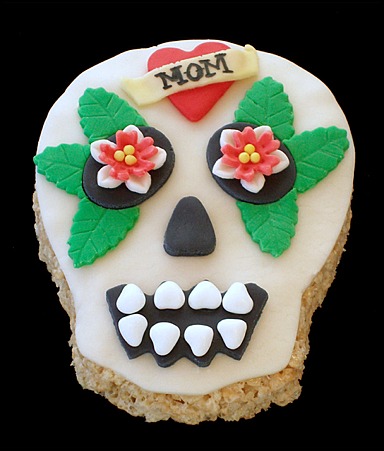
Because of the whole sugar skull tattoo genre, I wanted to do a “Tough Guy” skull, as another variation on a theme.
I gave him a “gold tooth” from a yellow Wilton “Heart Drops” sprinkle,
a “Mom” forehead tattoo, red ribbon rose eyes and a gold nose ring.
After the little banner on the heart was dry, I used a food color marker to write “Mom” on his tattoo.
Don't forget to complete the third candy coated skull!
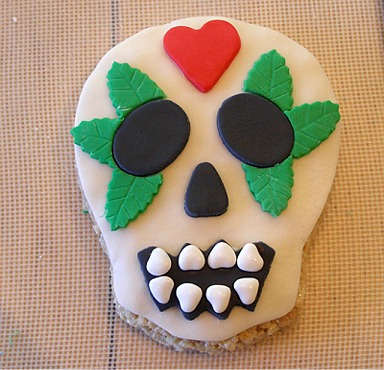
2. Decorate the three MMF covered skulls:
Decorating the MMF skulls is a similar process.
While you could adhere the decorations to the MMF with water, using the candy coating “glue” does a great job, and adds a little more flavor to the treats.
If using, melt a small amount of white candy melts. This will be the “glue” that you use to adhere the MMF to the cereal treat.
Set aside to cool slightly. Stir before using.
If the candy coating in the cup begins to harden, just pop it in the microwave on 50% power for about 10 seconds to remelt it.
Stir before using.
I like to call this one my “Biker Chick”.
A. Adhere the facial features first.
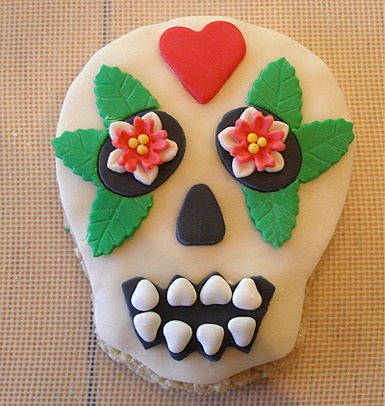
B. Then, add the embellishments.
NOTE: To fit the leaves around the eyes, cut the leaves with the same cutter you used to cut the eyes. This will give you an accurate fit.
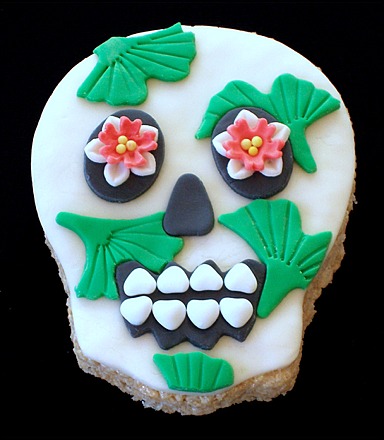
Two other design ideas:
I call this one “Sugar Skull-Japanese Style”.
I call this one “In the Garden”.
I used Wilton “Jumbo Rainbow Nonpareils” for the cheek spirals and pink “Heart Drops” as accents.
Just paint water on the MMF, where you want to place the nonpareils and heart drops, and press to adhere.

STORAGE
Store in a cool, dark place, in an airtight container for several days.
VARIATION
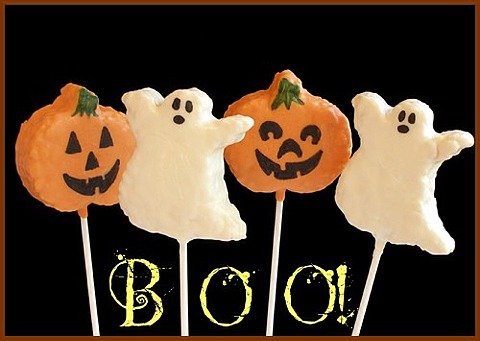
Halloween Rice Kripsies Treats on a Stick
INSTRUCTIONS
Rice Krispies Treats (RKTs) cut-out and then, coated with candy melts. Faces drawn with edible food ink (ie: foodoodlers).
KELLY SAYS: If the candy melts are old (i.e. hanging out in your cabinet for several months), you may have to add a little shortening (1-2 teaspoons).
I have also used a product called 'paramount crystals' to thin the candy melts.
It is much easier to draw on it with edible food ink when it is dry.
Of course, with the candy melt coated RKTs I waited until the candy melts were hard set before I drew on them.