
Variations: Vanilla Pecan Logs; Cherry Pecan Logs; Lemon Pecan Logs; Mint Pecan Logs; Orange Pecan Logs; Raspberry / Strawberry Pecan Logs
Logs and photo by msbreez, Premium Member © Sarah Phillips
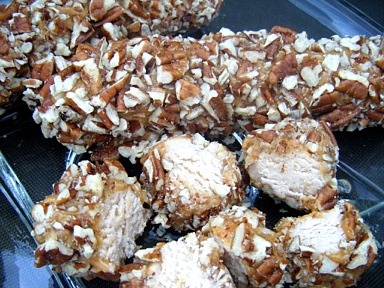
Combine a creamy caramel fondant center with a delightful caramel and roll it in chopped pecans for a special classic Stuckey's treat. Stuckey's – the gift shop/diner/gas station with the blue roof – originated in the early 1930s in Eastman, Georgia. When founder W. S. Stuckey, Sr., had a successful pecan harvest from his family's orchard he decided to offer a portion of the crop for sale in a lean-to roadside shed. Many Florida-bound tourists traveling the Georgia 23 highway stopped to purchase the pecans.
As the roadside business continued to expand, Stuckey's wife, Ethel, created a variety of homemade pecan candies to sell at the stand, including pecan log rolls and pecan divinity. They were made with a creamy white fondant center with just a hint of caramel flavor. They were dipped in caramel and then covered in the finest pecans available in the confectionery industry. A candy factory was constructed in Georgia to supply an eventual 350-plus Stuckey's stores located throughout the continental United States. As the post-war baby boom took off and families began to travel across the country by car more often, Stuckey's continued to grow financially as they were almost always constructed along large highways and usually were paired with Texaco gas stations as well as restaurants and clean restrooms. I remember Stuckey's and their famous Pecan Logs well!
CANDY RECIPE HELP
MSBREEZ, Premium Member, Says: “I tried the recipe here and it's nearly perfect!!!”
INGREDIENTS
Caramel Cream Fondant
1 cup whipping cream
1 1/2 cups milk, divided
1/2 cup light corn syrup
4 cups sugar
1/2 teaspoon salt
1/2 cup Marshmallow Creme, optional; adds a light, fluffy texture
1 tablespoon vanilla extract; for more about flavoring and tinting, go to *Notes, below
Caramel**
2 cups heavy cream (divided into 1 1/2-cups and 1/2-cup), room temperature; can use half-and-half, but do NOT use milk
1 1/2 cups dark or light corn syrup
2 cups sugar
1/2 cup (1 stick) unsalted butter, softened
2 teaspoons vanilla extract
1-1 1/2 pounds chopped and toasted pecans; chop, measure and then, toast; can substitute with chopped salted peanuts
**CARAMEL VARIATION
NOTE: The homemade caramel recipe may be eliminated by using:
14 oz bag of commercial caramels
2 tablespoons milk or more, if needed
Instead of following the instructions to make caramel:
Cut caramels into four pieces. Cut each fourth into smaller pieces, place 1/2 the caramel in top of double boiler, add 2 tablespoons milk. Place on medium-low heat, stirring occasionally, heat until caramels are melted. Add 1-2 tablespoons additional milk, if needed, to make melted caramel consistency for dipping (do not over thin).
INSTRUCTIONS
Cream Fondant:
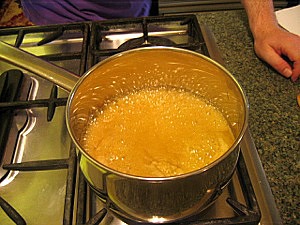
1. Combine the cream, 1 cup milk, corn syrup, sugar and salt in a 4-quart heavy-bottomed sauce pan. Bring to a boil over medium heat, stirring occasionally to dissolve the sugar. As the syrup approaches the boil, wipe the inside of the pan with a clean pastry brush dipped in cold water.
2. At the boiling point the syrup may foam up because of slight impurities in the sugar. Skim off any foam that remains on the surface of the syrup, then cover the pan and allow the syrup to boil for a minute or two. This step accumulates steam inside the pot which helps to wash down any crystals that might remain on the inside surface of the pan.
3. Clip on a CLEAN Candy Thermometer. Stirring occasionally, cook over low heat until the mixture turns a medium-tan color, about 30 minutes. Stirring constantly, slowly pour in the remaining 1/2 cup milk, and increase the heat to medium. Continue to cook the mixture, uncovered and WITHOUT STIRRING, to the soft-ball stage, 238-240 degrees F.
Remove the pan from the heat, and without stirring or scraping, immediately pour the hot syrup onto a marble slab or a buttered large baking pan with low sides. Do not scrape the excess candy from the pan.
4. Allow the syrup to cool undisturbed until it is lukewarm. This may take anywhere from five to ten minutes. (At this temperature you will be able to touch the syrup with your fingertip and comfortably leave it there. Note that the actual temperature of the syrup at this point is not that critical. It just should not be scalding hot, nor should it be room temperature. Were you to gather the syrup up and measure the temperature – which is not necessary – it would measure approximately 110°F.)
5. Using a stainless steel bench scraper work the syrup in a back-and-forth motion, scraping it up from the surface and folding it over itself. After 15 minutes of stirring, fold in the marshmallow creme, if using. Then, place vanilla and/or gel food coloring (*See Notes) on fondant candy and knead in before the fondant sets-up. Eventually the syrup will turn white and begin to stiffen into fondant. When the fondant is stiff and holds together almost like a dough, it is done.
6. Divide fondant into 8 pieces and shape each piece into a log approximately 3-4 inches long. Wrap in plastic wrap or wax paper, set aside to 'ripen' at room temperature for 24 hours – this ensures that it loses any slightly crumbly texture that the newly made fondant might have.
Fondant Storage:
Wrap fondant in plastic wrap and then place in an airtight container. It can be stored in the refrigerator for several weeks or frozen for several months. zAllow it to warm to room temperature before using.
*NOTES: FLAVORINGS AND TINTING TO ONE BATCH
Add scraping the fondant, in Step #5.
Vanilla: 1 teaspoon vanilla
Cherry: 1 teaspoon almond extract and 1/2 teaspoon rum extract, a small amount of red gel food coloring
Lemon: 1 teaspoon lemon extract and 1/2 teaspoon vanilla extract, a small amount of yellow gel food coloring
Mint: A few drops peppermint extract, , a small amount of green gel food coloring
Orange: 1 teaspoon orange extract and 1/2 teaspoon vanilla extract, a small amount of orange gel food coloring
Raspberry / Strawberry: 1 teaspoon strawberry or raspberry extract and 1/2 teaspoon vanilla extract, a small amount of red or pink gel food coloring
ADDING FLAVORING AND COLORING TO SEVERAL BATCHES
After the fondant has set up in Step #5, divide it into the number of colors you wish to tint. Roll the individual pieces into balls. Press your thumb in the middle mof each portion, and pour desired coloring and flavor into each hole. Knead until well-mixed. If the fondant becomes sticky, dust your hands and/or the work surface with a light coating of cornstarch and continue kneading. Do not use powdered sugar as it makes this type of fondant sticky.
SARAH SAYS: If you do not have a marble slab, you can use a 9- x 13-inch GREASED baking pan, stirring the fondant with a wooden spoon. Stir until the fondant becomes very stiff and loses its gloss. At this point it has set up.
If the fondant is too stiff, break off small pieces and knead with your hands. Or, wrap in plastic wrap and place under a warm towel for 15 minutes.
If the fondant does not set-up after stirring for an hour, it is undercooked.
Fondant can be recooked. In a heavy bottomed saucepan, combine 1 1/2 cups water with the cooked candy. Place over low heat and stir with a wooden spoon until well-blended. Increase the heat and bring to a boil. Wash down the sides of the pan with a wet pastry brush. Clip on a Candy Thermometer and cook to the appropriate temperature. The candy may have a darker color.
Sarah's Caramel Tutorial:
1. Butter a shallow baking pan. Set aside.
Place chopped pecans on a sheet of wax paper. Set aside.
Place another sheet of wax paper on a cookie sheet and lightly spray wax paper with nonstick spray. Set aside.
2. Combine the caramel ingredients in a certain order:
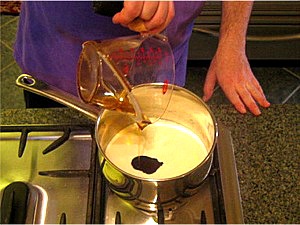
In a saucepan, combine 1 1/2-cups heavy cream and corn syrup.
SARAH SAYS: Making caramel starts with a clean and dry saucepan to prevent unwanted crystallization ruining the whole batch.
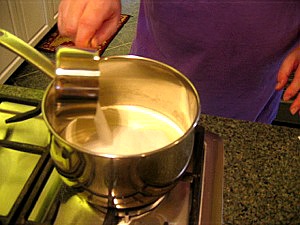
B. Add the sugar in a steady stream aiming for the center of the pan. Make sure you don't get sugar on the side of the pan. Use a heatproof pastry brush dipped in cold water to get rid of unwanted crystals on the side of the pan.
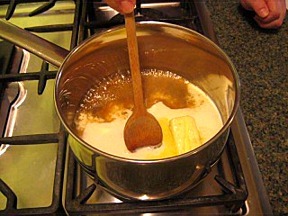
C. Add the butter on top of the sugar.

SARAH SAYS: I add the liquid ingredients first and then the sugar; the opposite of what most candy makers suggest. The traditional way leaves some sugar dry spots in the bottom of the pan causing them to burn even though traditional instructions have you draw an “x” in the sugar to moisten it slightly or to stir the two together. Stirring often causes sugar grains to cling to the inside of the pan. If they aren't washed off with a moistened pastry brush before boiling, the loose grains will cause the syrup to crystallize. My way is more convenient. That is, if done carefully (i.e., adding the liquid first followed by sugar), you can skip the initial wiping with the pastry brush.
D. Heat the sugar mixture to make caramel:
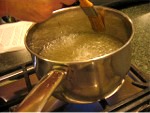
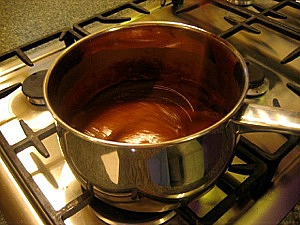
Place the pot over medium heat and bring to a boil. (If you are using a gas range, take care that the flames do not rise up the sides of the pot, which would cause the mixture to burn.) Push the sugar DOWN under the cream with a wooden spoon WITHOUT stirring the mixture.
SARAH SAYS: Never stir your candy after the sugar crystals are completely dissolved in the water and when it has started boiling – this will incite the formation of big crystals that will make your candy grainy when it cools. Candy mixtures should boil, not simmer, at a moderate, steady rate over their entire surface.
E. Allow mixture to start boiling undisturbed. DO NOT STIR THE MIXTURE.
SARAH SAYS: To prevent unwanted crystallization, frequently wash down the side of the pan. Use a heatproof pastry brush dipped in cold water to get rid of unwanted crystals on the side of the pan to where the boiling mixture starts.
F. Insert a Candy Thermometer when the mixture just starts to boil. DO NOT STIR THE MIXTURE. Watch the sugar solution carefully and read the thermometer frequently until the temperature registers 248 degrees F (firm ball stage), about 20 minutes.
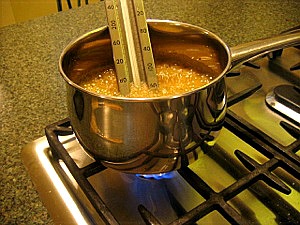
SARAH SAYS: Read the Candy Thermometer at eye level for accuracy. DO NOT remove it from the pan until your recipe is done cooking.
3. Finish the caramel mixture:
A. Remove the caramel mixture from the heat and at arms length blend in the remaining 1/2 cup cream and vanilla extract. (Be careful – the mixture will bubble up and splatter a bit, then subside.)
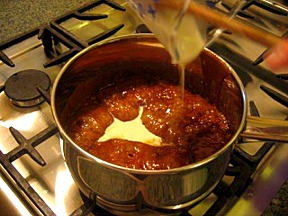
B. Stir until the caramel mixture is a uniform consistency, taking care not to scrape any burned bits that might be clinging to the bottom of the pot. Let the caramel mixture cool slightly before dipping the apples. Its consistency should be a bit thinner than honey!
C. REMOVE THE POT IMMEDIATELY FROM THE HEAT.
4. Immediately pour the caramel into shallow buttered pan. Allow to cool, but not set.
Dip Fondant Logs:
1. Using a fork, dip fondant logs in warm caramel, then place log on chopped nuts. Use the edges of the wax paper to help, roll the log in chopped nuts until well coated. Place log on prepared wax paper lined cookie sheet.
2. Refrigerate logs to harden.
LOG STORAGE
Wrap cooled logs in wax paper and store in cool place until ready to slice and enjoy.
SARAH SAYS: You can also refrigerate the Pecan Logs until the caramel is firm, about 1/2 to an hour. DO NOT store them in the refrigerator!
CARAMEL NOTES
QUESTION: My Pecan Log stuck to the wax paper. How do I get it off without ruining the smooth caramel?
SARAH SAYS: Dampen your hands lightly. Try and lift the log from the waxed paper. Quickly, with your dampened hands, work the caramel into shape over the bottom of the log, covering any thin spots. You can also cover any spots with drizzled caramel. If the pooled caramel at the bottom of the log bothers you, you can also use damped fingers to reshape the bottom.
QUESTION: Is there any other way I can decorate my caramel covered logs?
SARAH SAYS: After the caramel has completely set and cooled, you can cover the logs with drizzled chocolate. Melt 6-ounces semi-sweet and 6-ounces white chocolate chips, separately in top of double boiler above gently simmering water; remove from heat when almost melted and stir until smooth.
Dip tines of fork in chocolate and drizzle thin, random strips of chocolate over each log. Repeat melting and drizzling with semi-sweet and white chocolate. Sprinkle chocolate with chopped nuts or candy. Place wax paper covered pan and let set about 1 hour.
If you wish to dip the logs in real chocolate, I recommend tempering about 1 pound semi-sweet chocolate so it hardens properly. Let the caramel set first. Dip in tempered chocolate twice; let set between dippings. Let chocolate semi-set and then optionally coat in chopped and toasted nuts before the chocolate sets. After enrobing in chocolate, chill in the refrigerator for about 1/2 hour and then let set at room temperature.
QUESTION: I made a batch of caramel for my logs and the whole thing crystallized. Is there any way to save it?
SARAH SAYS: Once the crystals are there, even if you reheat it the batch is “seeded” so to speak and once it resets it will be grainy. Unfortunately there's nothing you can do.
QUESTION: I dipped my log in the caramel and it immediately slid off. What happened?
SARAH SAYS: The temperature of the coating has a bearing on how well it clings. Melted caramel that is too thick will just slide off. Warm it slightly over low heat. Be careful not to make it so hot that it simmers or boils because it burns easily.
If that doesn't help, you may need to stir in a 1/2 teaspoon or so of water (not cream) at a time and then warm it while stirring. Be careful that you don’t add too much liquid. If you do, the coating will be too thin, and will remain soft at room temperature, making the log difficult to handle and eat.
SARAH SAYS: The reason you should thin your caramel with water and not cream is there's a possibility that it could separate if the mixture is close to being saturated with fat. Water is just safer in that regard, and serves the same purpose.
QUESTION: My caramel coating seems too thin. How can I fix it?
SARAH SAYS: If the coating is too thin, allow the mixture to cool slightly before continuing. Stirring helps cool the mixture faster.
QUESTION: Any tips on doubling or tripling the recipe?
SARAH SAYS: You can double or triple the recipe. The difficulty in dealing with larger quantities is that it'll take longer to cook and cool. Make sure you use a VERY deep and large pot and be very careful. Hot caramel is VERY dangerous and larger quantities are more so, especially when adding large quantities of cream and the mixture bubbles up and steam forms.
QUESTION: After the caramel has cooled in the pot can I reheat it again?
SARAH SAYS: Yes, you can reheat the caramel. Just make sure it doesn't burn. Reheat it in the top of a double boiler.
GIFTS
When I give them as gifts, I gather the ends of cellophane (not plastic) at either end of the log and tie with a pretty ribbon.
SERVE
To serve, slice with a large, sharp, straight-edged knife.