

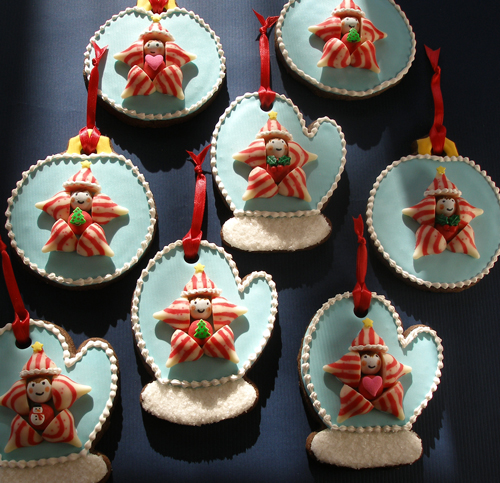
These chocolate holiday sugar cookies feature Hershey's Special Dark Cocoa, Hershey's Candy Cane Kisses, and Cadbury Holiday Solid Milk Chocolates. They are so charming, and make perfect holiday gifts for friends and family. Plus, they are delicious! The Creative Cut-Out Chocolate Sugar Cookies I use bakes flat and barely spreads, making it a perfect recipe to use for these special cookies. Learn how to make them below, with plenty of step-by-step photos and Sarah's Secrets for success!
COOKIE RECIPE HELP
INGREDIENTS
You will need:
1 recipe Creative Cut-Out Chocolate Sugar Cookies, below
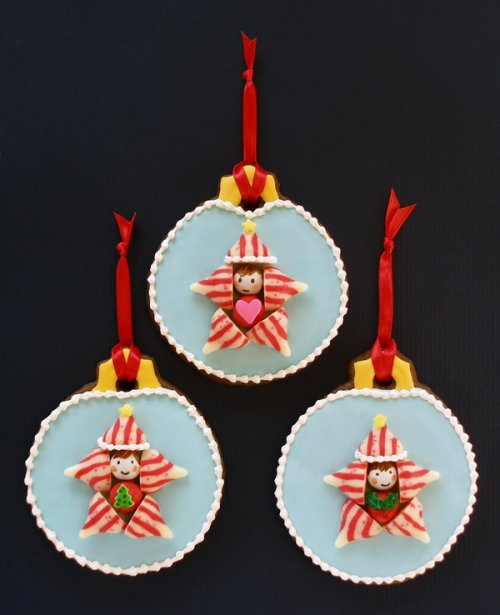
One 4-inch high Ornament cookie cutter.
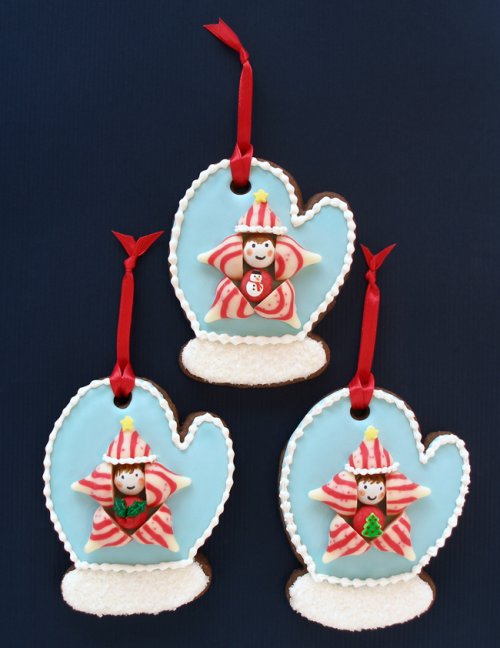
One 4-inch high Mitten cookie cutter
1 recipe Royal Icing
Gel paste food coloring, royal blue, egg yellow
1 cup large sanding sugar or white nonpareil sprinkles
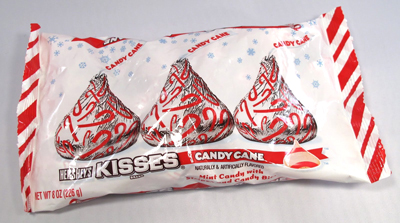
1 bag Hershey's Candy Cane Kisses or any Hershey's Kisses flavor
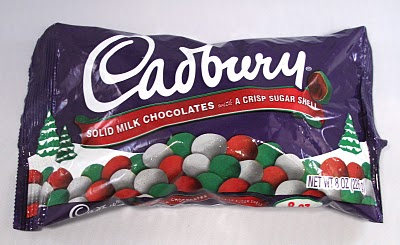
1 bag Cadbury Holiday Solid Milk Chocolates or any similar chocolate candies preferably in holiday colors
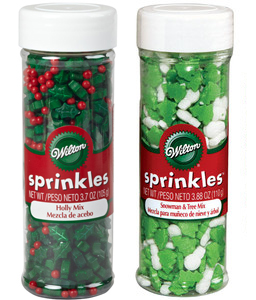
Various large holiday sprinkles:
I used Wilton Holly Mix and Snowmen and Tree Mix.
Small star sprinkles – For the fairy hats
Food safe color markers in black, brown and pink
Disposable piping bags
Small plain piping tips, such as Wilton #2
Small shell piping tip, such as Ateco #13
Microplane grater
tweezers
STEP I: BAKE THE CREATIVE CUT-OUT SUGAR COOKIES
These can be baked in advance, and stored at room temperature, well-wrapped, for a few days before decorating. They can be frozen for a month or more. Thaw in their wrappers at room temperature. Alternatively, you can use Sarah's Creative Cut-Out (Vanilla) Sugar Cookie Recipe.
CREATIVE CUT-OUT CHOCOLATE SUGAR COOKIES / Recipe alone
Creative sugar cookies are buttery, crispy, flavorful and beautiful when decorated with a royal icing, fondant glaze or Marshmallow Fondant. They have little baking powder so they bake with flat, smooth surfaces, perfect for decorating on. The cookies start out on the crispy side—necessary when covering with a royal icing glaze made with egg white powder; the water and sugar in the glaze provides and attracts moisture so they soften slightly when the glaze is applied, making them the perfect eating consistency when decorated. Cookies glazed with royal icing made with meringue powder dry harder.
VIDEO: TIPS ON WORKING WITH COCOA POWDER AND CHOCOLATE
INGREDIENTS
2 cups unbleached all-purpose flour; spoon into measuring cup and level to rim
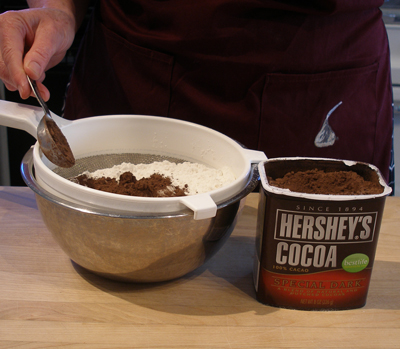
2 tablespoons cocoa powder, Dutch-processed (alkalized) or Natural; use Dutch-processed for best results NOTE: Hershey's Special Dark Cocoa Powder is the way to go! (Hershey's Special Dark has dutched-process cocoa powder in it. Do not use regular Hershey's cocoa powder.)
1/2 teaspoon baking powder
1/2 teaspoon salt
1 1/4 sticks (10 tablespoons) unsalted butter, cold from the refrigerator
1 cup sugar
1 large egg, cold from the refrigerator
1 teaspoon vanilla extract
INSTRUCTIONS
1. Position two oven racks: one of them 1/3 of the way from the bottom and the top rack 1/3 of the way from the top of the oven. Preheat the oven to 350 degrees F.
You’ll need at least two (preferably four) UNGREASED non insulated cookie sheets or sheet pans. You can also cover them with parchment paper (not waxed), if desired.
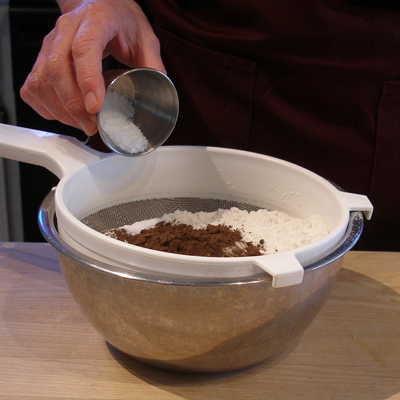
2. Into a medium bowl sift together the measured flour, cocoa powder, baking powder and salt. Set aside.
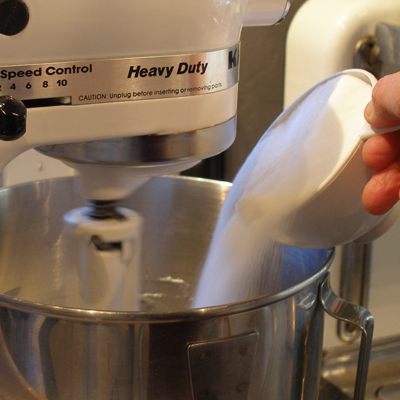
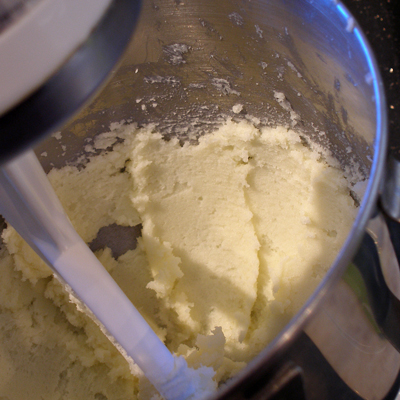
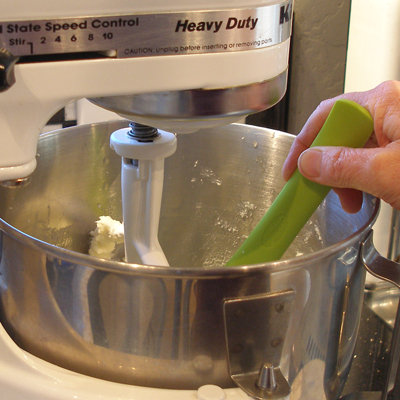
3. In a stand mixer fitted with a paddle attachment, beat the butter on low speed until softened. Add the granulated sugar, slowly at the side of the bowl. Increase the mixer speed to medium and beat for 45 seconds until lightened in color and creamy (not fluffy). Stop the mixer and scrape the bowl.

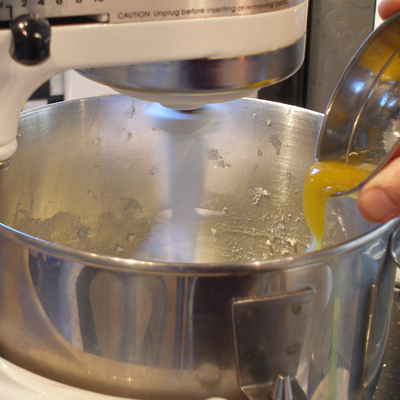
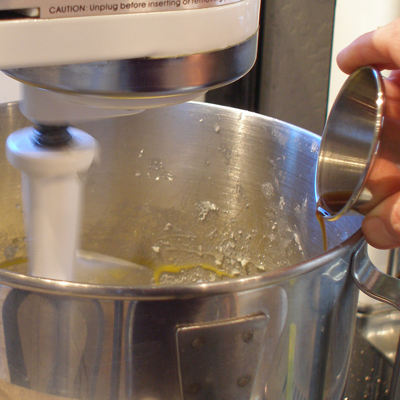
4. Add the egg and vanilla extract and beat on low until incorporated.
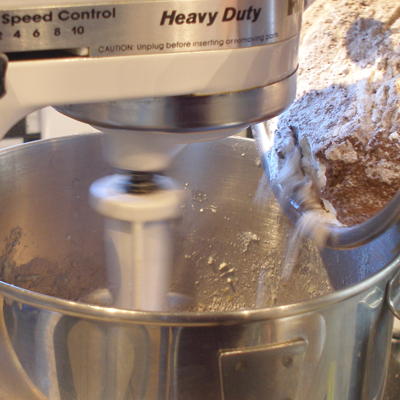
4. With the mixer on low, add the flour mixture slowly at the side of the bowl and mix until the mixture forms a STIFF dough; do not over mix. The dough will be stiff, but not dry. The dough should not be sticky, either. If it is, you need to add more flour, a teaspoon or two, and pulse the mixer to combine before deciding to add more. Do not overdo it because during the chilling step, the dough will firm up.
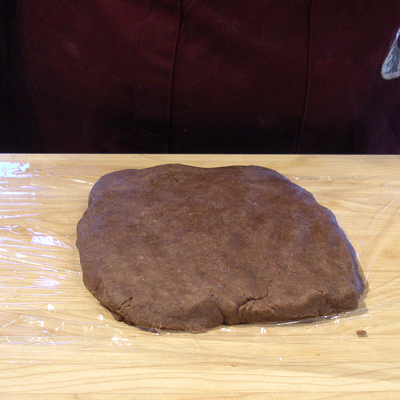
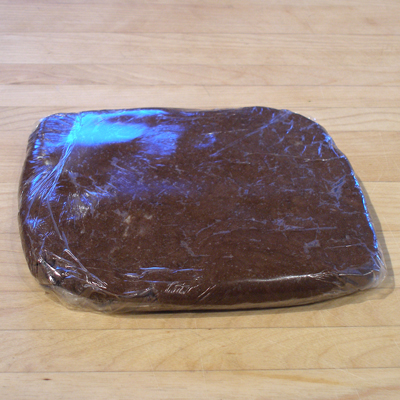
5. Pat the dough into a large, 1-inch thick rectangle and wrap it in plastic wrap. Refrigerate the dough, 20 minutes to an hour until well-chilled. This is so the dough will be cold throughout and easier to handle.
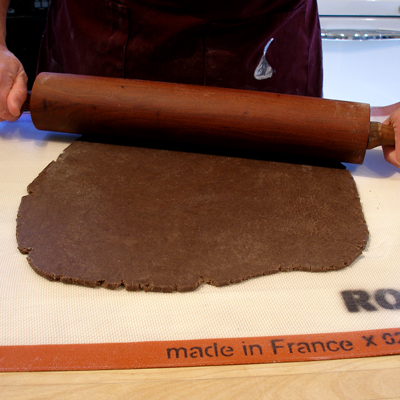
6. When chilled, roll out a small portion of the dough to about 1/8- to 1/4-inch thick, on a non-floured surface. Keep the unused dough covered in the refrigerator.
SARAH SAYS: Rolling dough in flour is the main culprit in producing hard, dry cookies.
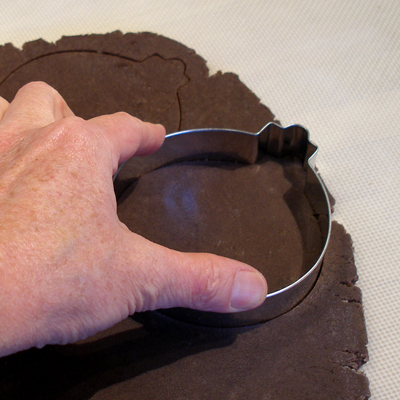
7. Cut cookies from the rolled out dough with cookie cutters. Start from one edge, cutting the cookies close together. Line up the cutter and cut, pressing down firmly to make a clean one. Lift the cutouts with a bench scraper or metal spatula to the cookie sheet and place about 1/2-inch apart; don’t crowd the baking sheet. This dough spreads about 1/8-inch on all sides.
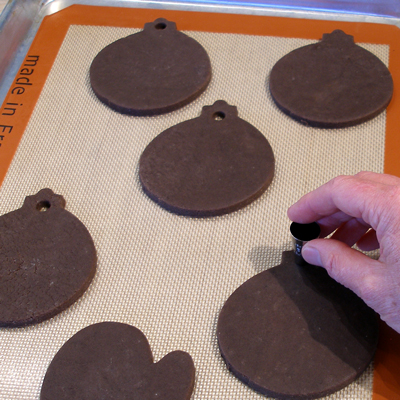
NOTE: If making ornament cookies, use a drinking straw or a large plain piping tip to cut the hole. I used a Wilton #12 tip.
NOTE: Don’t place cookie dough on a warm cookie sheet because it will cause the cut-out dough to spread and become misshapen. Use one a fresh cookie sheet or one that has cooled thoroughly from the last batch.
If the cookies easily become misshapen, the dough is too warm. Carefully reshape any cookie, if necessary and chill the cut-out cookies on the baking sheet for about 20 minutes before baking. You can bake them right from the refrigerator.
SARAH SAYS: I roll out a portion of the dough at a time on a piece of parchment paper, needing no flour. I remove the excess dough from around the cookies. Then, I freeze the cookie shapes just where they are on the parchment paper. When hardened, after about 10 to 20 minutes, I can easily then lift the shapes from the paper without distorting them and I then place them on an ungreased cookie sheet or reposition them on a parchment paper lined cookie sheet for baking.
After removing the scraps, quickly gather the scraps and press them together to loosely make a flattened rectangular shape without much handling, and rechill. Repeat rolling and cutting out the shapes one more time.
SARAH SAYS: For the best texture, avoid handling and re-rolling the scraps too many times. Both actions make a tough dough and cookie from excess gluten development.
8. Bake the cookies for 10 to 12 minutes until they just start to take on a light brown color around the edges; do not over bake – the browner the cookies, the harder and more inedible they become. Allow to cool on cookie sheet 1-2 minutes and remove to a wire cake rack to cool. If baked on parchment paper, cookies can be cooled right on its surface; simply slide the paper with the cookies on top to a wire cake rack to cool. Remove cookies when cooled.
Use a cold cookie sheet for the next batch.
STORAGE
The cookie dough can be refrigerated for 2 days before using, or frozen for a month or more. Thaw in the refrigerator before use.
Already baked cookies can be stored at room temperature or frozen. Crisp cookies should be stored in an airtight container. They will keep for about 4 days. Wrap cookies well for the freezer where they will keep for about a month.
STEP II: DECORATE THE COOKIES WITH ROYAL ICING
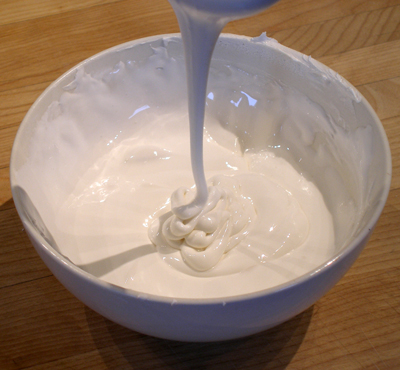
1. Make the royal icing and remove about 1 1/2 cups of the thick royal icing and thin it with water to piping consistency.
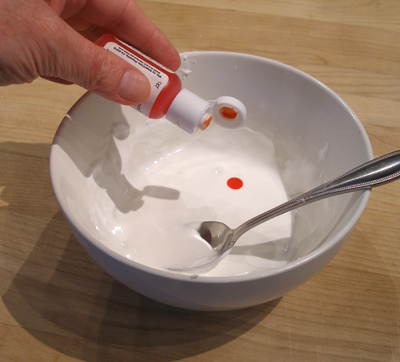
Tint this 1 1/2 cups with royal blue gel paste food coloring.
NOTE: I wanted a nice pale aqua, so I used about 1 1/2 drops of royal blue food color to tint it.
2. Remove about 1/4 cup of the thick royal icing and thin it to piping consistency. I used about 1 drop of egg yellow gel pate food coloring.
You are aiming for a gold-like color.
3. Remove about 1/2 cup of thick royal icing and thin it to piping consistency. Leave this icing as is (white).
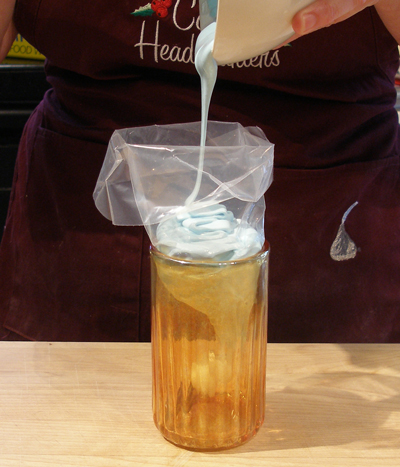
4. Put all three colors(aqua, gold, and white) of royal icing in disposable piping bags, with Wilton #2 plain tips in place.
NOTE: Make sure to tightly cover the bowl, containing the remaining thick royal icing, with plastic wrap, so it doesn't dry out.
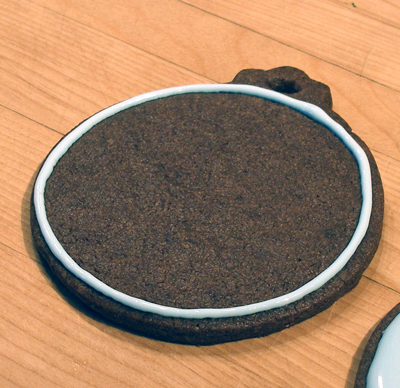
For the Ornament shaped cookies:
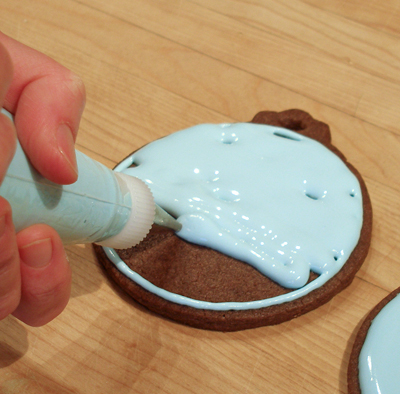
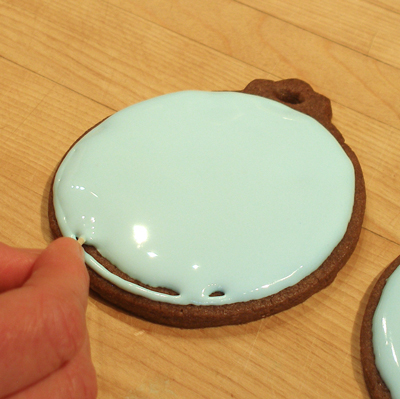
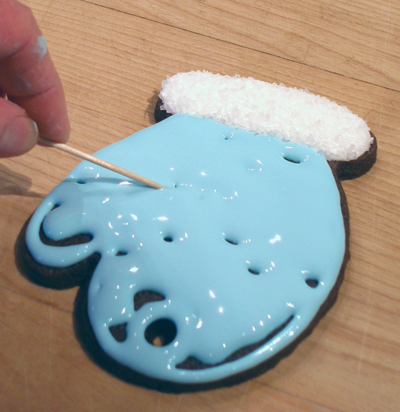
1. Outline the cookie with the aqua color, then immediately fill in. Move the icing around with a toothpick to fill in any gaps. Lightly tap the cookie on your work surface to level the icing.
Do the same with all of the Ornament shaped cookies you have made.
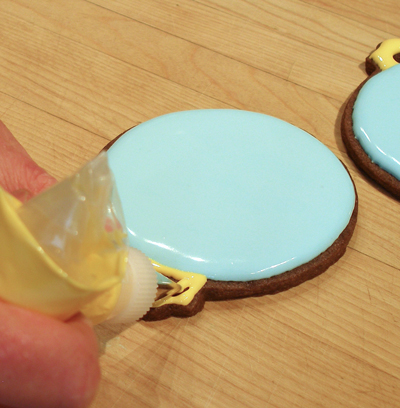
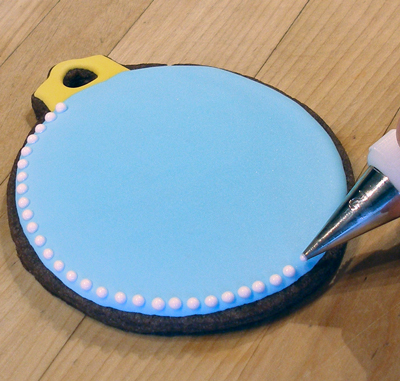
2. When you are done filling in all the ornament cookies, outline and fill in the ornament hanger on all the cookies, using the yellow icing.
3. Set cookies aside to dry.
For the Mitten shaped cookies:
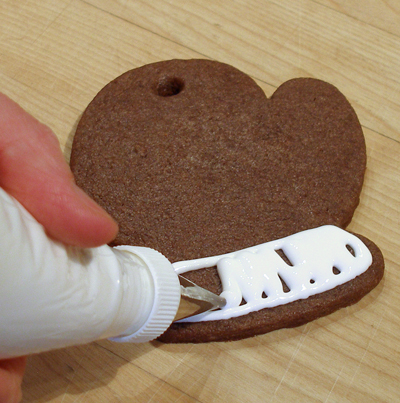
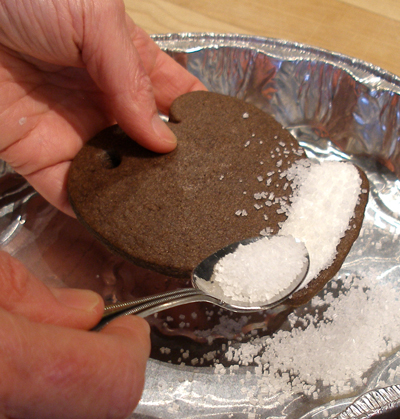
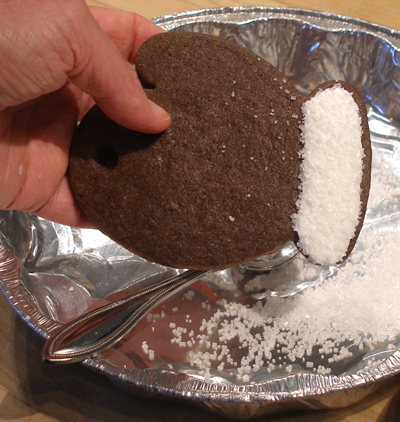
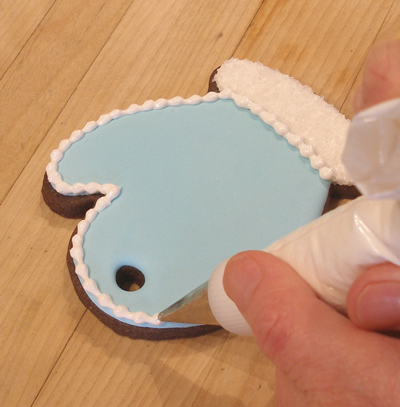
1. Outline the mitten cuff with white icing, then fill it in. Use the toothpick to move the icing to fill in any gaps. LIGHTLY tap the cookie to level the icing.

2. Sprinkle the cuff with large sanding sugar or white nonpareils. Tip the cookie to remove excess sugar/sprinkles.Repeat on the rest of the mitten cookies.
NOTE: It is a good idea to do this over a bowl or pan, so you can reuse the sugar/sprinkles that fall into it.
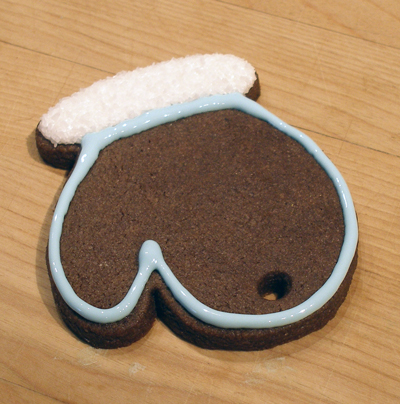
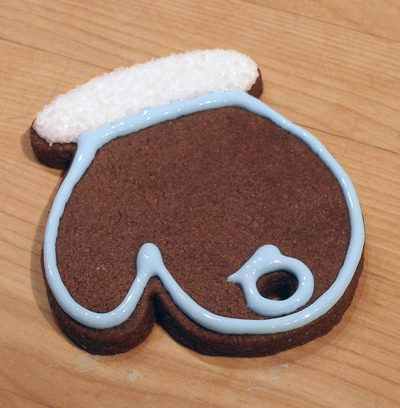
3. When you are done icing all the cuffs, outline the top of the mittens with the aqua color, then outline around the hanging hole.
Immediately fill in the mittens with the icing and use a toothpick to fill in any gaps. Gently tap the cookie to level the icing.
Both cookie shapes:
1. Set the cookies aside to dry for at least 4 hours before you pipe the optional border.
When the icing has set up, put some of the remaining THICK royal icing in a piping bag, with a small shell tip(Ateco #13) , or a small plain tip(Wilton#2).
Pipe a dot(plain tip) or shell border(Ateco #13) around the edge of all the cookies.
2. Set the cookies aside to dry THOROUGHLY before you continue to decorate. It is best to let them dry overnight before finishing them.
3. Meanwhile, prepare the candy decorations, Step III, next.
STEP III: DECORATE THE ROYAL ICED COOKIES WITH CANDY
Prepare the candy decorations:
1. For each cookie, you will need 5 Hershey's Candy Cane Kisses. If you have 12 cookies, you will need 60 of them.
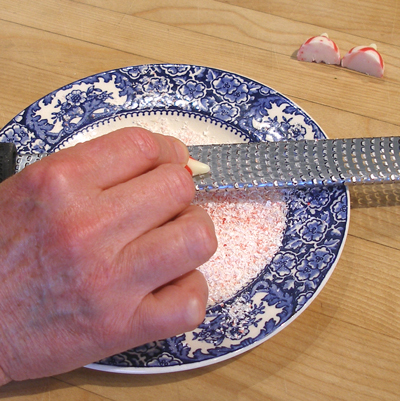
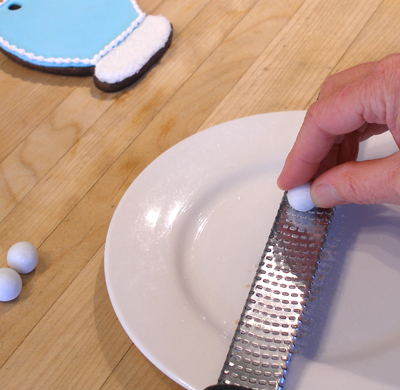
Before they can be used, you have to shave down one side, using the microplane grater, so that they are flat on one side. This should take 3-4 passes on the grater.
NOTE: DO NOT throw away the candy cane kiss shavings! They make great add-ins for cookies, brownies or frosting.
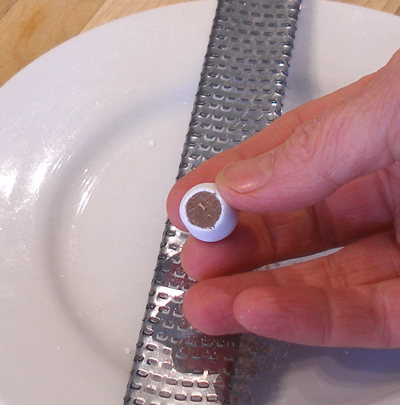
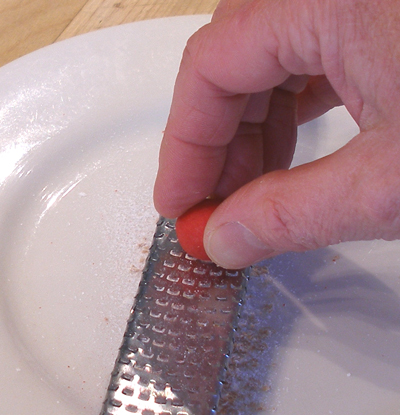
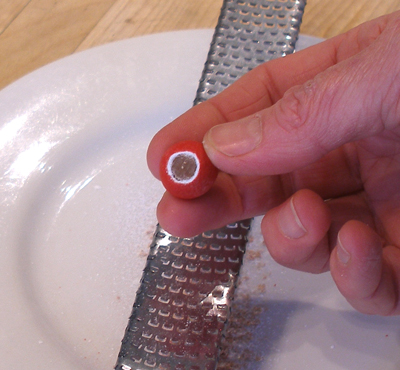
2. For each cookie, you will need 1 head(white), and one body(red). You make these from the Cadbury Holiday Solid Milk Chocolate Candy.
To make them easier to handle, lightly shave down one side, with the microplane, to make them lie flat.
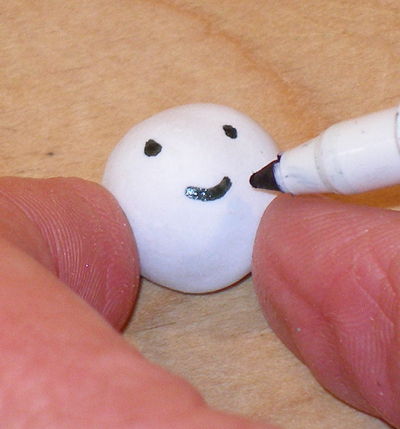
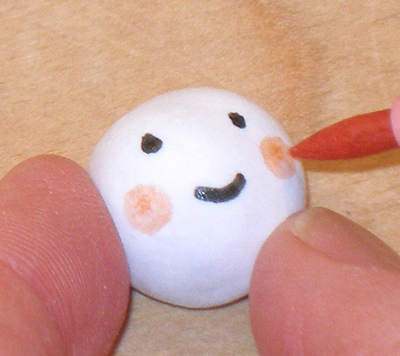
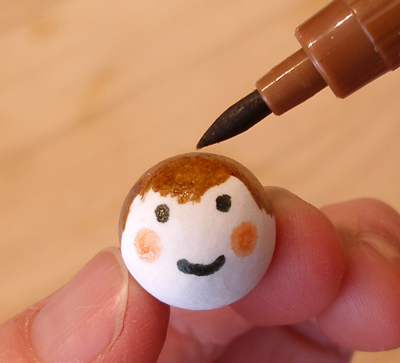
3. Take each white candy, the heads, and use the edible food color marker to draw the face, cheeks and hair.
Set them aside to dry for a few minutes.
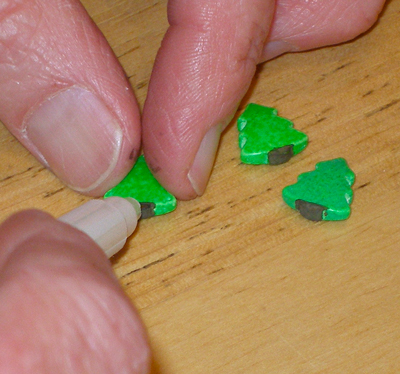
4. The next step is optional..I added details to the sprinkles, using the food color markers, because that's how we roll. 🙂
Assemble the candy on the royal iced cookies:
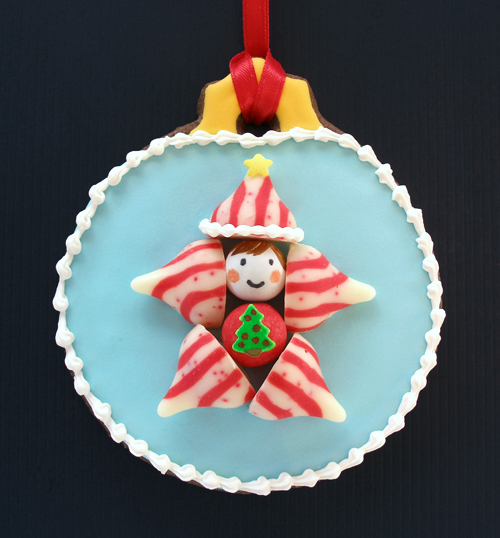
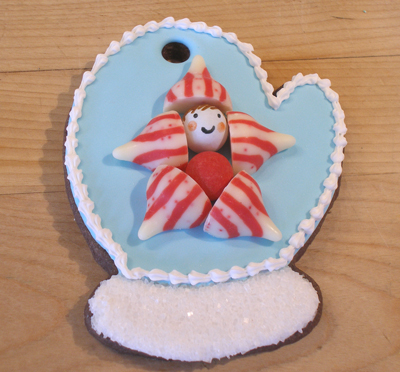
1. Take one head, one body and 5 trimmed Kisses and layout the Candy Cane Fairy on your DRIED royal iced cookie.
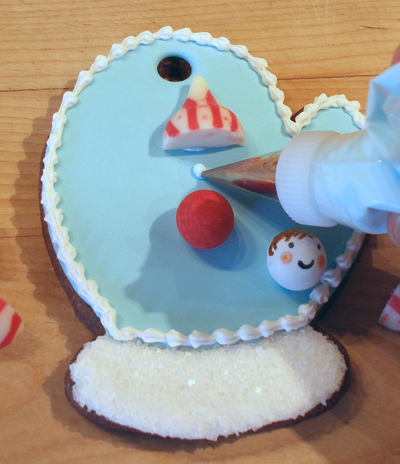
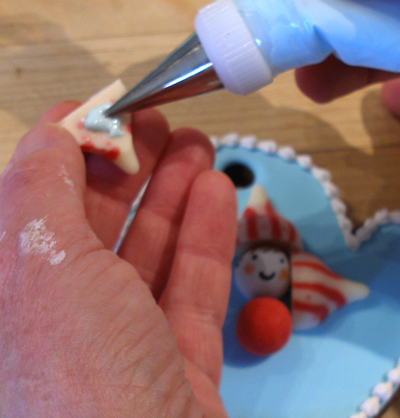
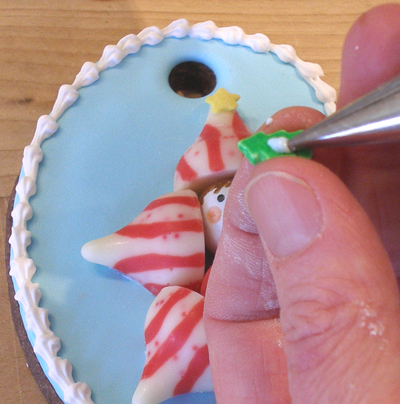
2. Starting with the hat, pipe out a small amount of aqua royal icing and set the hat on it.
3. Pipe a tiny amount of icing right below the hat, then place the head, centered under the hat.
Right under the head, place a small amount of icing and set the body in place.
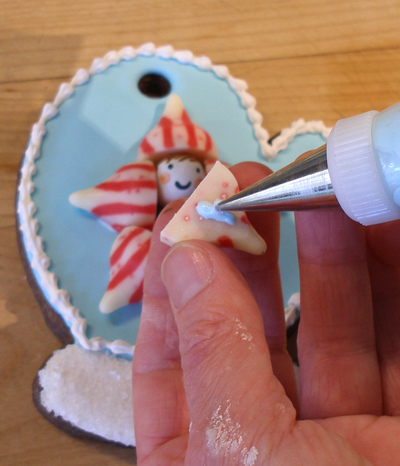
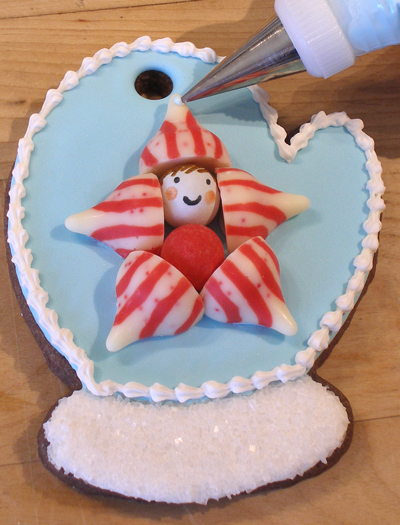
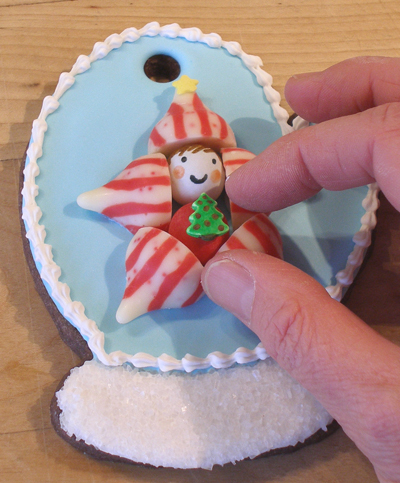
4. Pipe a small amount of icing on each “arm” and set them in place.

5. Do the same thing for the “legs”.
NOTE: Notice that the “legs” overlap slightly.
6. Pipe a tiny dot on the hat and, with tweezers, set a star sprinkle at the tip of the hat.
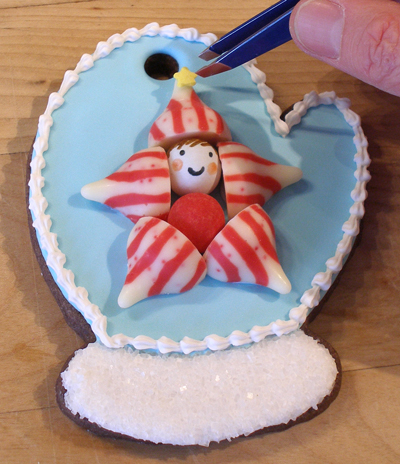
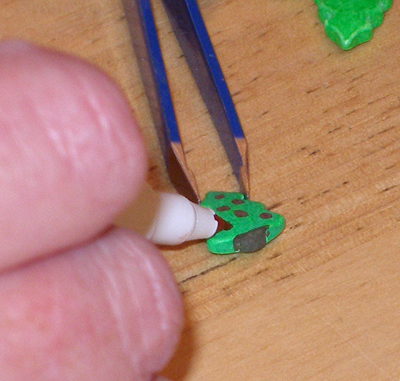
7. Pipe a small dot of icing on the tree, holly or snowman sprinkle and set in in place on the “body” of the fairy.

Optional decorating step:
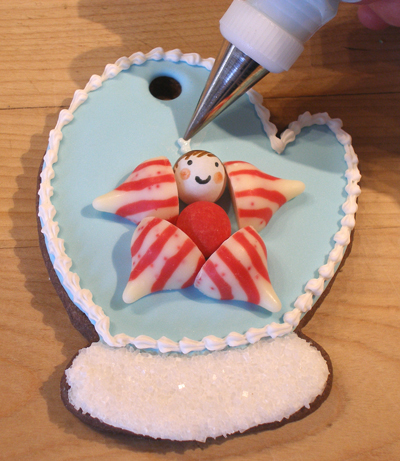
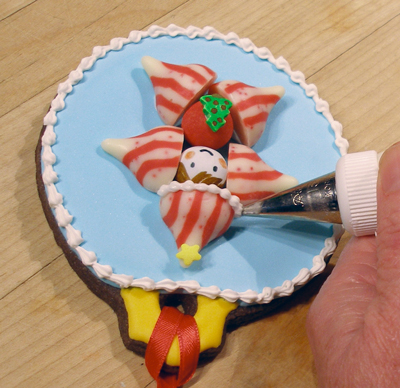
1. Another optional step is piping a shell border on the rim of the fairies' hats.
We have a tendency to go over-board, so feel free to omit this step, but it does look awfully cute! 😉
STORAGE
Store decorated cookies in a cool, dry place where they will last for up to a year. They will remain edible for about 5 to 10 days, though.
Disclaimer: Compensation and Hershey's products for recipe were provided by Hershey’s. The recipe expressed herein are those developed by the authors and are copyright 2012 Sarah Phillips, Inc.