
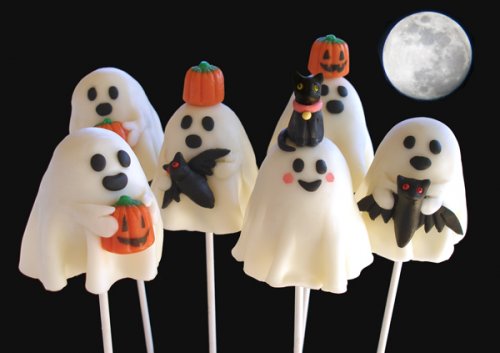

As a spin on cake pops, I thought making decadent brownie pops would be both easy and really yummy (find out the particular brownie recipe I use to make this project a success). These ghosts are the perfect Halloween treat. I cover them with homemade candy “clay”, which is easy to roll out and gives the ghosts a spookily realistic finish. This is such a FUN project and a lot easier than you might think!
COOKIE RECIPE HELP
INGREDIENTS AND SUPPLIES
You will need:
1 recipe Easy Candy Clay, using Wilton WHITE Candy Melts; Make this the day before you make this project, so it has a chance to set up.
1 recipe Chocolate Brownie Cake Bars, below; these could also be made the day before.
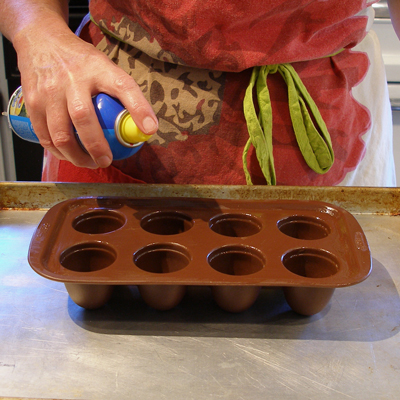
1 Wilton Brownie Pop Pan– NOTE: If you happen to have 2 of these pans, that's ideal! Then you won't have to wait, and you can bake all of the pops at once.
NOTE: Alternatively, you can make 16 Cake Pops (on sticks) in any flavor.
1 1/2 package Wilton White Candy Melts, for dipping
16 paper lollipop sticks
Large and thick Styrofoam block for placing brownie pops in or cake pop stand
5-inch round cookie cutter
Red or yellow medium round sprinkles for bat eyes
1/4 cup black Marshmallow Fondant or MMF or Easy Candy Clay for modeling and facial features
Black edible food marker
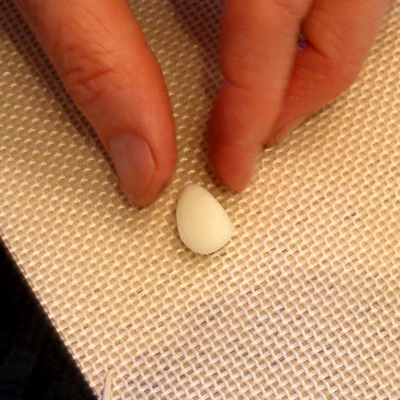
Candy Pumpkins from Brach's “Autumn Candy Mix”
STEP I: MAKE THE CHOCOLATE BROWN CAKE BARS IN THE WILTON BROWNIE POP PAN
CHOCOLATE BROWNIE CAKE BARS / Recipe alone
Makes one 8-inch square pan, 12 bars, or 16 brownie pops
INGREDIENTS
1 cup unbleached all-purpose flour; spoon into measuring cup and level to rim
1/4 cup Dutch-process or Natural cocoa powder
1/4 teaspoon baking powder
1/4 teaspoon salt
1 cup sugar
5 tablespoons (1/3 cup) unsalted butter
2 large eggs
2 teaspoons pure vanilla extract
INSTRUCTIONS
1. Position the oven rack in the middle of the oven and heat to 350 degrees F.
Place Wilton Brownie Pop mold on a baking sheet and spray it with non-stick spray.
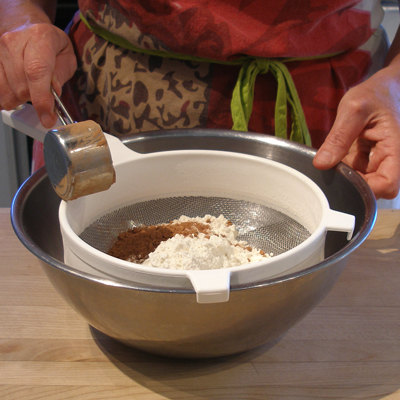
2. In a large bowl, combine flour, cocoa powder, baking powder and salt. If the cocoa powder is lumpy, sift mixture.
SARAH SAYS: I use a fine wire mesh strainer to sift my ingredients.
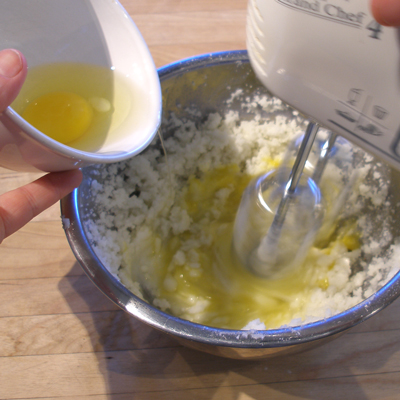
3. Beat the butter until soft with a hand held mixer on low speed.
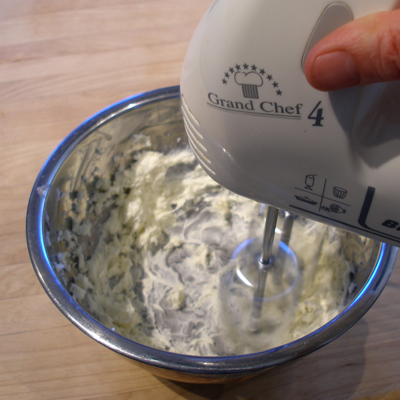
4. Add the sugar in a steady stream.
5. Increase speed to medium and beat for a minute until shaggy.
6. Add the eggs, one at a time and beat for 20 seconds after each addition. Beat until fluffy and aerated.
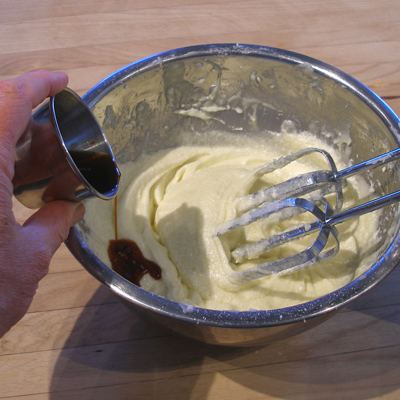
7. Add the vanilla, blending well.
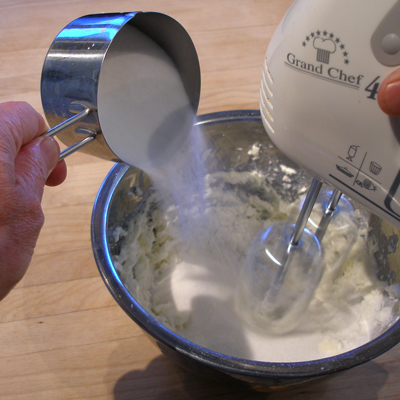
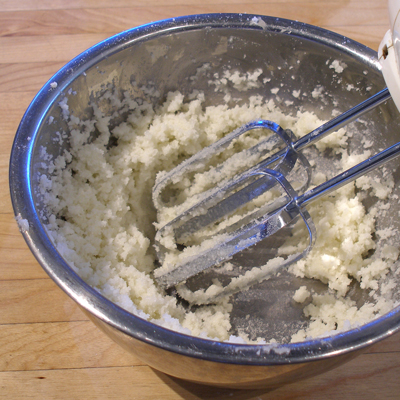
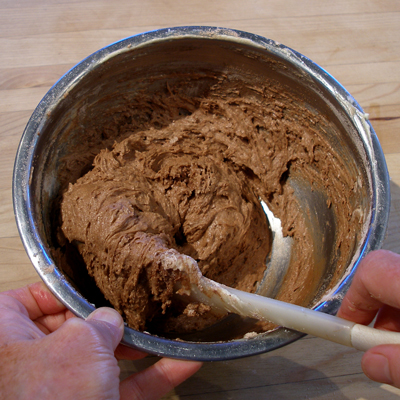
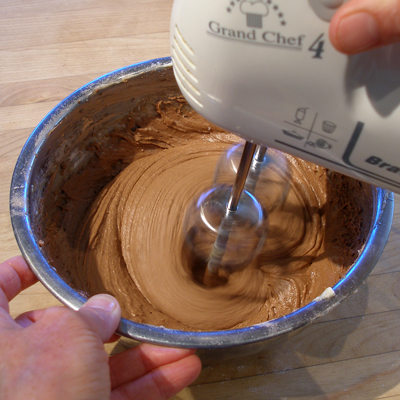
8. Fold in the dry ingredients with a large rubber spatula. Blend 30 seconds with the mixer on low. The batter will be thick.
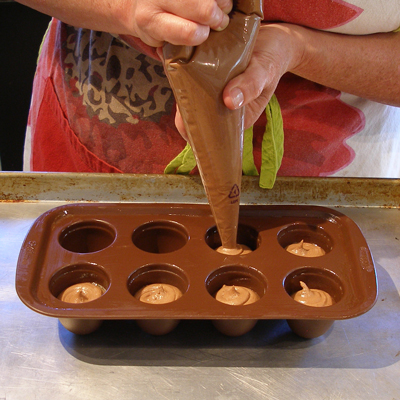
9. Place batter in a large disposable decorating bag.
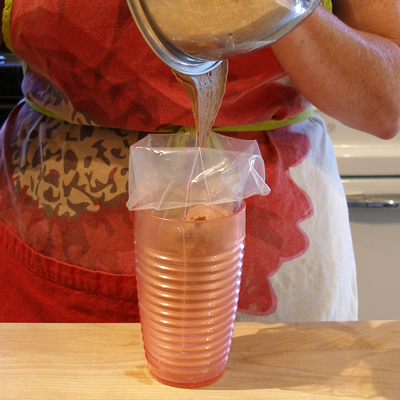
10. Then snip a medium sized hole in the bottom and pipe the batter into the mold.
Fill the molds 2/3s full.
When mold is full, place the remaining batter, in the decorating bag, in the refrigerator.
11. Bake for about 18-21 minutes until a wooden toothpick, inserted in the middle comes out with a few gooey crumbs, but not batter.
They will crack on top.

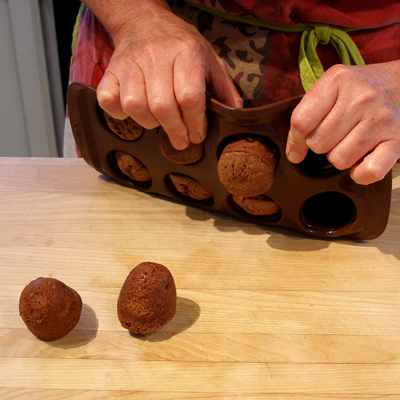
12. Cool the brownie pops in the mold. They must be FULLY cooled so they unmold cleanly.
After 10 minutes, you may pop the mold in the freezer for about ten minutes to help them cool faster.
Some of the brownie pops will be uneven on top. That's OK, we'll trim them up later.
13. When brownie pops are completely cool, push the bottom of each mold gently, and the brownies should pop out.
If you have any trouble, stick the mold in the freezer for ten minutes and try again.
14. Wash and dry the mold, respray with non-stick spray, then fill it again with the remaining batter. You should have just enough for 16 pops.
Bake as directed above.
STORAGE
When all the brownie pops are done, place them in a covered plastic container and freeze them for about 15 minutes. This will make the trimming easier.
STEP II: SECURE THE STICKS AND COAT THE BROWNIE POPS
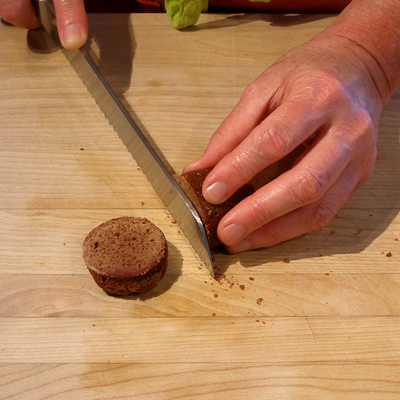
1. Remove the brownie pops from the freezer and with a sharp knife, trim the flat bottoms of the uneven ones so you have a nice even surface.
You want to leave the tops of the brownies rounded.
2. Melt 1/2 a bag of White Wilton Candy Melts in a small heat-proof bowl, in the microwave, according to the directions on the package.
3. Dip the bottom 3/4 inch of a lollipop stick into the melted candy, then push the stick into the center of the flat bottom end of the brownie.
The rounded end will be at the top.
NOTE: Go a little farther than 1/2 way into the brownie, being careful not to go too far..
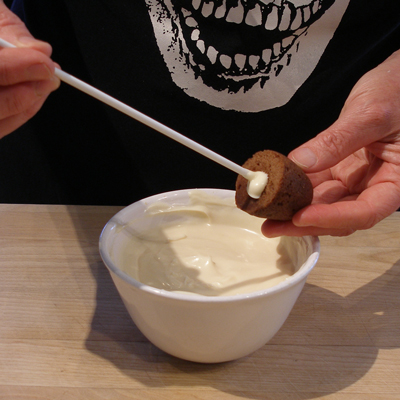
4. Wipe the excess candy from the stick, and spread it on the cut bottom of the brownie. This will help seal in the crumbs, when you go to dip the pops.
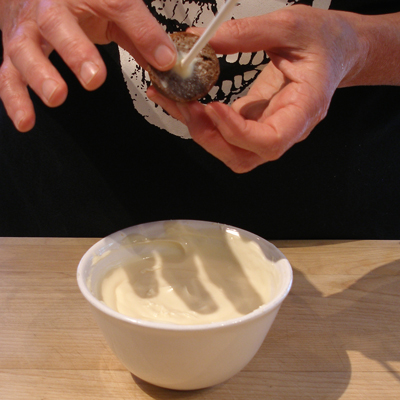
5. Then dip the pop, turning to make sure it is completely coated with melted candy coating.
Gently tap the stick on the bottom of the bowl to remove the excess. Wipe the excess off the stick with your finger, then place the stick into a cake pop stand, or a sheet of Styrofoam until the candy coating is set.

NOTE: As your melted coating runs out, refill your bowl with more melted candy melts.
Repeat above steps with all the pops. When they are all coated, you can place them in the refrigerator to hasten the setting process.
STEP III: DECORATE YOUR BROWNIE POPS
When the candy coating is completely set, you can start decorating the pops.
Drape the white ghostly body:
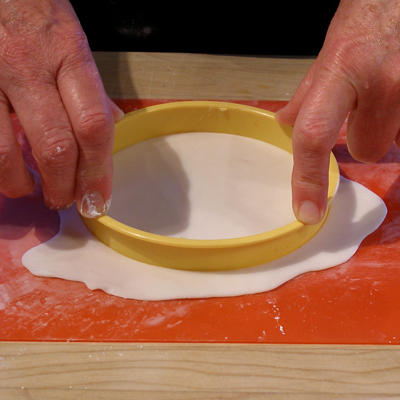
1. Knead the Easy Candy Clay Recipe until it is soft and pliable.
2. Working with one brownie pop at a time, roll out a small piece of candy clay on a silicone baking sheet that is lightly dusted with cornstarch.
Roll it out very thinly, so it will drape nicely and look like a “real” ghost.
3. Cut a circle from the rolled-out candy clay portion using a 5-inch round cookie cutter.
4. Brush a thin coating of melted candy coating on the top and sides of the brownie pop.
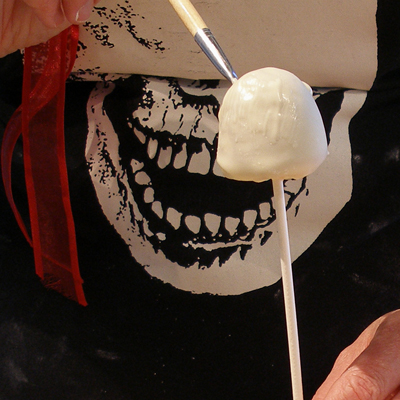
5. Pick up the cut-out candy clay circle, and drape it over the brownie pop.
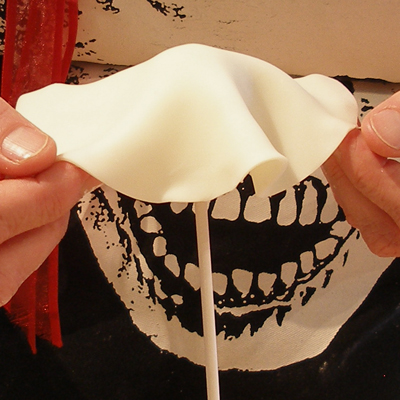
6. Using your hands, smooth the candy clay over the brownie's rounded top, and pleat it softly as it hangs at the bottom.
It will begin to look ghost-like!
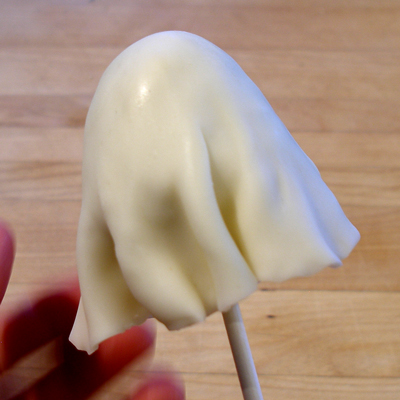
7. Set candy clay draped brownie pop into a cake pop stand or Styrofoam and repeat with the rest of the pops.
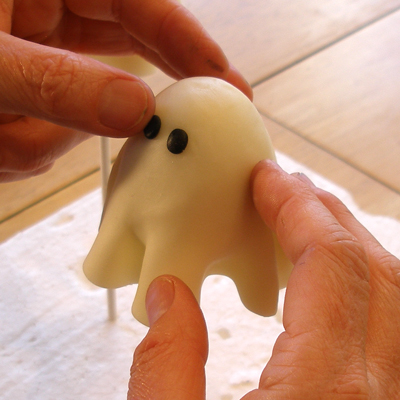
Make the facial features:
You can make ghost's facial features from black Marshmallow Fondant or MMF or Candy Clay, or by drawing it on directly with a black Edible Food Marker.
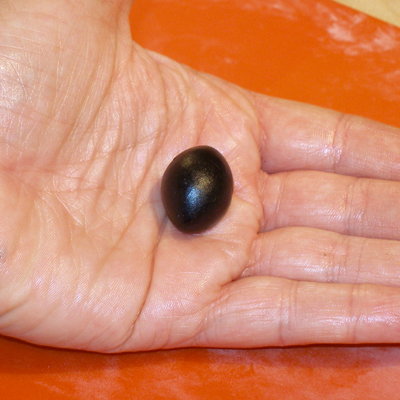
1. To make the facial features on the ghosts with MMF or candy clay, make 3 balls; two of them, which will be the eyes, should be smaller than the one that will be the mouth.
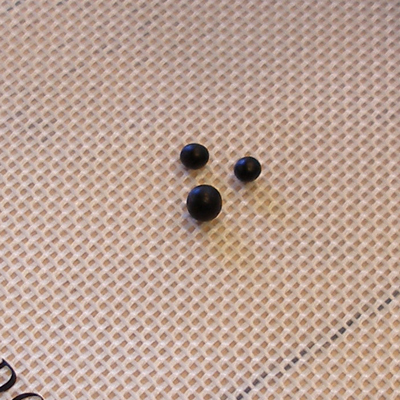
2. Use your finger to flatten the balls. You may adjust the shapes into ovals, or whatever shape you want, by manipulating the shape with your fingers.

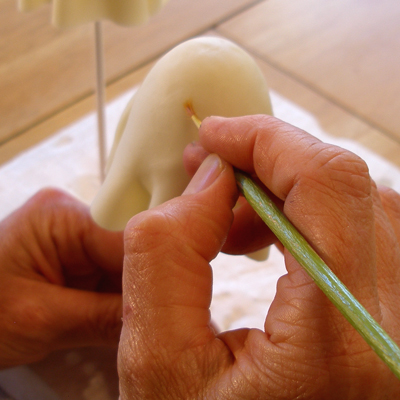
3. Paint a small dab of water where you want to place the eyes, and gently press the eyes into place. Do the same for the mouth.
Repeat with the rest of the pops.
Decorating the brownie pops! Now, this is where it gets REALLY fun! And, there are several options.
JACK-O-LANTERN GHOSTS
If you want to keep things simple, you can decorate all of your ghosts with the candy pumpkins.
You can place them on top of the ghost's heads, or make candy clay hands, so they can hold the pumpkins in front of them, or make a Bat Friend Ghost.
Use your imagination, and have fun with the process.
If you find some interesting Halloween sprinkle shapes at the craft store, perhaps you can make them into a necklace or crown for your ghosts.
The most important thing is to just HAVE FUN! You can get your kids involved too!
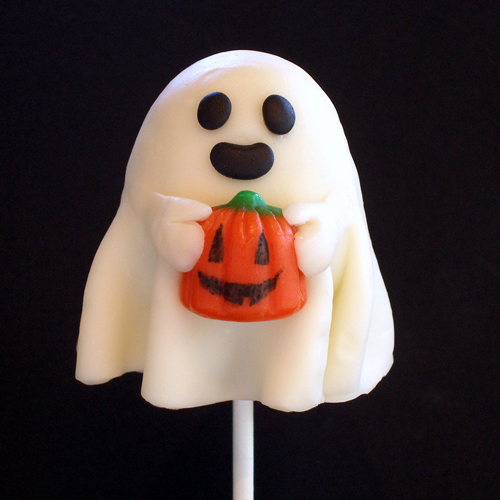
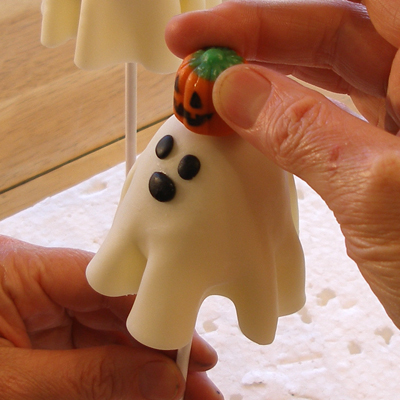
Place pumpkin on top of ghost's heads:
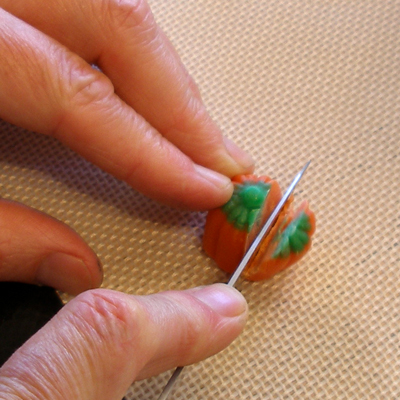
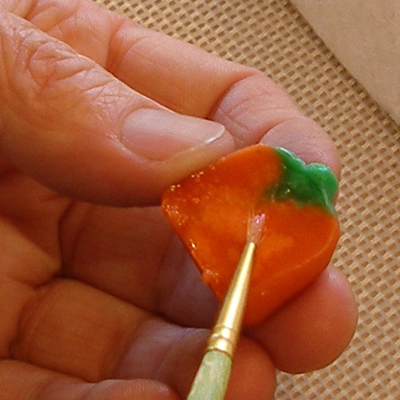
1. For the Jack-o-Lantern Ghost, use a black Edible Food Marker to draw a Jack-o-Lantern face on the candy pumpkin.
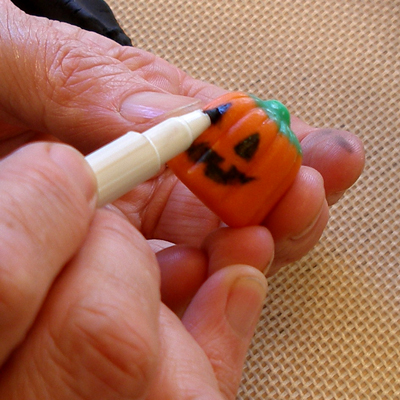
2. Paint a generous amount of water on the bottom of the pumpkin and gently press it down onto the head of the ghost.
The water will soften the sugar in the pumpkin will “glue” the pumpkin to the ghosts head.
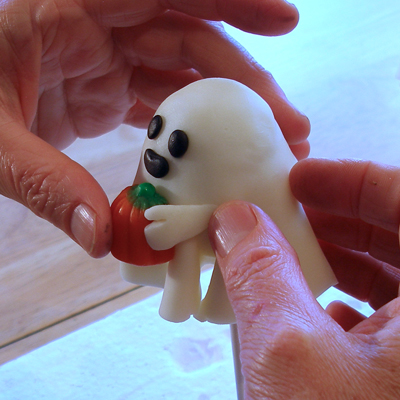
Make candy clay hands, so ghost's can hold the pumpkins in front of them:
1. Make two teardrop shapes of candy clay then use a toothpick to create a thumb in the shape. Refine the shape with your fingers. The hands will end up looking like two mittens.
Remember, you will need to make a right and a left hand.
Set the hands aside…I found it helpful to make a bunch of hands first, then place them in the refrigerator to firm up a little.

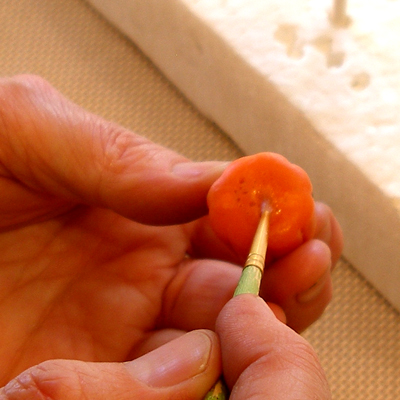
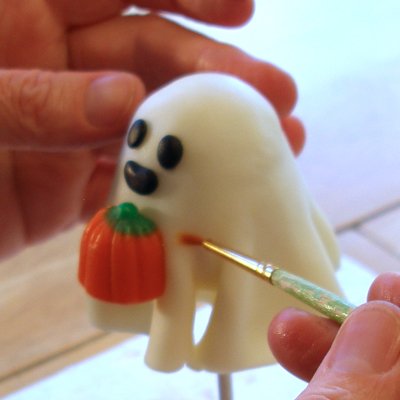
2. Use a sharp paring knife to cut off about 1/3 of the candy pumpkin, leaving a nice flat surface to adhere to the ghost.
3. Paint the cut side generously with water, then press it onto the ghost's body.
4. Take a set of hands, paint a little water on the ghost, on either side of the pumpkin, and on the sides of the pumpkin, and press the hands into place, smoothing the seams with your fingers.
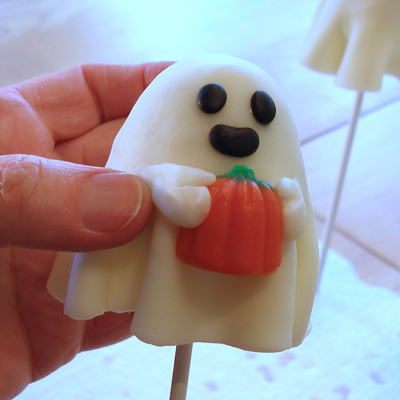
5. You may draw a Jack-o-Lantern face on the pumpkin with the black Edible Food Marker, or leave it as is.
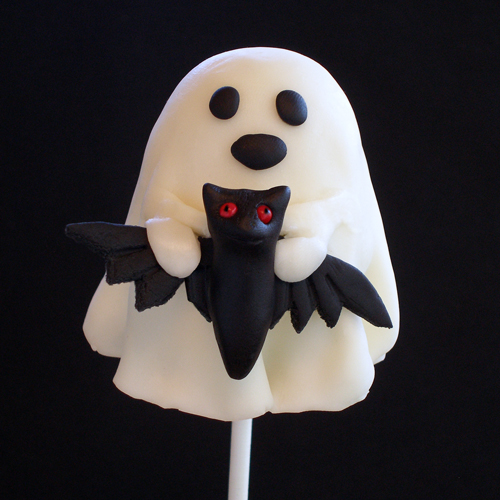
Bat Friend Ghost:
NOTE: Making the cat is very similar to making the bat. The head is identical, you just make a flat bottom on the body, rather than a pointed one, and use a toothpick to delineate the two front legs, and add a little snake shape for the tail.
For the Bat Friend Ghost, you will need two hands and a little bat, which is easier to make than you might think!
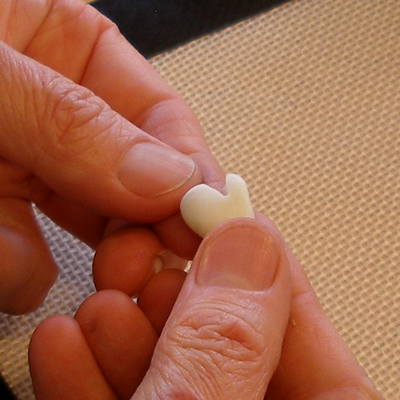
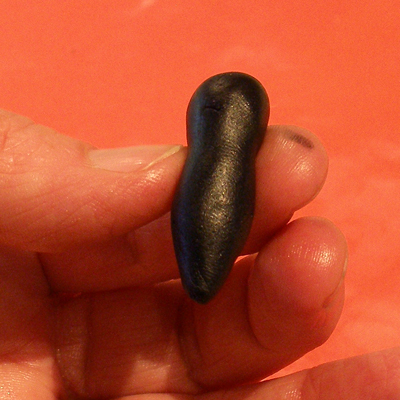
1. Take a small piece of black MMF or candy clay and roll it into a football shape.
2. Using your hands, roll it into a more elongated shape, then pinch in the neck and roll it between your fingers to create a head.
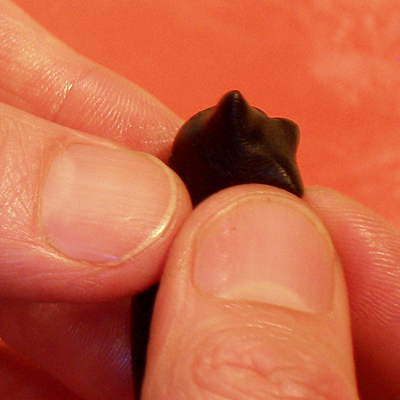
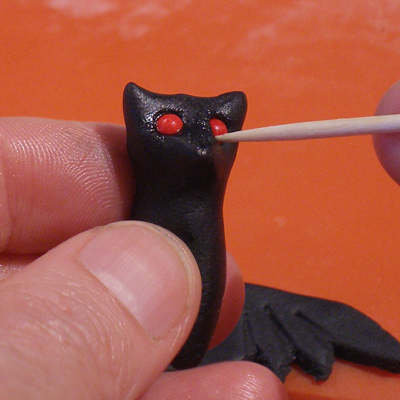
3. Pinch up two ears into the top of the head. Use your fingers to create a nice point on top.
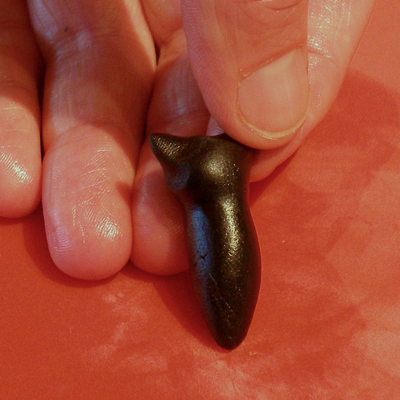
4. Gently pinch the front of the face to make the snout.
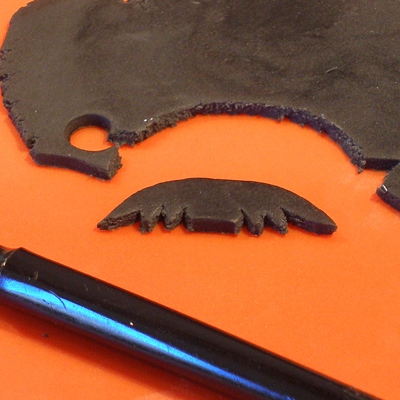
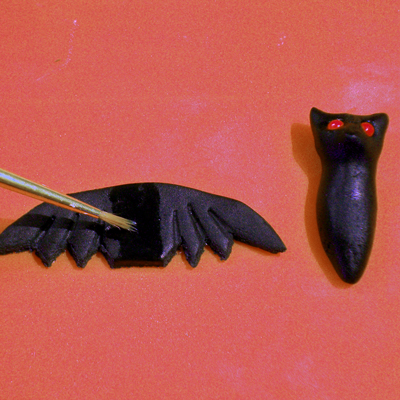
5. Roll the MMF out on a lightly dusted cornstarch surface and cut arc, that is about 1 3/4-inch long, using an X-acto knife.
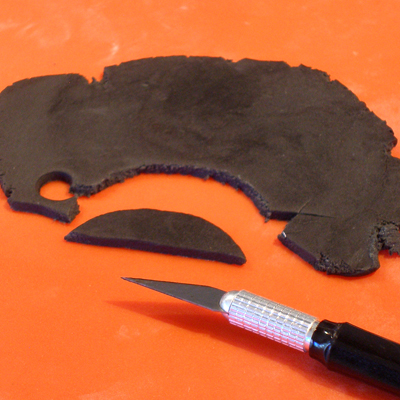
6. Cut wing notches in the flat side of the shape, leaving the center uncut. This will make a nice stable area to attach the wings to the body.
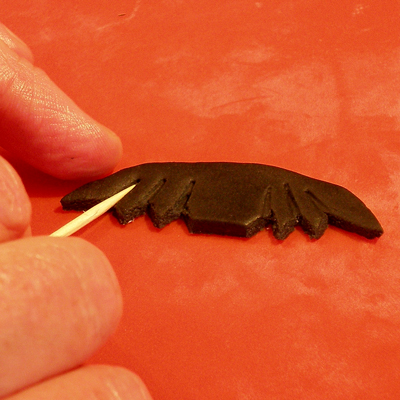
7. Using a toothpick, gently press indentations in the wing to make it look more realistic.
8. Poke two indentations in the head of the bat, so you can set the candy eyes in place.
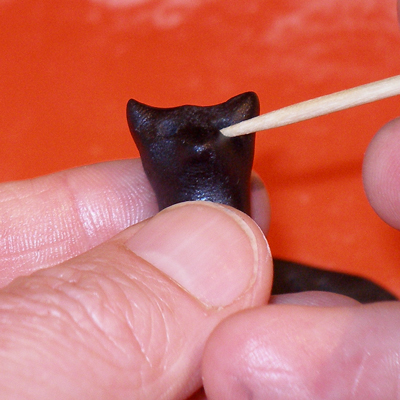
9. Paint a little water in each eye socket.
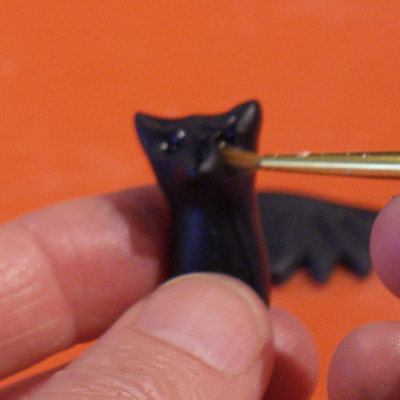
10. Set two red or yellow round sprinkles in the eye sockets.
11. Paint some water in the center of the wings, then press the body in place.
Let the bats set up for about ten minutes, so they are well adhered, before you “glue” them to the ghost.
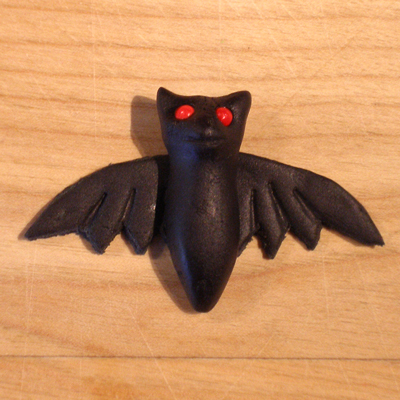
12. Paint the back of the bat generously with water, then press it onto the ghost's body.
Paint a little water on the ghost, on either side of the bat, and on the sides of the bat, and press the hands into place.
13. Use the black edible marker to add pupils to the bat's eyes.
STORAGE
Storage all ghost projects at room temperature in a cool dark place. They will keep for about a week.