
“Airplane Banner Cookies for Any Occasion”
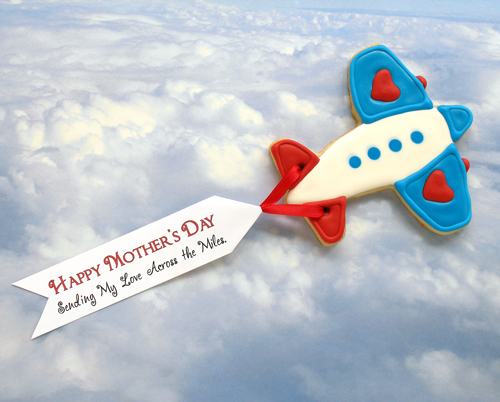
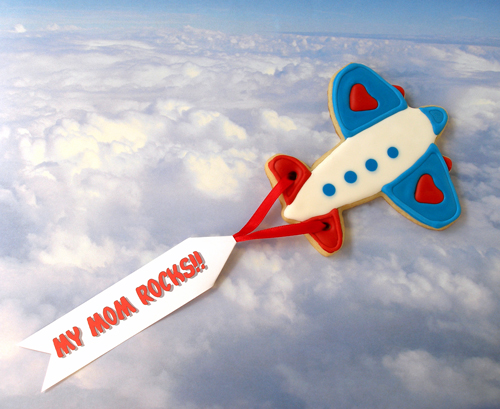
KELLY SAYS: “I don't know about your mom, but my mom lives clear across the country. Of course, I miss her terribly, so I was trying to come up with a cute idea for Mother's Day that would make her smile and warm her cookie-loving heart. I think these airplane cookies are just the ticket!
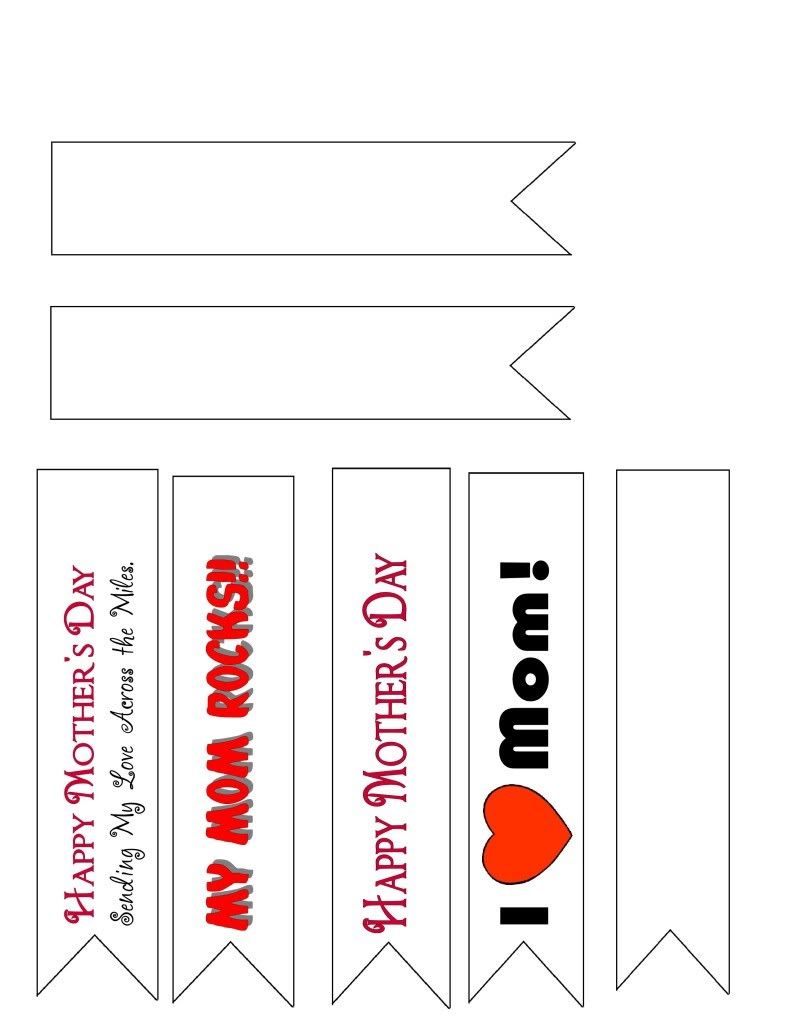
We have included banner templates in the tutorial so you can make some too. There are also some blank banners, if you want to write your own messages.
These cookies would also be great for little boys' birthday parties, welcome home parties, and all sorts of other occasions.
We hope you have fun making them, I sure did! “
COOKIE RECIPE HELP
INGREDIENTS
1 recipe Sarah's Creative Cut-Out Sugar Cookie Dough
1 4- x 4-inch airplane cookie cutter
1 recipe Royal Icing
2 sheets white card stock
Disposable piping bags
Wilton #2 piping tips and couplers
Wilton #6 piping tip(to cut holes out for the banner)
No-taste red gel color and Royal Blue gel color (I used Wilton)
Black edible ink marker
miniature heart cookie cutter
1/4″ wide satin ribbon in coordinating color
3/16″ glue dots, or double-sided tape
INSTRUCTIONS
PREPARE MATERIALS
1. PRINT BANNER TEMPLATE on white card stock – You will need 11 banners total
If you have a photo editing program, you can save the banner template to your computer, and add whatever sentiment you want to the blank banner images on the page.
2. Cut Eleven 11-inch lengths of 1/4-inch satin ribbon in the color of your choice. Cut the ends of each ribbon to a small point. This will help make it easier to thread the ribbon through the holes.
STEP I: ROLL-OUT, CUT AND BAKE SARAH'S CREATIVE CUT-OUT SUGAR COOKIES. PREPARE THE ROYAL ICING FOR PIPING.
Cookies:
1. Position an oven shelf in the middle of the oven. Heat the oven to 350 degrees F.
Line two cookie sheets, each one with a silpat mat or parchment paper. Set aside.
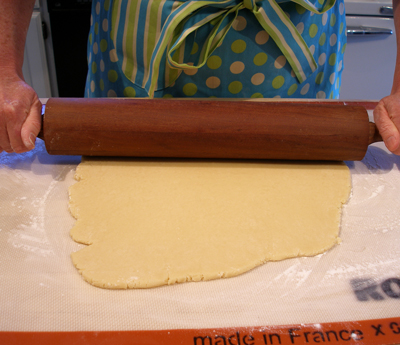
2. Roll out Sarah's Creative Cut-out Sugar Cookie Dough on a lightly floured work surface, to about 1/4-inch thick.
3. Using the airplane cookie cutter, cut out eleven cookies, leaving as little waste as possible.
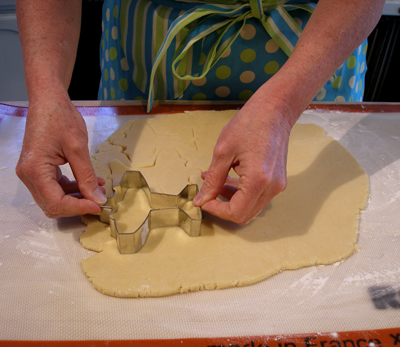
Brush off any excess flour, stack any scraps and re-roll the dough for more cookies.
4. Place the cut-out cookies on the prepared baking sheet. Make sure to leave at least 1-inch between each one.
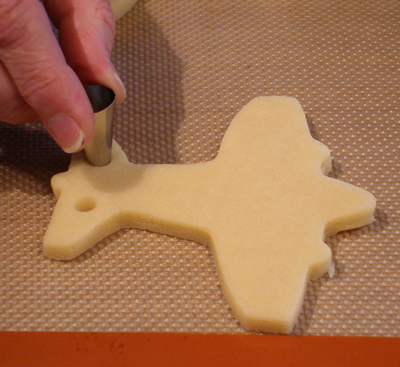
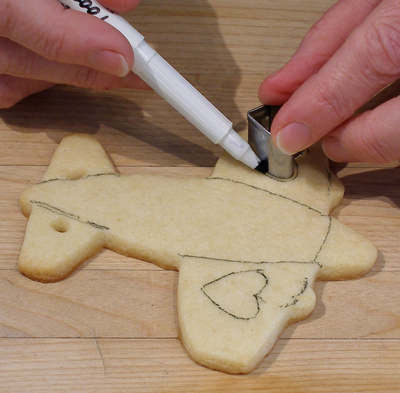
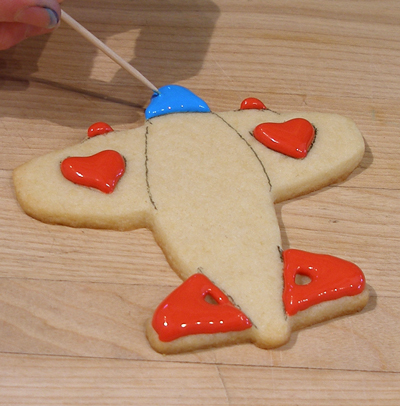
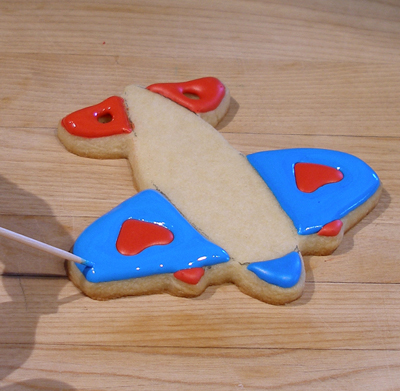
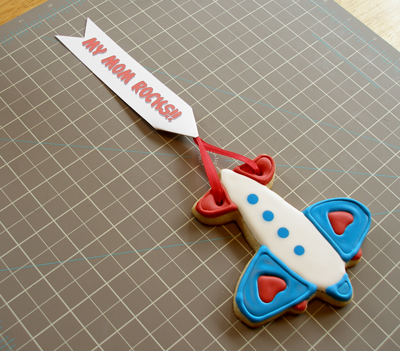
5. Using the small end of the #6 Wilton piping tip, cut two holes in the tail of each cookie airplane. This is where you will thread the ribbon that holds the airplane banner.
Make sure to remove the little plug of dough from the hole.
6. Bake one cookie sheet at a time until the edges are just starting to brown, about 10-12 minutes.
Set aside the second cookie sheet uncovered in the refrigerator while the first one bakes.
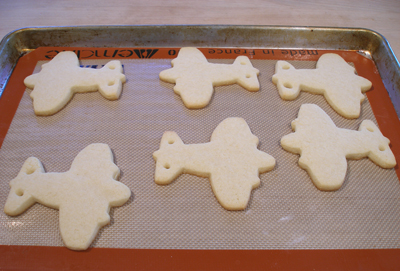
7. Allow the cookies to cool on its cookie sheet 1-2 minutes and remove to a wire cake rack to cool.
8. Bake the second cookie sheet, directly from the refrigerator, following Steps 6 and 7, above.
Prepare the Royal Icing for Piping:
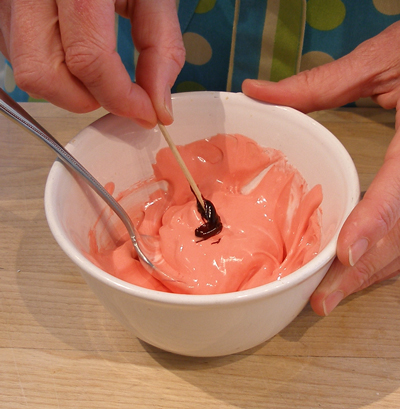
The Royal Icing recipe makes stiff royal icing, so you will have to add a small amount of water to get it to cookie decorating consistency.
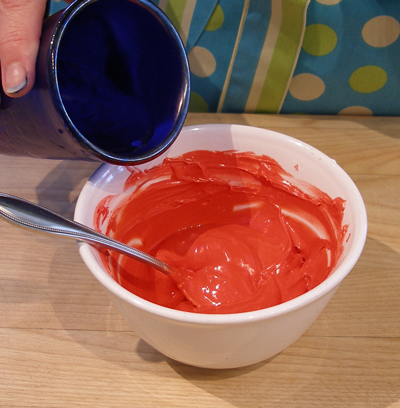
1. Place about 2/3 cup of royal icing in each of 3 small bowls. Using a toothpick, add some red color to the icing and stir. Deep red is a very difficult color to achieve, so be prepared to add quite a bit of color to the icing. Just add and stir, until you achieve the color you want. I added about 1/2 teaspoon of color.
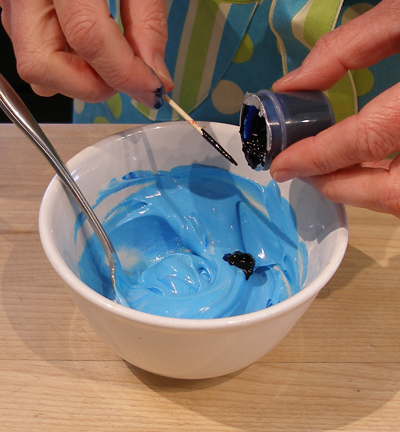
2. Add the royal blue gel color to another bowl, and stir. You will not need to add as much color to get a nice blue.
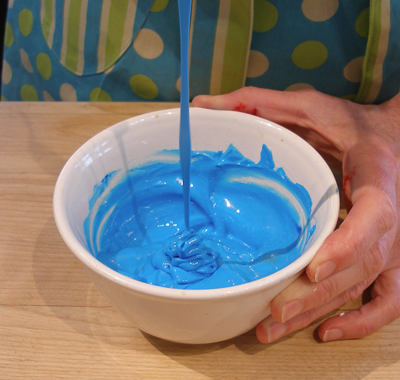
3. Add water, a little at a time, stirring between each addition, until the icing slowly falls when poured from a spoon, and the ridges of icing slowly disappear in the bowl.
4. Leave the icing in the third bowl white, with no coloring, but thin it to piping consistency.
5. Place the blue, red and white icings in piping bags fitted with Wilton #2 piping tips.

STEP II: DECORATE THE COOKIES
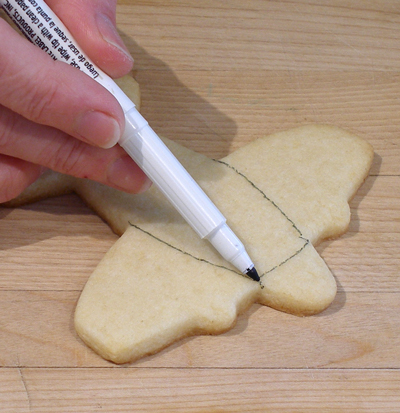
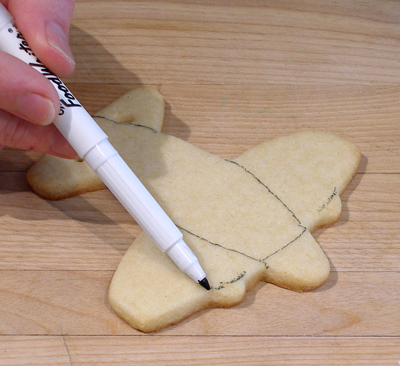
Draw the design on the cookies:
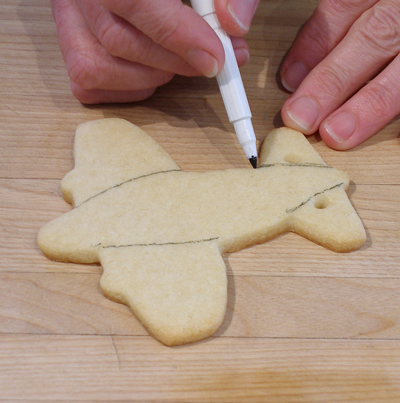
1. Using a black edible ink marker, draw out the design on the cookie.
Pipe the initial designs:
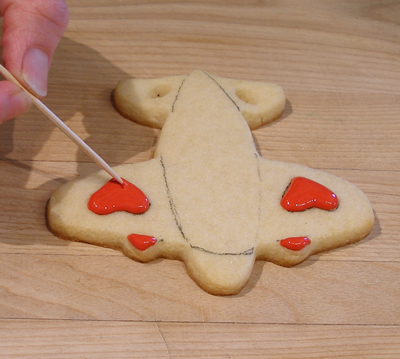
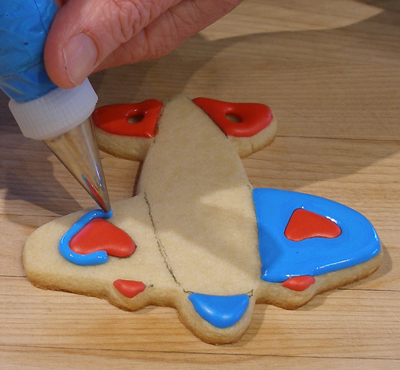
1. Pipe the engines in red, using a toothpick to gently coax the icing.
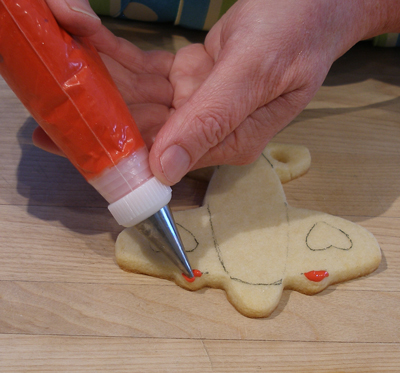
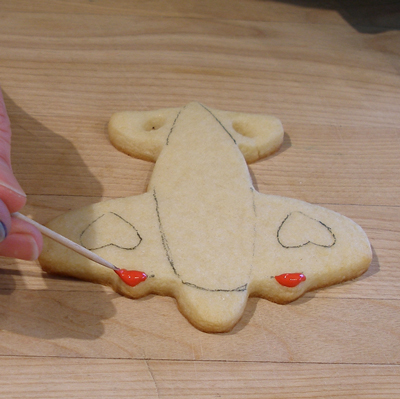
3. Pipe the hearts on the wings, outlining first, then immediately filling in, coaxing the icing with a toothpick to completely fill the heart
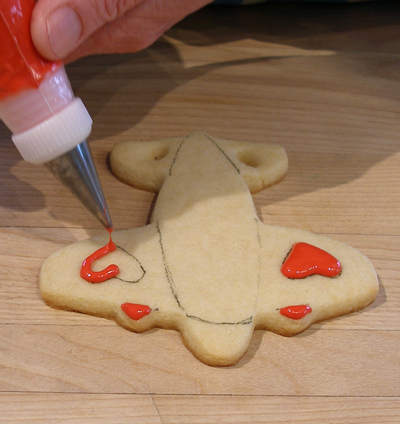
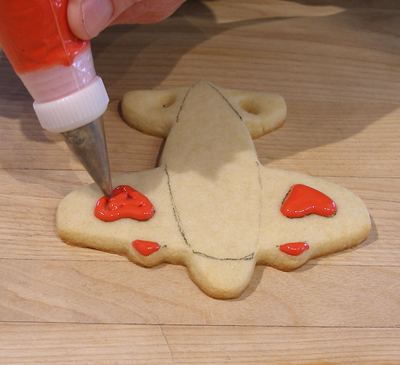
2. Pipe the tail in the same way, making sure to outline the holes, so the icing stays out of there.
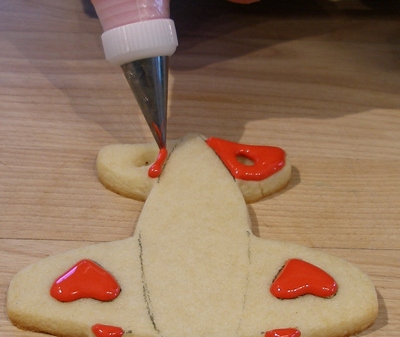
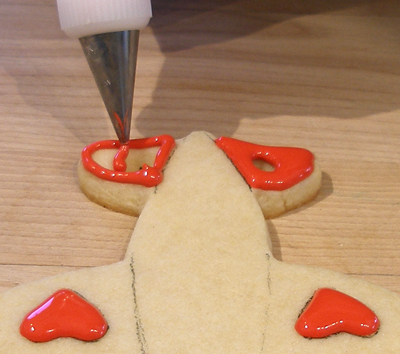

3. Pipe the nosecone with the blue icing.
4. Set the cookies aside for 20 minutes while the icing sets up a bit. This is so the red hearts on the wings will not bleed into the blue you are going to put on the wings.
Finish piping the cookies:
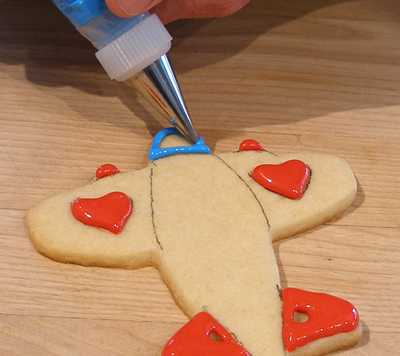
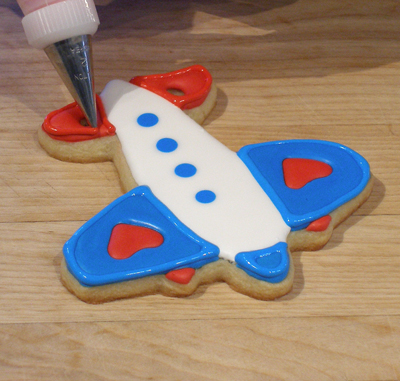
1. After the cookies have set, pipe the wings in blue. Outline around the heart first, the outline the entire wing, then fill it in.
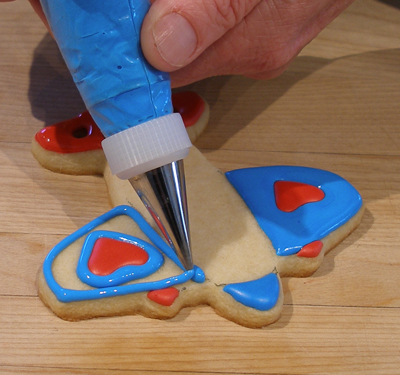
2. When you are done piping the wings on all the cookies, let them set up for about ten minutes before you pipe the white icing on the body of the plane.
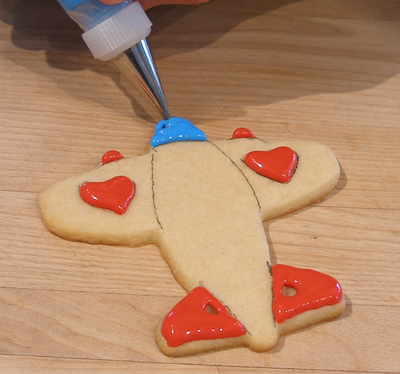
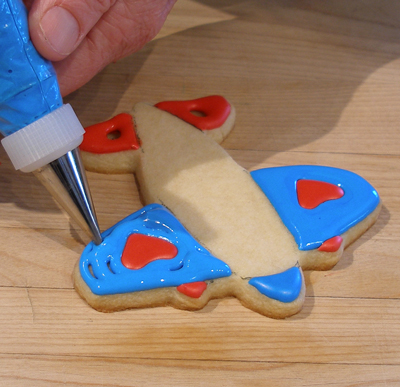
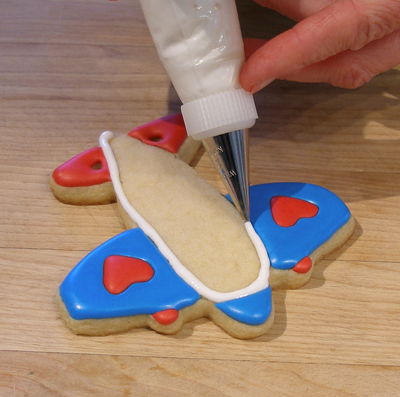
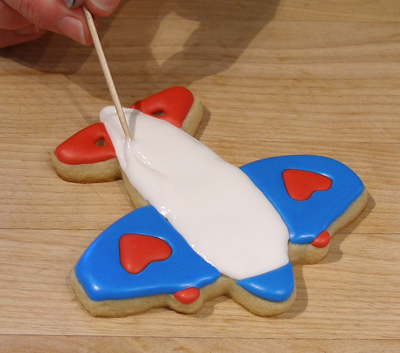
3. After 10 minutes, pipe the body of the plane, outlining first, then filling in, as before.
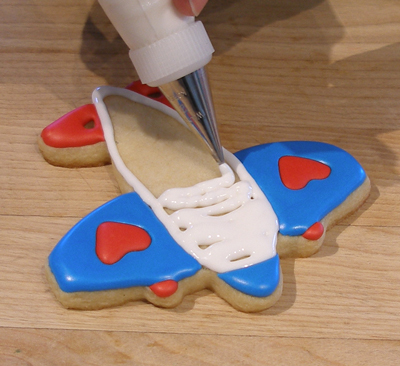
4. Pipe some windows on one side of the plane, with the blue icing. You must do this while the white icing is still wet, or the bue icing will not level out, but rather dry raised. This is called “wet on wet” icing.
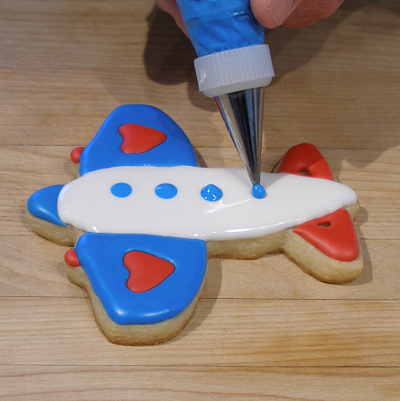
KELLY CA SAYS: You *could* be done at this point, but I think it looks more 'finished' to outline the wings and tail. You must let the icing dry for about an hour before you do this.


5. Set all the decorated cookies aside to dry overnight. You CANNOT put the banners on the cookies until they have thoroughly dried. The icing may look dry on top, buy may be wet underneath, so, the best thing to do id to attach the banners the next day. Unless, of course, you enjoy crying because of ruined cookies. 😉
STEP III: FINISH THE BANNERS. PACKAGE THE COOKIES.
Make sure the cookies are completely dry before attaching the banners and packaging them.
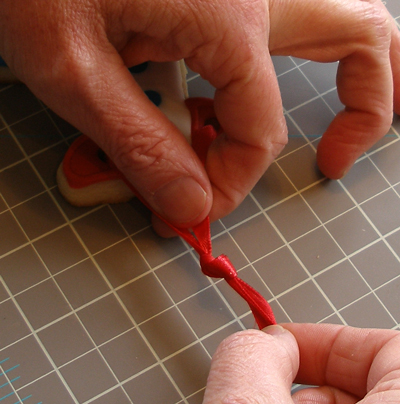
1. Turn the cookie over to its back and thread the ends of the ribbon through the holes, to the front of the cookie.
If you find that the holes are too small on the back of the cookie, you can use the tip of a paring knife to GENTLY bore it out to make it larger.
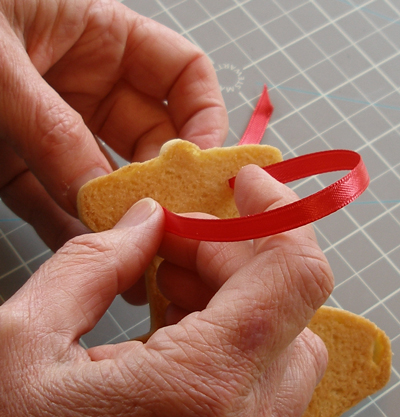
2. Turn the cookie over to its front decorated side, then make the ribbon equal lengths on each side.
Tie a knot in the ribbon, about 1-inch from the end of the tail.
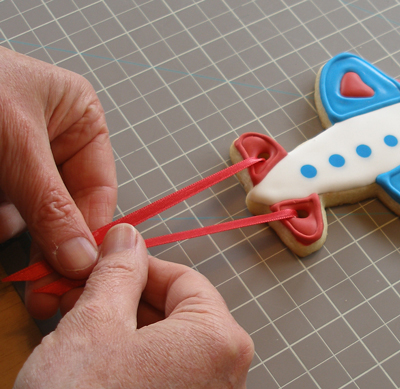
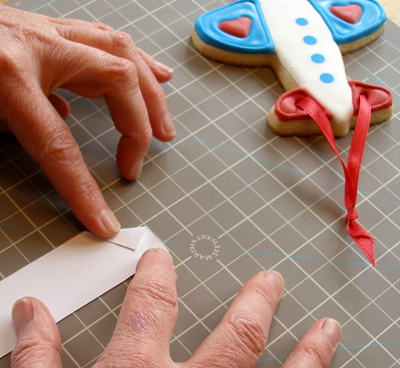
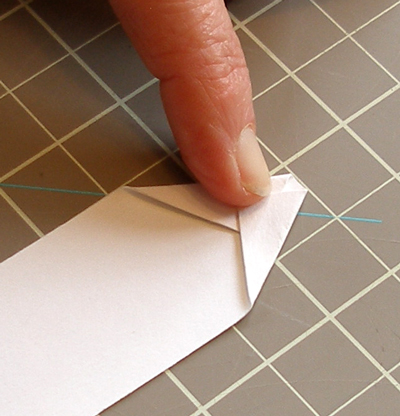
3. Place banner on work surface, printed side down. Fold in the straight end of each banner to make two flaps that overlap.
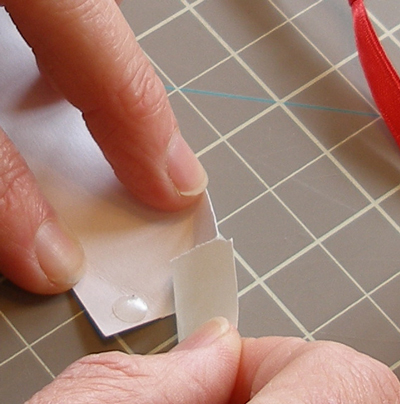
4. Put 1 glue dot under each flap. Turn cookie iced side down, then put the ribbon between the two flaps, making sure that the knot is well below where the flaps overlap. Press to adhere the glue dots.

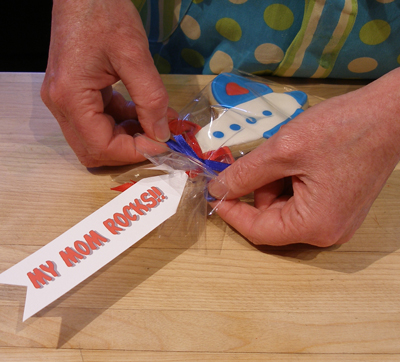
5. To wrap the cookies, place them in a cellophane bag, leaving the message hanging outside of the bag. If the bag is too deep, simply trim the top to the length you need. The card stock would most likely get grease-stained if left in the bag, plus the ink is not edible, that is why you leave it outside the bag.
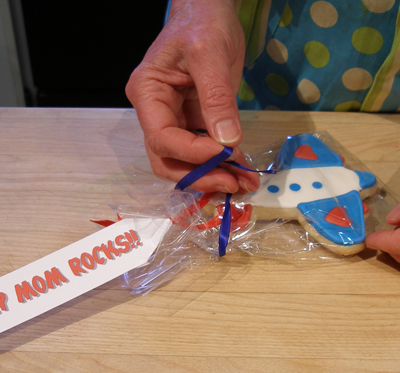
6. Tie the top of the bag with a coordinating ribbon.
Happy Mother's Day!
STORAGE
Cover and store at room temperature, where the cookies will keep for about 5 days.
You can wrap and freeze for a month or more. Thaw them in their wrappers at room temperature.
The dye will not run.