
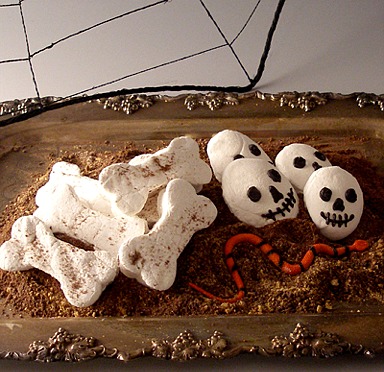
KELLY SAYS: “I dressed up a tarnished silver platter with graham cracker crumbs (mostly chocolate, with a few regular graham crackers), to represent dirt.
I sprinkled a few crumbs on the bones, to make them look like they had just been unearthed.
Add a rubber snake and you're all set! SCARY!!”
CANDY RECIPE HELP
WHOLE MILK, Premium Member, SAYS: “The best recipe I've found is (this one).”
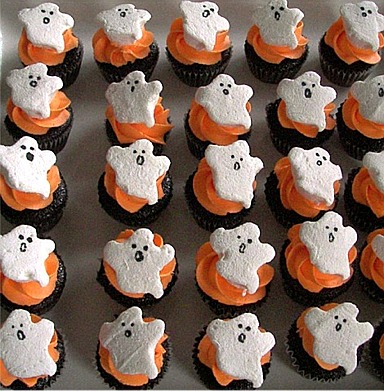
KAKE, Premium Member, Says: “I made cupcake marshmallow toppers with this recipe!”
SPOOKY BONES TUTORIAL

INGREDIENTS
1 recipe Homemade Marshmallows; complete recipe through Step 9. Smooth the top of the marshmallow mixture and leave to set for several hours at room temperature to dry.
1/2 cup Dark Candy Melts or chocolate chips, or more, if needed depending on level of detail
2 cups powdered sugar, sifted and more, if needed; use for dusting finished marshmallow shapes with.
All-purpose flour
INSTRUCTIONS –
CONTINUE after Homemade Marshmallows, Step 9. Smooth the top of the marshmallow mixture and leave to set for several hours at room temperature to dry:
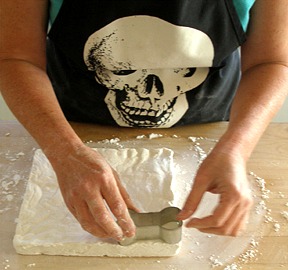
1. Sprinkle counter with powdered sugar.

2. Remove marshmallow slab from the pan and place it on the powdered sugar covered work surface.
3. Take your desired cookie cutter and spray it with non-stick spray.
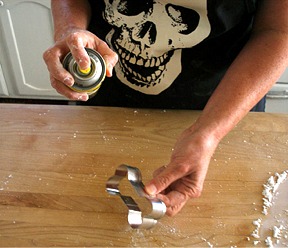
4. Cut marshmallows out by pressing straight down, without twisting.
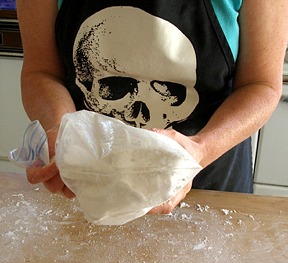
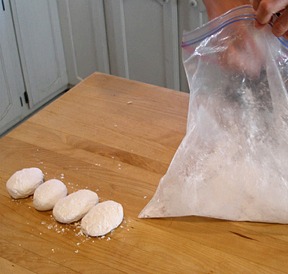
5. When shapes are all cut out, drop them in a plastic bag, with about a cup of powdered sugar, and shake till marshmallows are fully coated with sugar. This will insure that the marshmallows will not stick together.
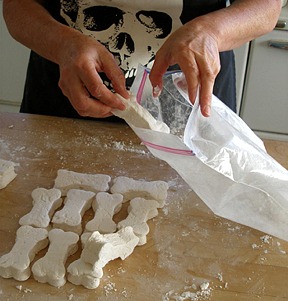
6. Remove marshmallows from bag and shake off excess powdered sugar.
STORAGE
Store in an airtight bag, for freshness.
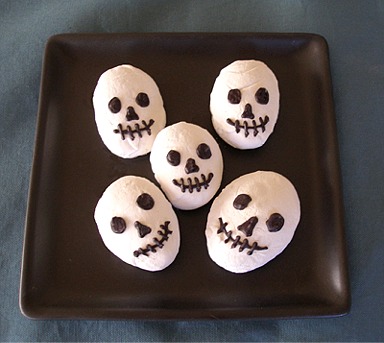
SCARY SKULLS TUTORIAL
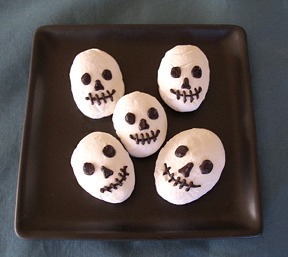
This technique is not for the faint of heart! It was a really fun project, though, and I'm glad I did it. P.S. You can optionally use an egg shaped baking pan to make the marshmallow shapes from; I think it would be easier than using a flour mold! Make sure you grease and dust the pan with powdered sugar before using.
INGREDIENTS
1 recipe Homemade Marshmallows; complete recipe through Step 7. Switch the stand mixer to a paddle attachment. Beat on medium-high until the mixture is a thick white opaque mass which will hold it's shape.
1/2 cup Dark Candy Melts or chocolate chips, or more, if needed depending on level of detail
2 cups powdered sugar, sifted and more, if needed; measure and then, sift
All-purpose flour
INSTRUCTIONS: CONTINUE after Step 7, Homemade Marshmallows –
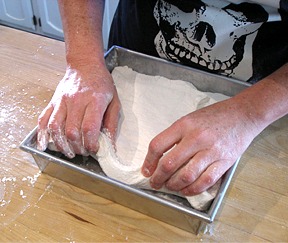
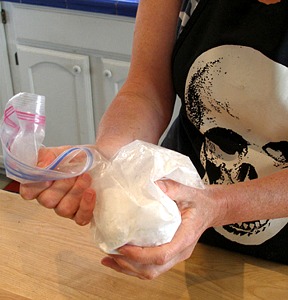
1. Make a 1 1/2-inch layer of flour in a large baking pan. I used a 9- x 13- inch Pyrex pan. Make depressions in the flour, to make molds for your marshmallows.
KELLY CA SAYS: Since I wanted to make skulls, I used a plastic Easter egg to make oval shaped molds.
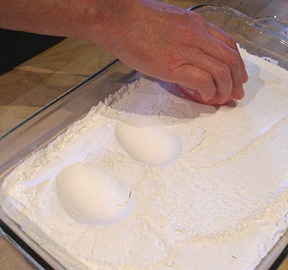
Carefully spoon the marshmallow mixture into the depressions.
NOTE: It is helpful if you spray your spatula or spoon with non-stick spray, before you scoop the marshmallow mixture into the pan. It is VERY STICKY!
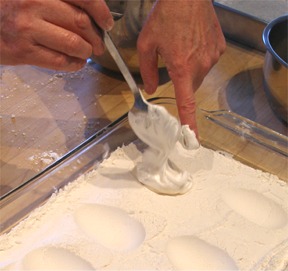
The mixture is VERY sticky, and does not level out on it's own, so I decided to spray my fingers with non-stick spray and GENTLY press the mixture into the molds.
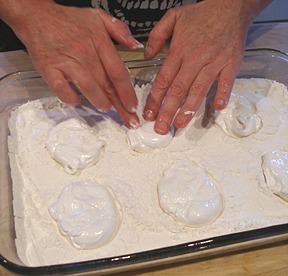
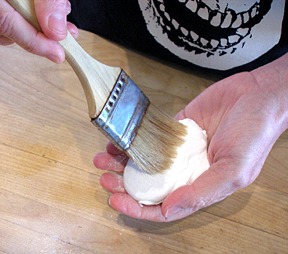
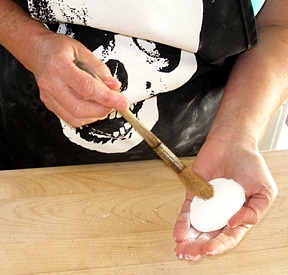
2. After the marshmallows set up (this takes a few hours), remove them from the molds and brush off the excess flour with a pastry brush.
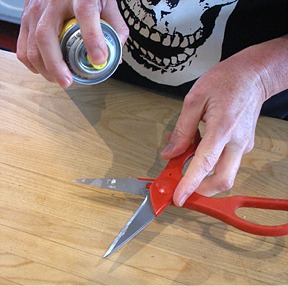
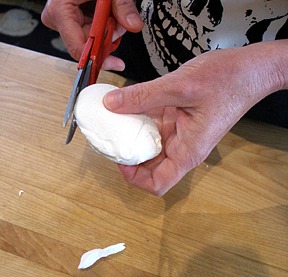
Since the shapes were a little uneven, I trimmed the edges with a pair of kitchen shears, that I first sprayed with non-stick spray.
3. Put the shapes in a bag, with powdered sugar, and shake bag to cover completely. This insures that the marshmallows will not stick together.
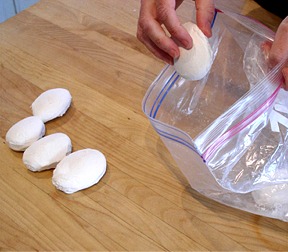
Remove ovals from bag and shake off excess powdered sugar.
Using a pastry brush, remove as much powdered sugar off the “face” of the marshmallow, so the candy melt mixture will stick to the surface of the marshmallow.
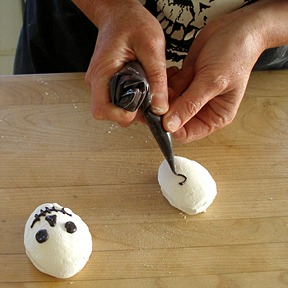
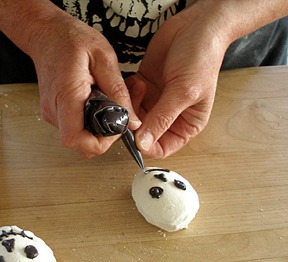
4. To make the designs on the marshmallows, I used dark candy melts.
To do: Melt 1/2 cup of dark candy melts, following package directions, and spoon into a small zip-top bag or a disposable plastic pastry bag.
5. Snip the corner of the bag, or the tip of the pastry bag, to make a small opening. Pipe two round shapes for eyes, a triangle for the nose and a scary set of teeth.
And there you are…Creepy Halloween Marsh-hallows, for your spooky Halloween festivities!!
Happy Halloween, everybody!!
STORAGE
Store in a cool, dark place or freeze for 2 – 3 months. For either, cut and coat each one in powdered sugar and place in an individual cupcake liner.
Place in an airtight a plastic container that has been lined with a double layer of paper towels. Separate the layers with wax paper.