
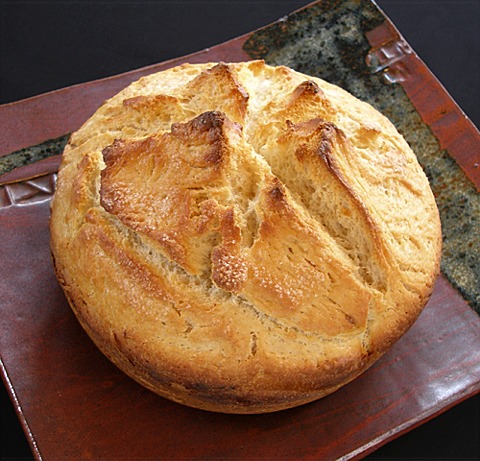
If you're in the mood for a really crispy crusted rustic bread to have with a steaming bowl of comforting soup, this is PERFECT! No Knead Breads are a great alternative if you want a dough that can be prepared in advance and left to ferment for a longer period of time to develop the gluten and flavor, but the process of making the bread is very easy. It has a wonderful texture too. The acid in the buttermilk also makes the slightly tangy, and its crumb moist and tender. Sprinkling the top with coarse salt right before baking adds to its appeal. This recipe has been adapted from Nancy Baggett, cookbook author.
BREAD RECIPE HELP
INGREDIENTS
4 cups (20 ounces) unbleached bread flour or unbleached all-purpose flour, plus 1⁄2 cup (2.5 ounces), plus more as needed
2 tablespoons sugar
1 3⁄4 teaspoons salt
3⁄4 teaspoon instant, fast-rising, or bread machine yeast
1 3⁄4 cups plus 2 tablespoons ice water*, plus more if needed
1⁄3 cup dried buttermilk powder; SACO brand is recommended or instant nonfat dry milk powder with 1 or 2 more teaspoons of melted butter
2 tablespoons unsalted butter, melted and cooled slightly
3⁄4 teaspoon coarse crystal salt (Kosher) for garnish; can use 1/3 teaspoon table salt, instead
Corn oil, canola oil, or other flavorless vegetable oil for coating dough
*NOTES: To make ice water, measure 2 cups water and add ice. Let stand until chilled. Measure 1 3⁄4 cups plus 2 tablespoons ice water needed for use in the recipe.
INSTRUCTIONS
Mix and First Rise:
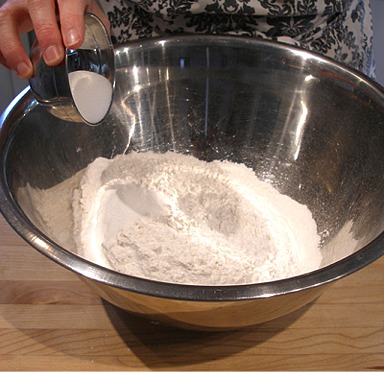
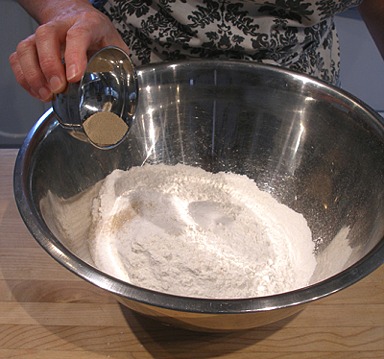
1. In a large bowl, thoroughly stir together 4 cups flour, sugar, 1 3/4 teaspoons salt, and yeast.
NOTE: Instead of a large mixing bowl, you can use the bowl of a stand mixer here, instead, because you'll need it when adding in more ingredients before the Second rise, anyway..
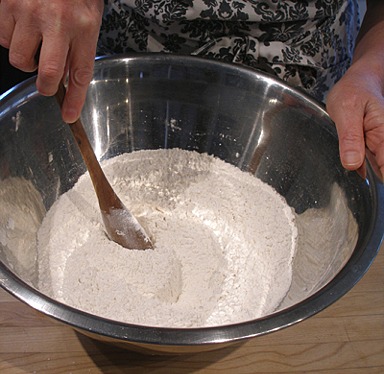
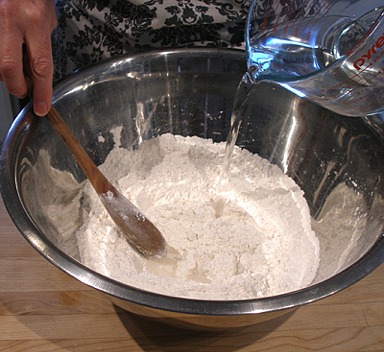
2. Slowly stir the water into the bowl, scraping down the sides, until the dry ingredients are just moistened, and slightly stiff.
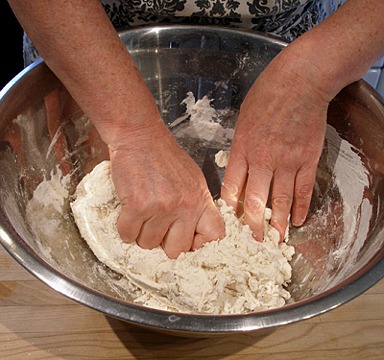
As you mix, you may need to switch to using your fingertips to mix the ingredients together as the dough becomes stiffer.
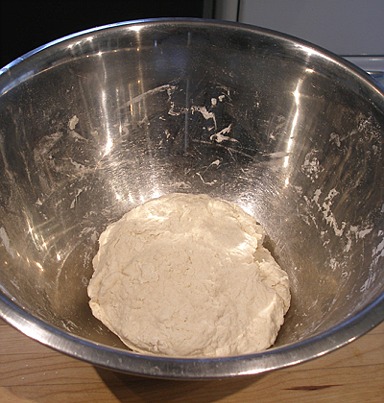
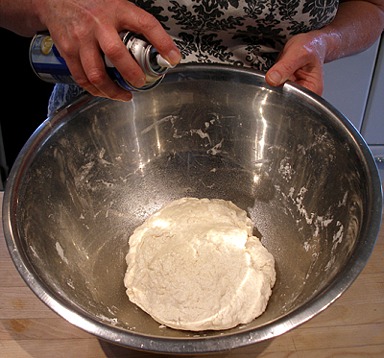
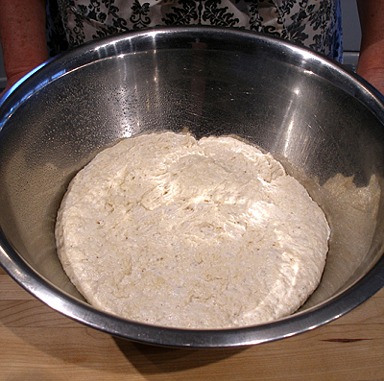
3. Brush or spray the top with oil. Cover the bowl with plastic wrap. Let rise until almost doubled in bulk.
NOTE: If desired, for best flavor or for convenience, you can refrigerate the dough for 3 to 10 hours. Then let rise at cool room temperature for 12 to 18 hours.
For example, I made the bread dough in the morning of Day 1, then put it in the refrigerator for about 7 hours or until about 7:00 that evening. I then took it out of the fridge and left it on the counter to rise overnight. I then baked the risen loaf on Day2 in the early afternoon.
Add in More Ingredients and the Second Rise:
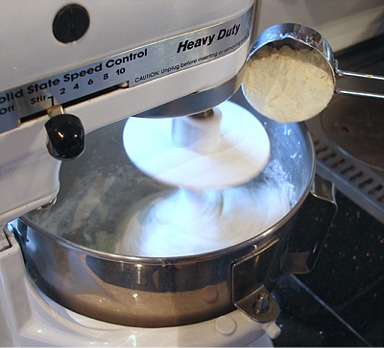
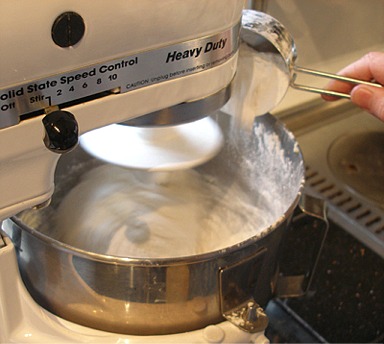
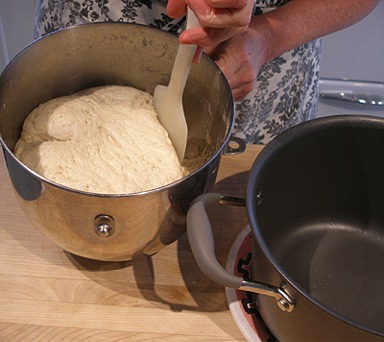
1. With a large rubber spatula, push the risen dough into the bowl of a stand mixer (or clamp the mixer bowl onto the stand mixer). Fit the mixer with a dough hook.
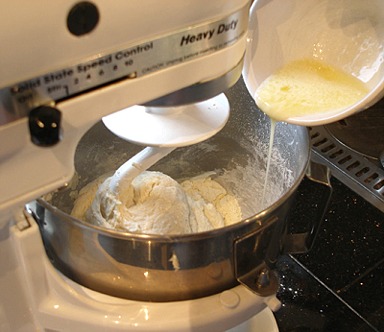
2. With the mixer on low, add in the buttermilk powder and mix until incorporated.
3. Then, drizzle in the melted and cooled butter and mix until incorporated.
4. Add in the remaining 1/2 cup flour to make the dough very stiff. If necessary, add in a tablespoon more flour at a time, if necessary,
and mix after every addition.
Scrape down the bowl sides thoroughly.
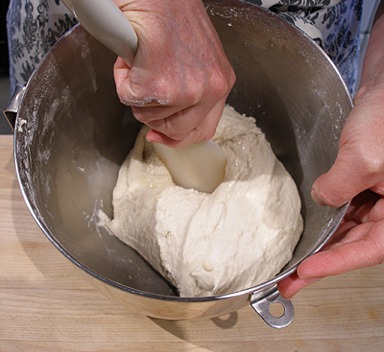
5. Stop the mixer and unclamp the bowl.
6. Using an oiled rubber spatula, lift and fold the dough in towards the center all the way around.
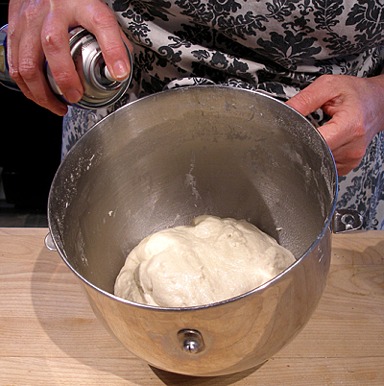
Evenly brush or spray the dough top with oil. Cover the bowl with nonstick spray– coated plastic wrap.

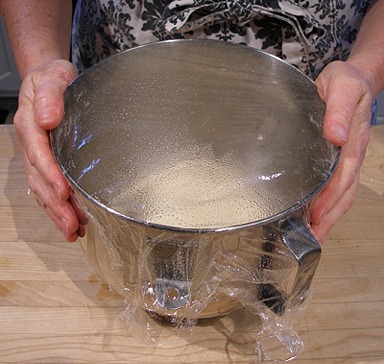
7. Let the bread rise at the warm side of room temperature for 1 1/2- to 2 1/2-hours.
NOTE: a 1- to 2-hour accelerated rise, use Sarah's Microwave Bread Proofer; or for an extended rise, refrigerate for 4 to 24 hours, then set out at room temperature.
8. Continue the rise until the dough doubles from its original size, removing the plastic if the dough nears it.
Preheat the oven. Prepare the dough in the Baking Pot:
1. Preheat the oven: 20 minutes before baking time, put a rack in the lower third of the oven; preheat to 450 degrees F.
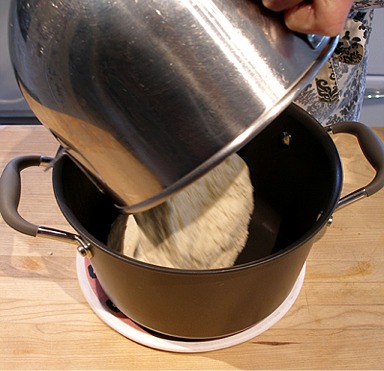
2. Heat a 4-quart Dutch oven or similar heavy metal pot in the oven until sizzling hot (check with a few drops of water), then remove it, using heavy mitts.
3. Taking care not to deflate the dough (or burn yourself), loosen it from the bowl sides with an oiled rubber spatula and gently invert it into the pot.
Don’t worry if it’s lopsided and ragged-looking; it will even out during baking.
4. Lightly spray or brush the dough top with water.
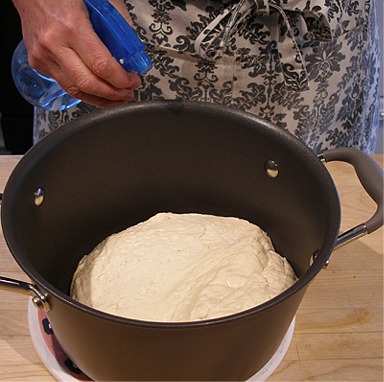
5. Then evenly sprinkle over the coarse salt.
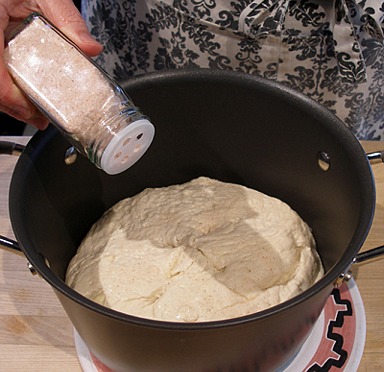
NOTE: I had some coarse pink Himalayan salt, so that's what I used.
6. Slash a large, 1/4-inch-deep × in the dough top with well-oiled kitchen shears.
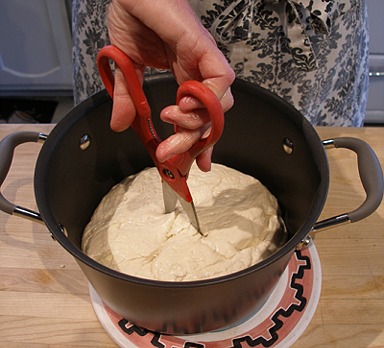
7. Immediately place the top on the pot. Shake the pot back and forth to center the dough.
Bake the Bread:
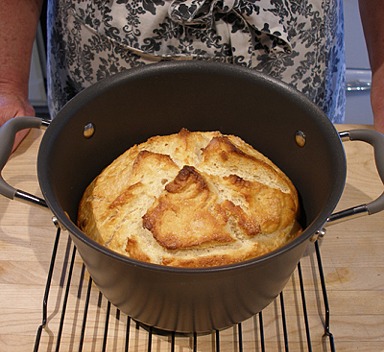
1. Lower the oven heat to 425 degrees F. Bake the bread for 50 to 55 minutes or until puffed and firm on top.
2. If the loaf is nicely browned, continue baking with the lid on; if the loaf looks pale, remove the lid. Bake for 10 to 15 minutes longer, until the top is well browned and crusty and a skewer inserted in the thickest part comes out with just a few crumbs on the tip (or until center registers 205º to 207ºF on an instant-read thermometer).
Then, bake for 5 to 10 minutes longer to ensure the center is baked through.
NOTE: I removed the lid after 50 minutes to check the loaf and noticed that the bottom of the loaf was getting quite brown, so I put a sheet pan under the loaf to shield it from direct heat.
I then baked it for 15 more minutes and it reached the desired temperature. I did not want it to get too brown, so I removed it at that point. It was perfectly done inside when I cut it open.
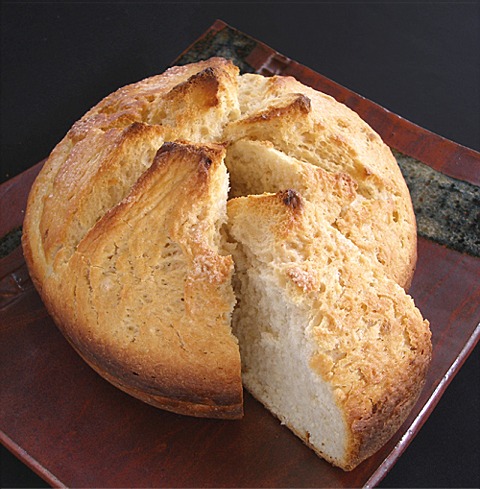
3. Cool in the pan on a wire rack for 10 to 15 minutes. Remove the loaf to the rack. Cool thoroughly.
SERVE
Cut the loaf into wedges or crosswise slices; it tastes good warm, but will cut much better when cool. Cool completely before storing.
STORAGE
To maintain the crisp crust, store draped with a clean tea towel or in a heavy paper bag. Or store airtight in a plastic bag or wrapped in foil: The crust will soften, but can be crisped by heating the loaf, uncovered, in a 400 degrees F oven for a few minutes. The bread will keep at room temperature for 3 days, and may be frozen, airtight, for up to 2 months.