
Recipe by Sarah Phillips; Food styling and photos by Kelly Hong © 6-23-2015 Sarah Phillips CraftyBaking.com
With the sudden explosion of fresh summer fruits and berries, it only makes sense to pair them with cake for a light and delicious dessert.
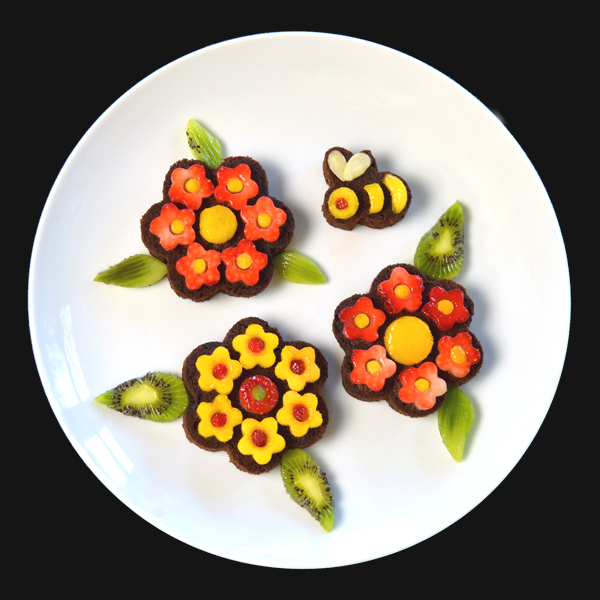
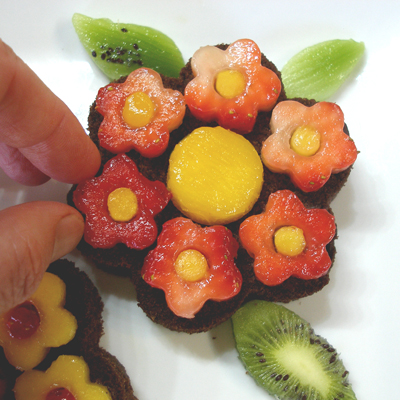
Strawberry shortcake is a summer tradition, but these little cakes are a feast for the eyes, as well as the stomach.
The dark chocolate cake contrasts beautifully with the rich jewel-tones of the fruit, creating a stained glass effect.
A show-stopper for your next dinner party, or just a fun treat for your children, plus the taste is divine!
CAKE RECIPE HELP
Cakes:
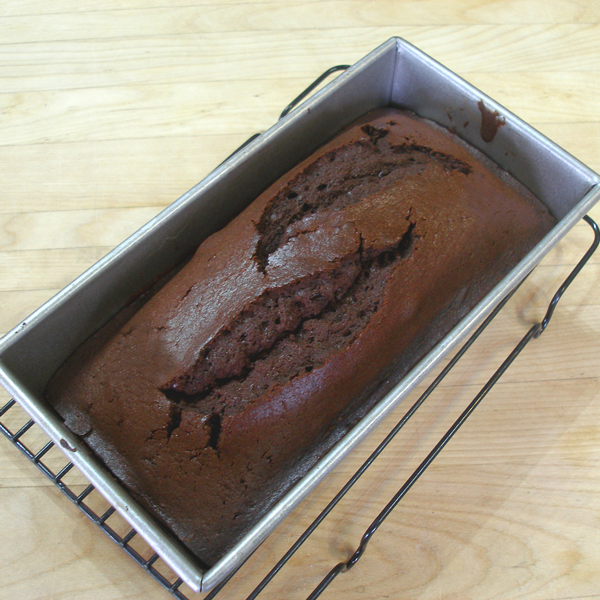
1 recipe “Basic Pound Cake” chocolate variation; bake in a 9- x 5- x 3-inch loaf pan
Fruit:
2 pounds Strawberries
5-6 kiwi fruit
2-3 mangos (or peaches), depending on the size
Sliced almonds, for the bee’s wings
Honey glaze
1 tablespoon honey
1 tablespoon water
Supplies:
1-inch flower vegetable cutter, for cutting the fruit; NOTE: You *can* use cookie cutters but the vegetable cutters are usually sharper, and you will have better results.
3 to 3 1/2-inch Six petal flower cookie cutter, for cutting the cake slices
2 different sizes of leaf cutters. 2-inches long and 1 1/4-inch long, approximately
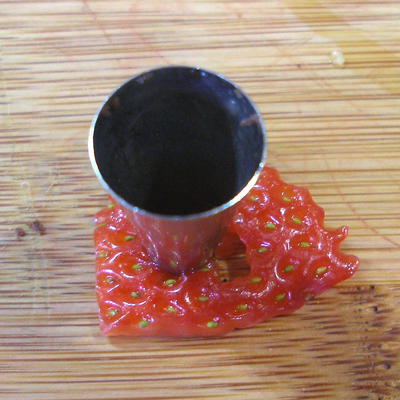
Wilton #10 piping tip, for removing and cutting the flower centers
1-inch circle cutter, for cutting out the fruit centers of each cake
NOTES:
You want to use JUST ripe fruit. Do not choose fruit that is too soft, or it will crush when you try to cut it.
Also, there will be a lot of scraps made from cutting the fruit. Save the scraps, the freeze them in a single layer, on a foil lined baking sheet.
When the fruit is frozen, remove them from the foil and store them in the freezer in ziplock bags to use for smoothies or sorbet.
We have been enjoying them by using our Yonanas machine! A FABULOUS invention!
INGREDIENTS
STEP I: PREPARE THE CAKE SHAPES
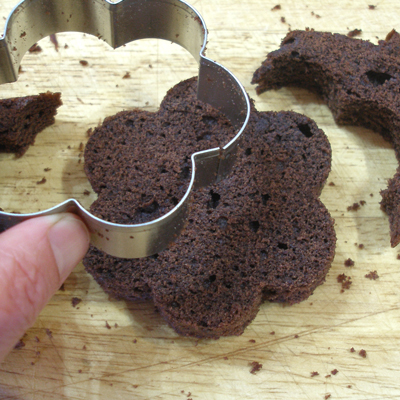
1. When cake is cool, unmold it and then slice it into 3/4-inch thick pieces.
2. Then cut the flower shapes out with the large flower cutter.
NOTE: As you get to the ends of the cake, the slices will not be as tall as they are in the center of the cake. You may have to use a smaller flower cutter, or save the rest of the cake for another use, such as cake pops.

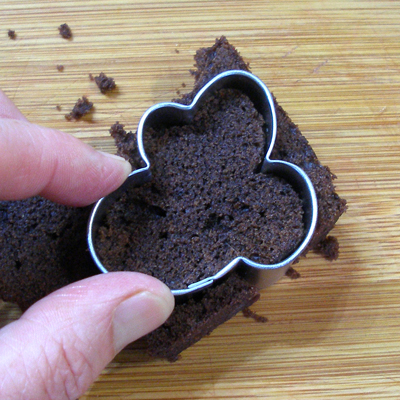
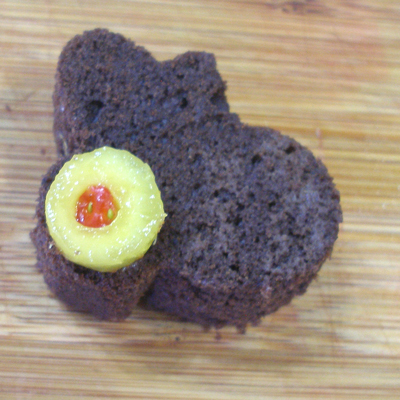
3. Cut out the bee shape.
4. When the cakes are all cut out, set them on a parchment paper lined baking sheet. Cover the baking sheet with plastic wrap so the cakes do not dry out.
Clean your work surface to remove all the cake crumbs, then get ready to cut the fruit.
STEP II: PREPARE THE FRUIT SHAPES
FLOWERS:
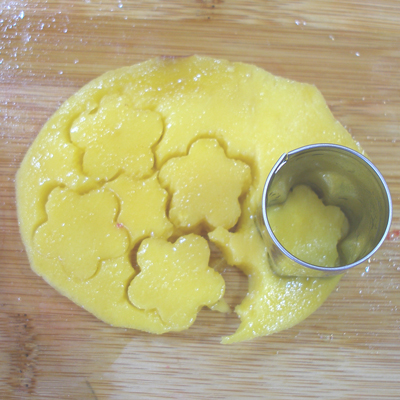
1. Peel the mango with a vegetable peeler.
2. Slice a small slice off the side of a peeled mango to make a flat surface, then slice the mango slightly thicker than ¼”.
You should be able to get two slices off each side, before you encounter the mango pit.
Set aside the small outer slice. This will be used to make the flower centers.
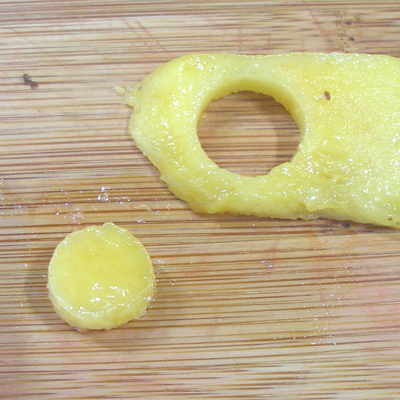
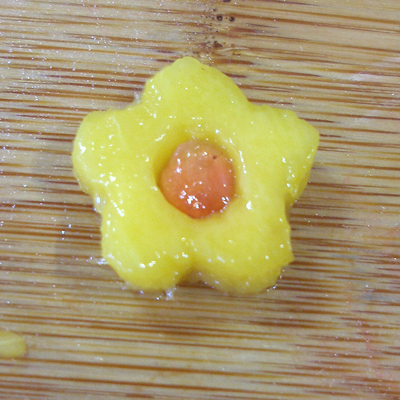
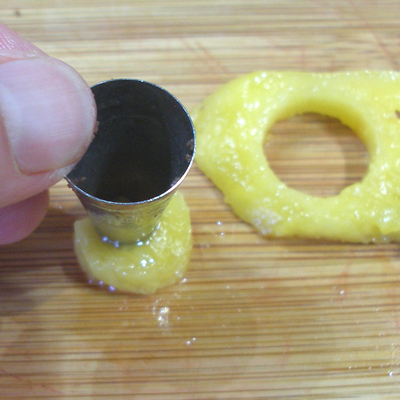
3. Cut the mango into flower shapes, using the small vegetable cutter.
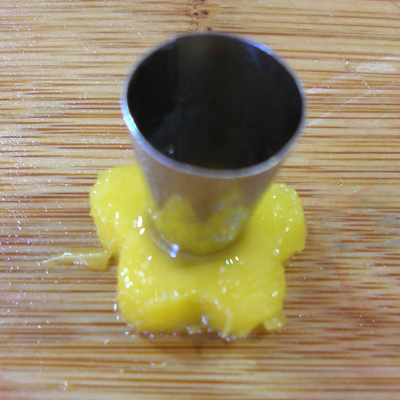
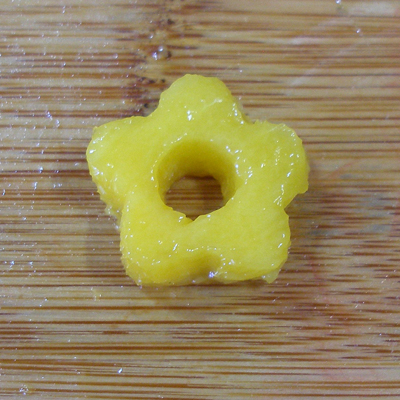
4. Cut the center out of each mango flower, using the Wilton #10 cutter.
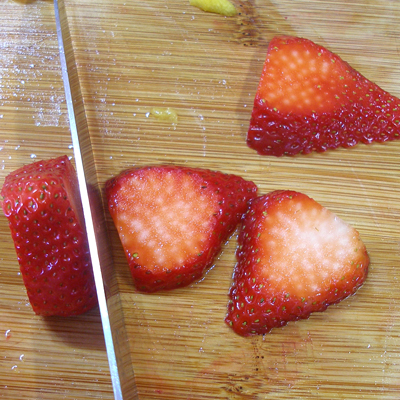
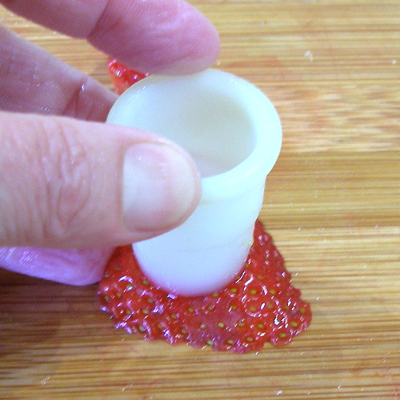
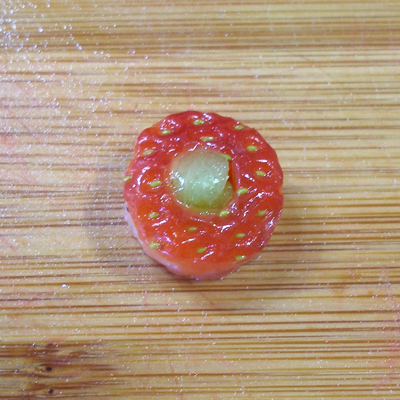
5. Cut the top off a strawberry, and lay it cut side down on your work surface.
Cut off the Curved outer edge and set that aside to use for the flower centers.
Slice the remaining strawberry into slices just shy of 1/4-inch.
As you reach the center of the strawberry, there may be a hollow area. Set those slices aside for cutting out flower centers.
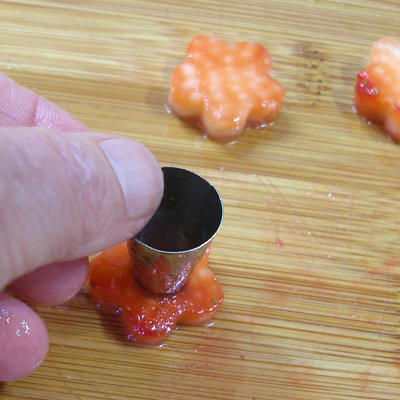
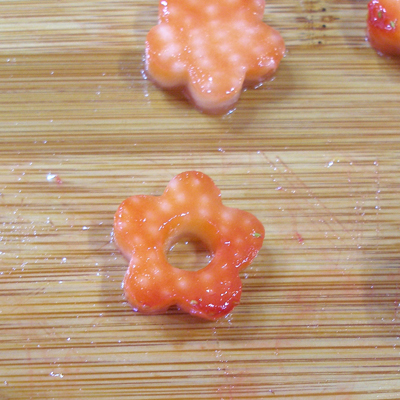
6. Cut flowers out of the whole strawberry slices, then cut out the centers with the Wilton #10 tip.

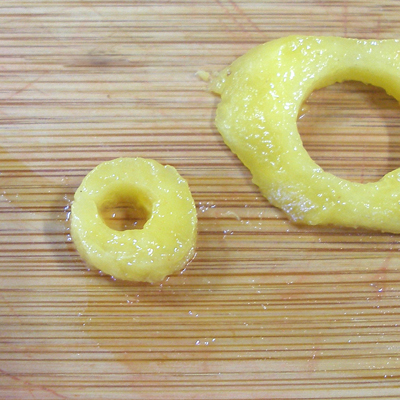
7. Cut out the large flower centers for the mini cakes, using the 1-inch round cutter.
Use the curved end cuts of the strawberries and mango to cut out the flower centers for each mini cake.

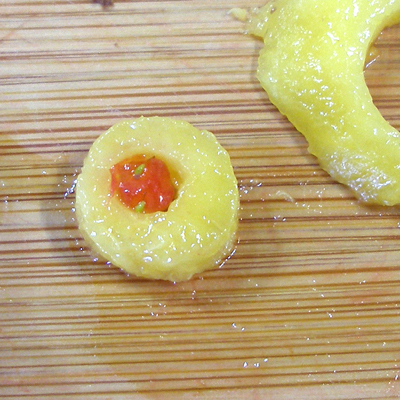
If desired, you may add a touch of color to the flower centers by adding a kiwi fruit dot.

8. Use the Wilton #10 tip to cut out the contrasting color centers for each of the small fruit flowers.
Use strawberry for the mango flowers and mango for the strawberry flowers.
Put the cut piece into the center hole in each of the flowers.
LEAVES:
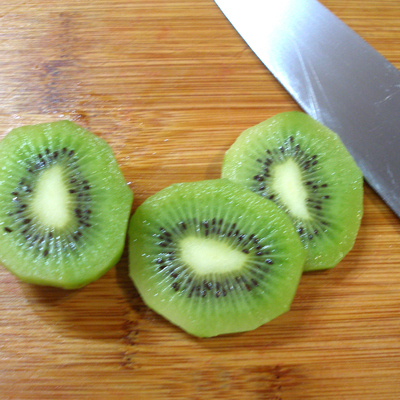
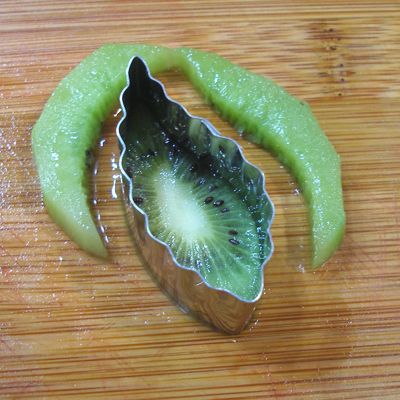
1. Peel the kiwis and slice them into slices that are just shy of 1/4-inch thick.
Use the two Wilton leaf cutters to cut out the leaves.
BEE:
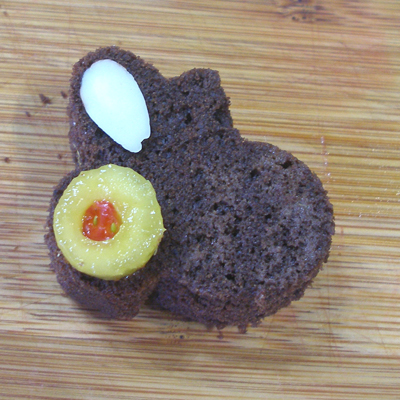
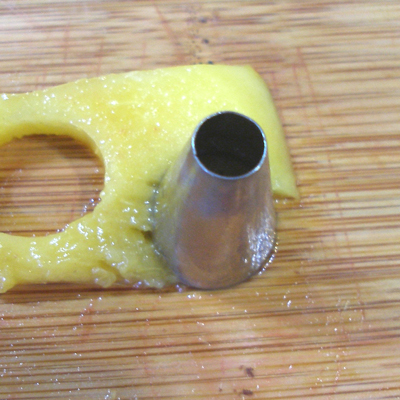
1. Take a slice of mango, and use the large side of the Wilton #10 cutter, to cut out the bee’s head.

2. Turn the tip over, and cut a hole out for the bees eye on its head. The eye should be slightly off center, as seen in the picture below.
3. Cut the eye out of a strawberry slice, and set it in place.

4. Set the bee’s head in place on the bee cake cut out.
5. Place two sliced almonds on the cake, for the bee’s wings.
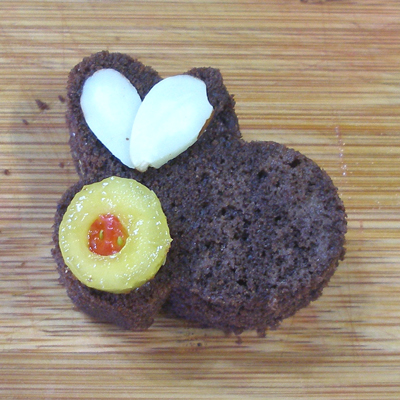
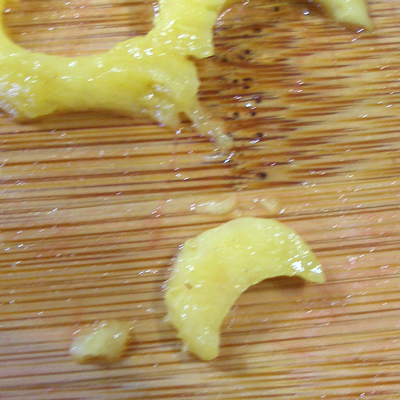
6. Use the large side of the cutter to cut out crescent shapes for the bee’s stripes.
Trim with a knife, if necessary.
Set the stripes in place.

STEP III: FINISH THE CAKES AND GLAZE THEM. SERVE.
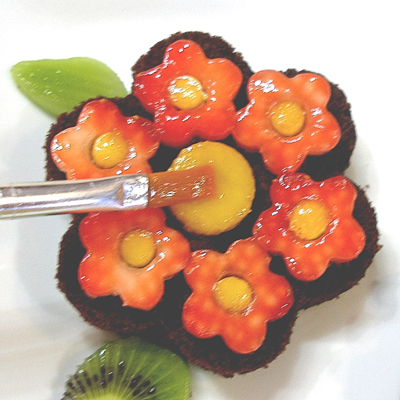
1. Arrange the cakes on a serving plate, use a brush to remove any stray cake crumbs.
Set the fruit flowers and centers on each mini cake, and set the leaves on the plate, around each flower.
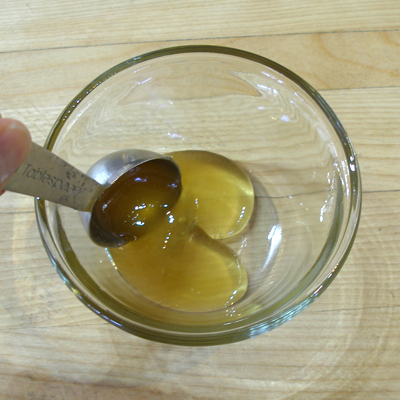
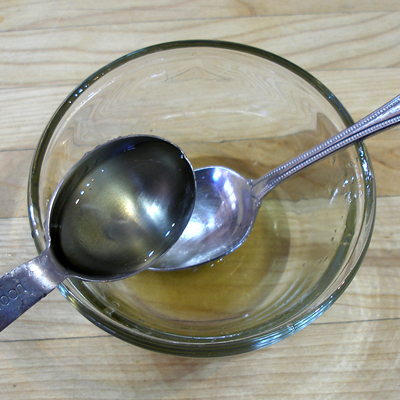
2. If desired, you may glaze the fruits with a thinned honey glaze, this adds a nice sheen and preserves the fruit and keeps it from drying out.
Add water to the honey, stirring until completely dissolved.
Paint the glaze on with a small brush.

Serve the cakes as soon as possible after adding the fruit, so the cakes do not dry out.
STORAGE
Store decorated cakes with fruit in the refrigerator, where they will keep for about 1 day. Fresh fruit does not freeze well.