
Recipe by Sarah Phillips and Kelly Hong; Food styling and photos by Kelly Hong © 7-27-2015 Sarah Phillips CraftyBaking.com

Nothing says summer like beautiful super-sweet and tangy heirloom tomatoes!
This vegetarian tart pairs them with a creamy cheese filling and our Vegan Whole Wheat Olive Oil Tart Crust for a delicious and healthful meal. You can use our gluten-free pie crust dough, instead, if desired.
Pair it with a garden salad for a soul-satisfying and tasty repast.
If you don’t have access to heirloom tomatoes, please use garden-ripe tomatoes for best flavor. Make sure you never store fresh tomatoes in the refrigerator for best results.
PIES AND TARTS RECIPE HELP / VEGAN / VEGETARIAN RECIPE HELP
INGREDIENTS
1 recipe Vegan Whole Wheat Olive Oil Tart Crust
For the Filling:
6-8 heirloom tomatoes, depending on the size
Extra-virgin olive oil, for drizzling
Salt and freshly ground black pepper
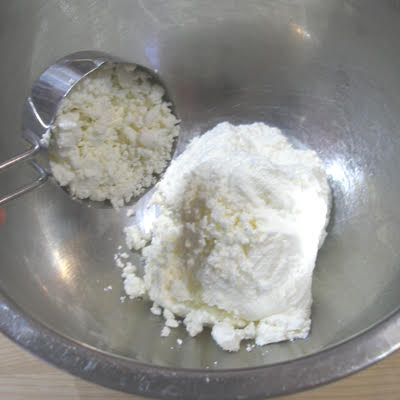
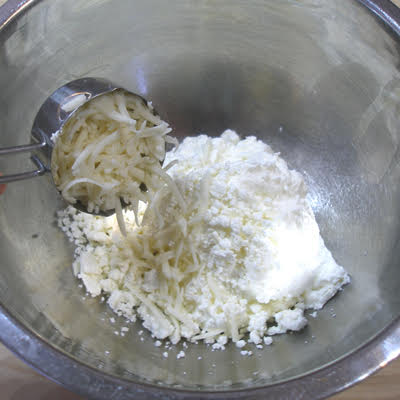
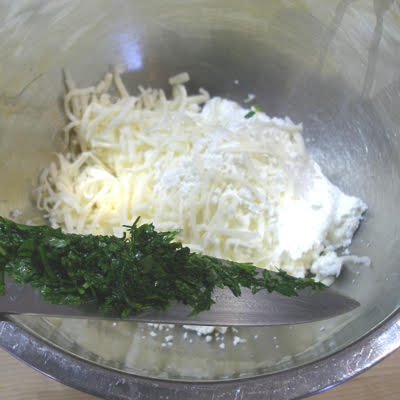
1 1/4 cups whole milk ricotta cheese, drained for two hours*
1/3 cup goat cheese, crumbled
1/2 cup shredded mozzarella cheese
1/4 cup parmesan cheese, preferably Parmigiano Reggiano
1 tablespoon chopped Italian parsley or parsley
1/2 teaspoon salt
Few grinds of black pepper
1 large egg
NOTES:
Drain the ricotta cheese. You can do this while you prepare the recipe:
1. Before you start mixing the tart crust, line a strainer with paper towels and put the strainer over a bowl.
2. Spoon in the ricotta, and cover the strainer with plastic wrap.
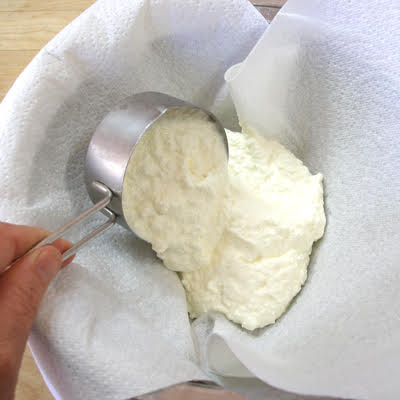
3. Place the bowl in the refrigerator for about 2 hours.
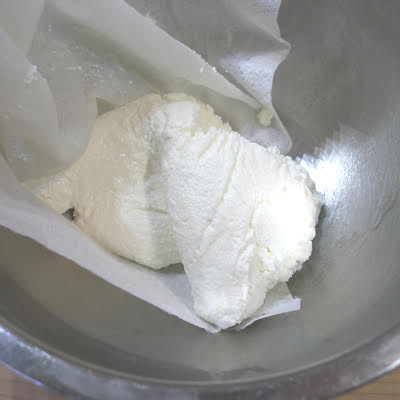
4. When done, it should look well drained.
Remove the ricotta cheese and keep well covered and refrigerated until ready to use in the recipe.
INSTRUCTIONS
STEP I: HEAT THE OVEN. PREPARE THE TOMATO TOPPING.
1. Position an oven shelf to the middle of the oven. Heat the oven to 350 degrees F.
2. Line two rimmed baking sheets with parchment paper.
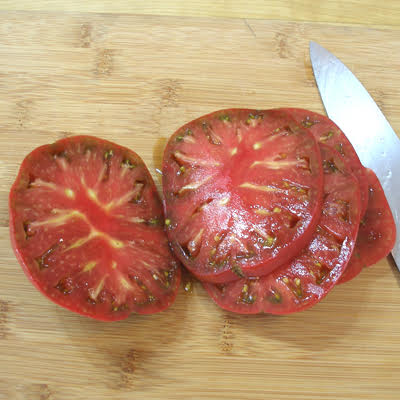
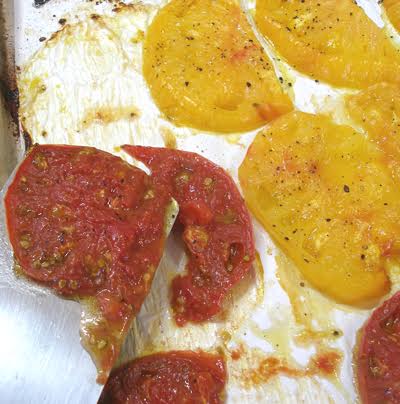
3. Slice the tomatoes in 1/4-inch slices and place them on the baking sheets, in a single layer.
4. Drizzle some extra-virgin olive oil over the tomato slices, then spread it over the surface of each slice with your hand.
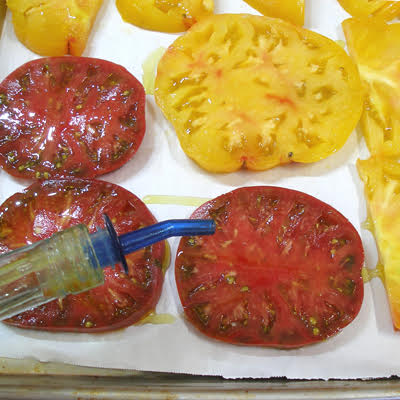
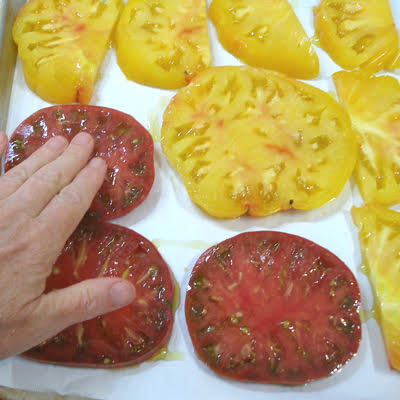
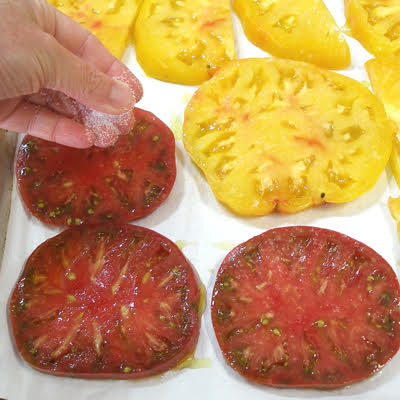
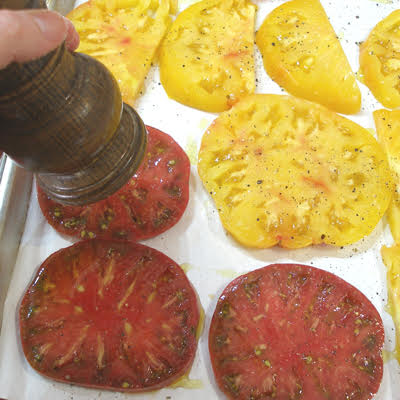
5. Generously salt and pepper the slices, then bake in the oven for 30 minutes.
After 30 minutes, the tomatoes will not be fully cooked, but much of the juice will be cooked-off, and the flavor will be concentrated.
6. Remove the baking sheets from the oven, and let the slices cool on the counter, while you roll out and bake the crust.
LEAVE THE OVEN ON.
STEP II: ROLL OUR AND PREBAKE THE TART CRUST
Note: The tart crust can be prebaked a few days ahead, cooled and stored at room temperature.
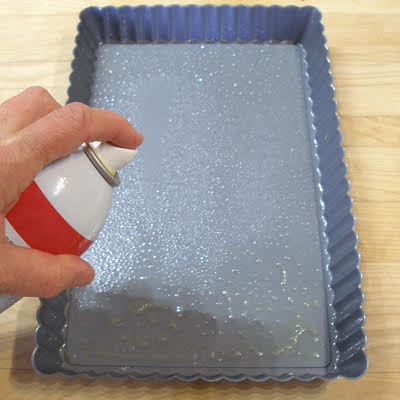
1. Spray an 11- x 7-inch rectangular tart pan with non-stick spray. You may use a 12-inch round tart pan, instead.
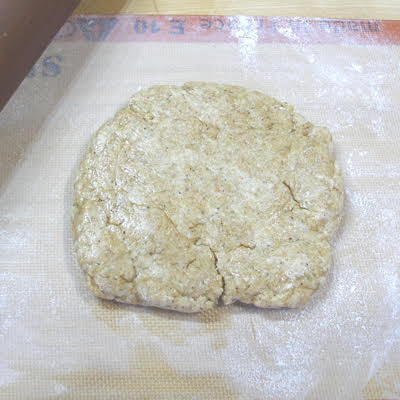
2. Take the pie dough out of the refrigerator and roll it out, on a lightly floured nonstick silpat baking mat, to a 14- x 10-inch rectangle.
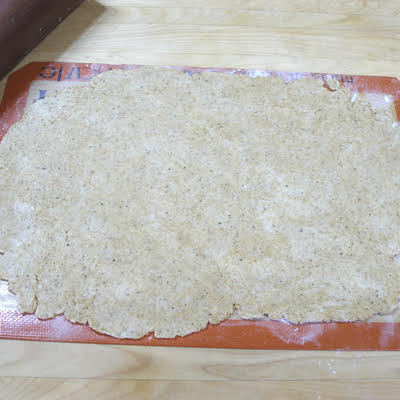
3. Pick up the nonstick silpat mat, and flip the dough into the prepared tart pan.
NOTE: This is a very forgiving dough. If it tears, just piece it back together again.

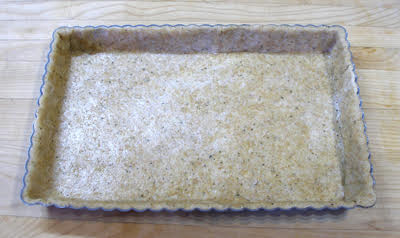
4. Ease the dough down into the pan, being careful not to stretch it, which can cause it to shrink when baked.

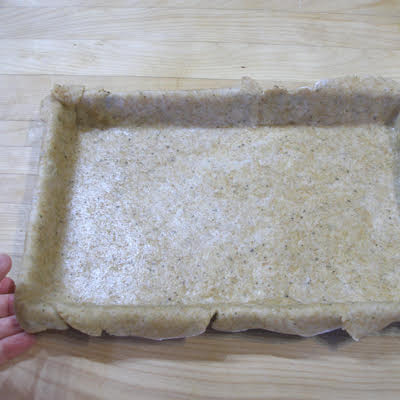
5. Roll the rolling pin over the top of the tart, to remove the excess dough.
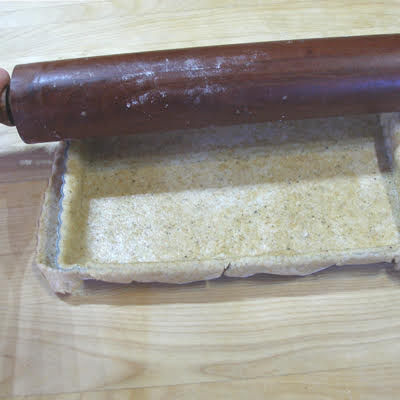
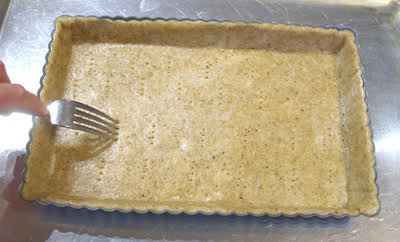
6. Place the pan on a baking sheet, and poke the bottom of the crust all over with a fork.
7. Gently press foil into the pan, and add pie weights or dried beans.
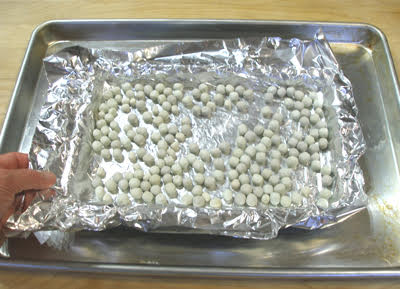
8. Bake the crust for 20 minutes, then remove the crust from the oven and remove the foil and pie weights.
LEAVE THE OVEN ON, the next Step #III will just take a few minutes.
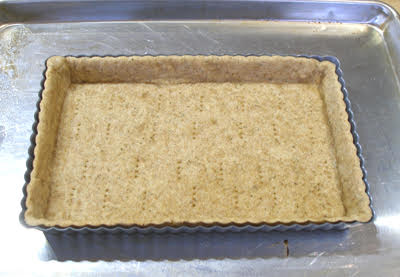
9. Let the tart crust cool on its baking sheet while you make the cheese filling.
Do not unmold the crust from its pan.
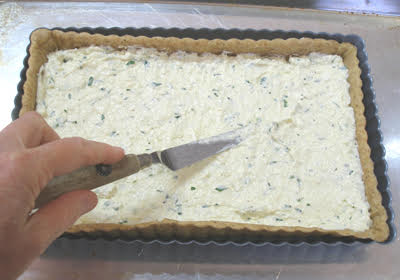
STEP III: MAKE THE CHEESE FILLING
Note: This filling can be made a day in advance and refrigerated. Discard any liquid that may have collected. Stir before using.
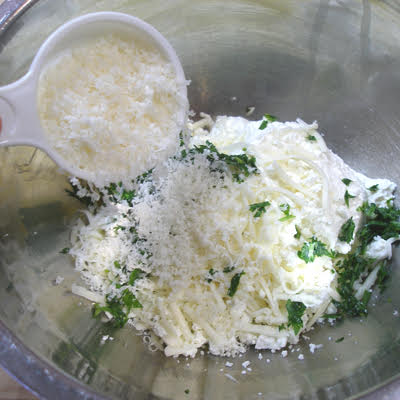
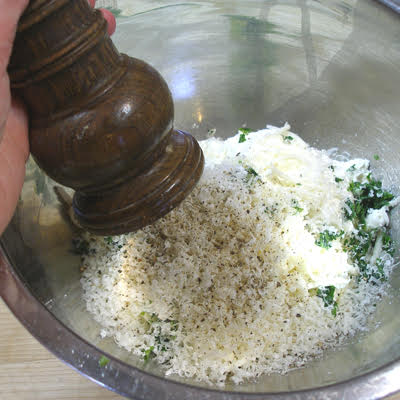
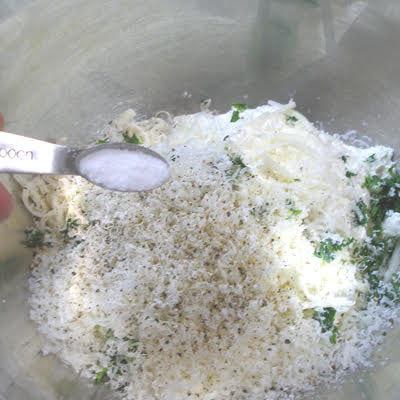
1. Place the drained ricotta, goat cheese, mozzarella cheese, chopped parsley, parmesan cheese and salt and pepper into a large bowl.
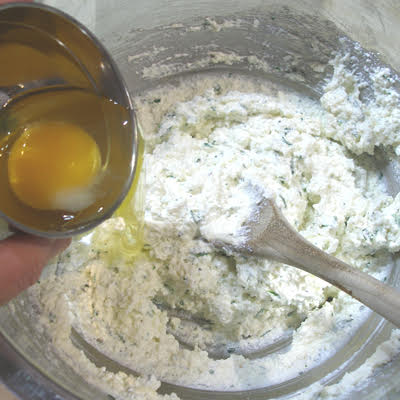
2. Stir to combine, then stir in the egg.
STEP IV: ASSEMBLE AND BAKE THE TART
Note: Do not fill the prebaked tart crust in advance of baking, otherwise it will get soggy.
1. Keeping the baked cooled tart crust shell in its pan, and on its baking sheet, spread the cheese filling, in an even layer, on the bottom of it.
Note: If the cheese filling has been made the day before, discard the extra moisture that may have collected and stir before using.
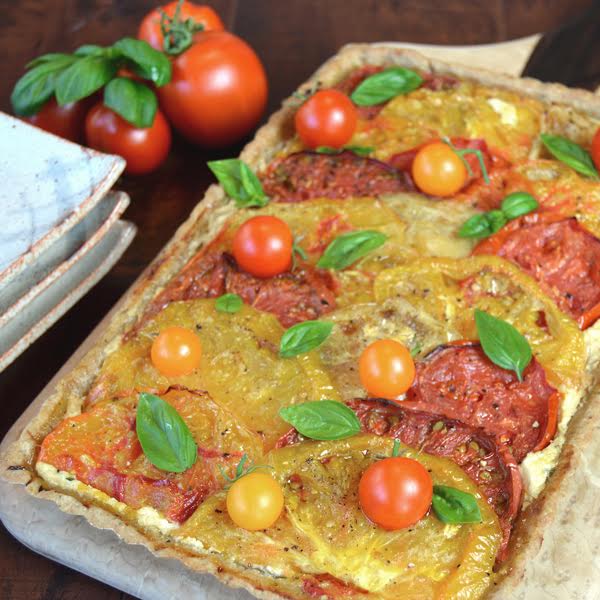
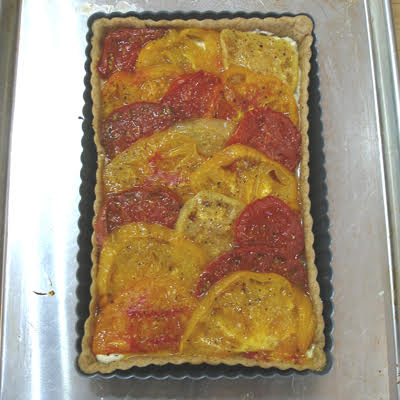
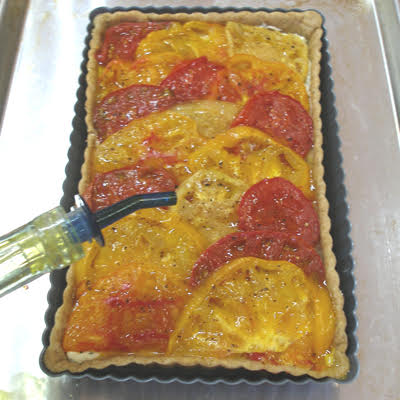
2. Layer the tomato slices over the cheese mixture, overlapping slightly, and alternating colors, for visual interest.
NOTE: If the tomato slices are very large, cut them in half first.
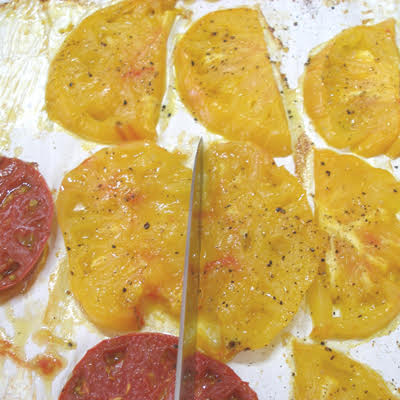
To do, use a pancake turner to pick-up the baked tomato slices with; they are very limp, and you will not be able to pick them up with your fingers.
NOTE: As you can see in the picture below, as the tart crust cooled, the sides contracted a bit.
Not to worry! They will expand again, once the pie if filled and baked.
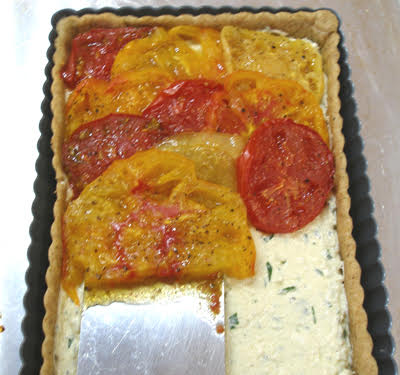
3. Drizzle the tomatoes with a little more extra-virgin olive oil.
4. Bake the tart for 35-40 minutes, or until the edges of the crust are toasty brown and the tomato juices have evaporated.
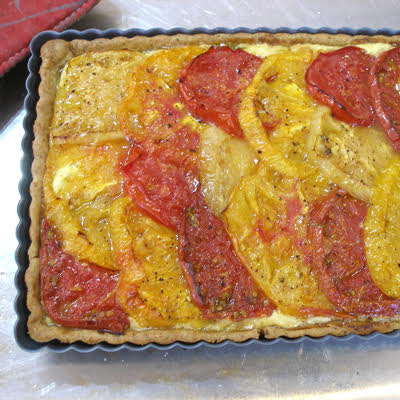
5. Remove the finished tart from the oven and let it cool for about 20 minutes before serving.
The tart may be served warm or at room temperature.
SERVE
Right before serving, sprinkle the top of the tart with small basil leaves, and tiny cherry tomatoes.
STORAGE
Wrap any left-over tart in plastic wrap and store it in the refrigerator for 2-3 days. The tart does not freeze well.